As soon as the LG Nexus 4, Google’s latest addition to the Nexus Smartphone lineup, was released last week, we saw the developer community spring into action and release methods for the first two things any Android enthusiast worth his/her salt would do with a new device – Root and Installation of a Custom recovery.
And sure enough, solutions for gaining root access as well as flashing the ClockworkMod recovery were out the very next day. While ClockworkMod recovery continues to be one of the most widely used tools used to flash custom ROMS as well as perform various other maintenance stuff on Android devices, the text only interface, and physical button controlled operation can feel a bit too dated for device like the Nexus 4.
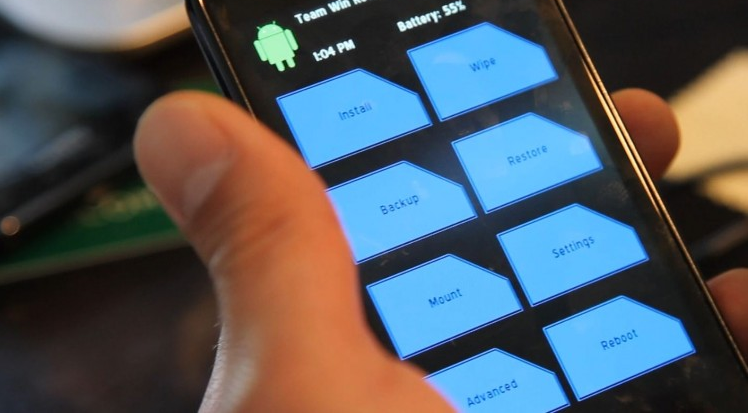
Just when folks who are lucky enough to have scored a Nexus 4 were beginning to think that way, TeamWin, the guys behind the touch-based TWRP Recovery have risen to the occasion and delivered a fully stable version for the Nexus 4. TWRP not only has a cool looking touch-based UI for the recovery, but also includes quite a few other useful features as well, such as fast backups and restores, ability to install ROMs even on encrypted phones, an inbuilt file manager and keyboard functionality, and themes support, making it the best custom recovery out there for any Android device.
Without any further ado, lets move on to how you can get TWRP rolling on your shiny, new Nexus 4. There are two was to get this up on your phone, an easy way which involves installing an app on your phone like any other, and then clicking an option, and a not so easy way which involves tinkering with a command prompt on your PC. We’d like to keep it super-simple for you, and so we’ll go with the first method.
Note: If you’re lucky enough to be holding a Nexus 4 in your hands, chances are you got it from Google play for that awesomely and ridiculously attractive price of $299/$349. This is probably one of the best devices out there in the open today, and you wouldn’t want it to come to any harm, would you? Flashing stuff like recoveries, or for that matter, flashing anything, is risky business and should not be attempted unless you know exactly what you’re doing, and what you expect to get out of it. We take no liability for helping you along the direction you have chosen for yourself and your device.
How to Install TWRP Recovery on Nexus 4
- Make sure you have rooted your Nexus 4. This requires a rooted device to work. If you haven’t crossed over to the dark side yet, you can refer to this handy guide which will help you get there.
- Download and install Goo Manager from the Play Store. It’s a free app.
- Launch the Goo Manager app on your Nexus 4
- Click the Options menu at the top right of the screen (the three dots)
- Click Install OpenRecovery Script
- Select Yes to the prompts that follow. Goo Manager will automatically download and install the latest TWRP recovery.

To check if TWRP has been installed properly, just reboot your device into recovery, by clicking Reboot Recovery from the Goo Manager home screen. Now that you’re all set with root and TWRP, wait for the custom ROMs to roll out, and flash away to your heart’s content.

