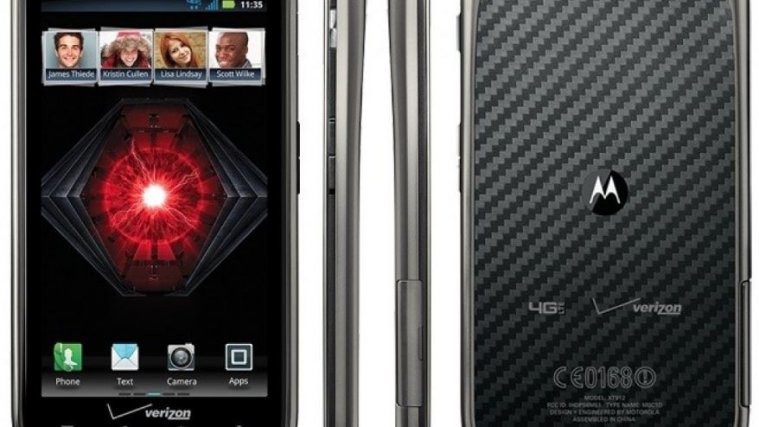
Owners of the Verizon Droid RAZR/RAZR MAXX have been waiting for the Android 4.1 Jelly Bean update for a long time, except for the lucky few who got the update that was mistakenly released by Verizon in December before being pulled – but it seems the wait may finally be coming to an end, as a test version of the update has been released for members of Motorola’s software test program.
The update brings all the goodies from Android 4.1 – improved performance and smoothness, actionable and expandable notifications, and Google Now to name a few, but there are some other major changes made by Motorola as well. A lot of Motorola apps and widgets, such as Social Location, Alarm and Timer, Motocast etc have been removed, with apps such as the clock and gallery replaced by the stock Android versions found on Nexus devices (the full changelog can be seen here). The changes in the update suggest that Motorola is moving towards a more non-bloated stock Android experience, which is great and shows that their acquisition by Google is having the desired effect.
Like always, this test update is available for download for anyone who wishes to install it (no need to be a member of Motorola’s test program), and we’ve explained the full update procedure in detail via step-by-step instructions. The update can be used by both Android 4.0.4 users as well as those who updated to the Jelly Bean build leaked in December.
However, do keep in mind that while this is an official update released by Motorola/Verizon, it may not necessarily be the final version that will later roll out to all users. You will be able to update to future updates directly from Motorola, but this being a test update, a few issues and bugs might be present.
So grab your Droid RAZR/RAZR MAXX and continue reading to find out how you can update to Android 4.1 Jelly Bean.
Compatibility
This firmware and the guide below are compatible only and only with the Motorola Droid RAZR/RAZR MAXX on Verizon, model number XT912. Do not try it on the GSM RAZR variant outside the US or with any other device. Confirm your device model in Settings » About phone before proceeding.
Requirements:
- You need to have a microSD card on your phone in order to install the update, as the update can’t be manually installed from the internal storage.
- Your phone must be on Android 4.0.4 build number 6.16.211 or the Android 4.1 firmware with build number 98.72.8 (the one leaked in December) – the ROM should be 100% stock and unmodified. Confirm the build number in the Settings » About phone menu on the phone.
- NOTE: If you’ve rooted, that’s fine as we can disable root temporarily to install the update, but otherwise the system files should be totally unchanged for the update’s installation to succeed.
- Make sure your phone’s battery is adequately charged – a minimum of 50% is recommended.
How to Update Droid RAZR/RAZR MAXX to Android 4.1.2 Jelly Bean
- While this procedure will not wipe anything on your phone, it is still recommended to take a backup of all your apps and personal data, such as SMS, contacts, etc. So make sure to take a backup of important files before attempting this procedure, taking the help of this Android backup guide.
- Download the update file. Remember, download the correct version depending on whether your phone is running Android 4.0.4 build 6.16.211 or Android 4.1 build 98.72.8. Confirm the build number of your phone in the Settings » About phone menu.
Update for ICS 6.16.211 | Update for JB 98.72.8 - If your phone is rooted, perform the following steps before moving on to step 4 (skip step 3 if your device is not rooted):
- Download OTA RootKeeper from the Play Store. .
- Launch OTA RootKeeper on your phone and backup your Root status by clicking the Protect Root button.
- Then, click the Temp Unroot option in OTA Rootkeeper to remove root before you flash the update. Close OTA RootKeeper.
- Copy the update file to the microSD card on your phone. Don’t extract the file, simply copy it to the phone.
- Switch off your phone (also disconnect it from the PC if it is connected).
- Boot into stock recovery. To do that, turn the phone off. Then turn it on while pressing and holding down both the Volume Up + Volume Down buttons till the boot selection menu shows up. Here, scroll down to highlight the Recovery option using the volume down button, then select it using the volume up button. You should now see a green Android with a triangle on the screen; here, press both volume up and volume down buttons together to boot phone into recovery.
- In recovery, use the volume buttons to navigate and the power button to select options.
- Wipe the cache by selecting the wipe cache option. This will not erase any of your data, don’t worry about that.
- Now select “install/apply update from external sdcard/storage”. Scroll to the update file you transferred to the phone and select it. The update will now start installing.
- This is a full OS upgrade and will take approximately 8 minutes. So be patient and do not panic.
- Your phone may reboot a couple of times during the entire upgrade process, and finally it should boot back up on its own into the wonderful world of Jelly Bean Android 4.1.2.
- [Restore Root] If you were rooted before installing the update but temporarily unrooted according to step 3, then simply open the OTA RootKeeper app and click on the Restore Root button to restore root access. Of course, you can skip this step if you do not wish to restore root access at this time.
The Android 4.1 Jelly Bean update is now installed on your Droid RAZR / RAZR MAXX, and we hope you enjoy the various new features and goodies that come with it. And if you run into any roadblocks while performing the manual update, leave a comment below and we’ll help you out.
Via: Droid RZR Forums

