ROOT PACKAGE INFO
| Name | Super OneClick Tool |
| Warranty | Voids Warranty |
| Stability | Stable without any issues. |
| Root Manager App | SuperUser. It manages root permissions for apps on the device. |
| Credits | CLShortFuse |
WARNING!
Warranty may be void of your device if you follow the procedures given on this page.
You only are responsible for your device. We won’t be liable if any damage occurs to your device and/or its components.
GUIDE: ROOT SAMSUNG GALAXY S 4G WITH SUPER ONE CLICK TOOL
Before you begin with the instructions below, make sure your android device is adequately charged — at least 50% battery of the device.
STEP 0: CHECK DEVICE MODEL NO.
To make sure your device is eligible with this, you must first confirm its model no. in ‘About device’ option under Settings. Another way to confirm model no. is by looking for it on the packaging box of your device. It must be SGH-T959V!
Please know that this page is meant only for Samsung Galaxy S 4G. Please DO NOT try the procedures given here on any other device of Samsung or any other company. You have been Warned!
STEP 1: BACKUP YOUR DEVICE
Back up important data and stuff before you start playing around here as there are chances you might lose your apps and app-data (app settings, game progress, etc.), and in rare case, files on the internal memory, too.
For help on Backup and Restore, check out our exclusive page on that linked right below.
► ANDROID BACK UP AND RESTORE GUIDE: APPS AND TIPS
STEP 2: INSTALL LATEST DRIVER
You must have proper and working driver installed on your windows computer to be able to successfully root your Samsung Galaxy S 4G.
In case you’re not sure, follow the link below for a definitive guide for installing driver for your Samsung device on your computer.
► SAMSUNG DEVICES DRIVERS INSTALLATION GUIDE
STEP 3: INSTALLATION INSTRUCTIONS
DOWNLOADS
Download the latest Super One Click Root tool given below and transfer it to a separate folder on your computer (just to keep things tidy, that is).
SUPER ONE CLICK ROOT TOOL
DOWNLOAD LINK | File name: SuperOneClickv2.2-ShortFuse_2.zip (1.83 MB)
For latest version of this tool, check the original page →
STEP-BY-STEP GUIDE
Important Note: Backup important files stored on internal SD card of your device, so that in case a situation arises requiring you to do a factory reset after using the Super One Click Root Tool, which might delete internal sd card too, your files will remain safe on PC.
- Extract/Unzip the root package, SuperOneClickv2.2-ShortFuse_2.zip on your computer (using 7-zip free software, preferably). You’ll get the following folders and files:
- ADB (folder)
- Dependencies (folder)
- Drivers (folder)
- Exploits (folder)
- Root (folder)
- AdbInterface.dll
- DriverInstaller.dll
- SuperOneClick.exe
- UpdateCheck.dll
- Turn on USB Debugging on your Galaxy S 4G:
- Enable developer options: Go to your device’ Settings » select About device » Scroll to the bottom and tap on “Build number” seven times to enable developer options.
- Enable USB Debugging: Open device’ Settings » select Developer options » Tick the “USB debugging” checkbox. (under Debugging section)
- Connect your Galaxy S 4G to computer with a USB cable and if a pop-up screen shows up on Phone asking you to Allow USB debugging for the computer, make sure to tick the checkbox and tap OK.

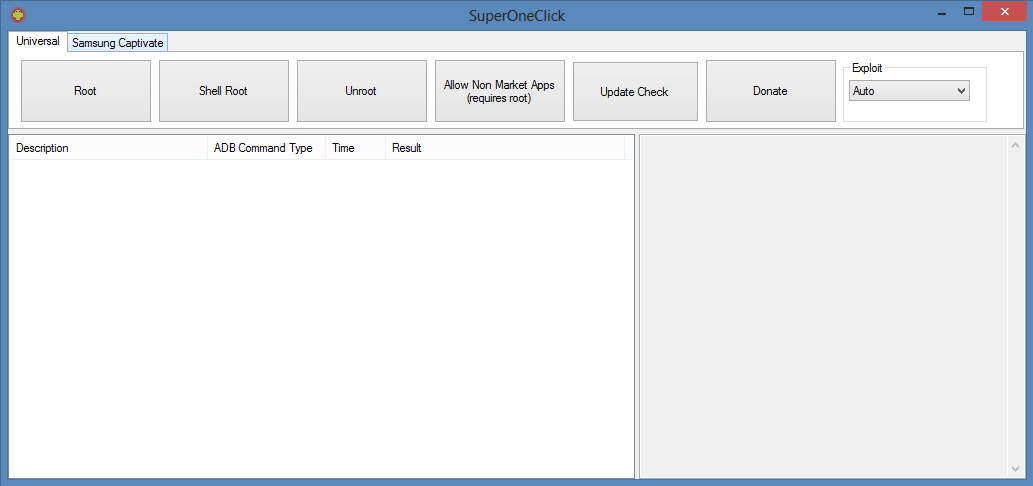
- Double-click the SuperOneClick.exe file to tool which looks similar to the screenshot below:
- Click the Root button on the tool menu to initiate the rooting process.
- If the device is not detected for a longer time, here are some troubleshooting tips:
- Make sure you have installed driver for Galaxy S 4G as said above in ‘Before you begin..’ section.
- If you have already installed driver, then uninstall them and reinstall back.
- Connect using a different USB port on your PC.
- Try a different USB cable. The original cable that came with your phone should work best, if not, try any other cable that’s new and of good quality.
- Reboot your phone and PC and then try again.
- After the rooting process is finished, it prompts to test if the root worked. You can skip this part.
- Now install Busybox as recommended. You can install the Busybox from the market link here.
That’s all your phone is now rooted and Busybox installed. If you need help regarding this, feel free to ask us in comments below.
FEEDBACK US!
It was easy to root your Galaxy S 4G with Super One Click Root Tool, right? Let us know how you plan to use root privileges on your Samsung Galaxy S 4G.
Your suggestions and queries, if any, are most welcomed!


