All-in-one toolkits are a great way of being able to perform different modifications on an Android device, such as rooting, installing custom recoveries, unlocking the bootloader, etc, from a single place without the need to use hacks from a lot of different places and sources. XDA Elite Recognized Developer mskip, famous for bringing all-in-one toolkits for different devices such as the Galaxy Nexus or the Galaxy S3, has now released the Nexus 7 Toolkit for all your Nexus 7 modification needs.
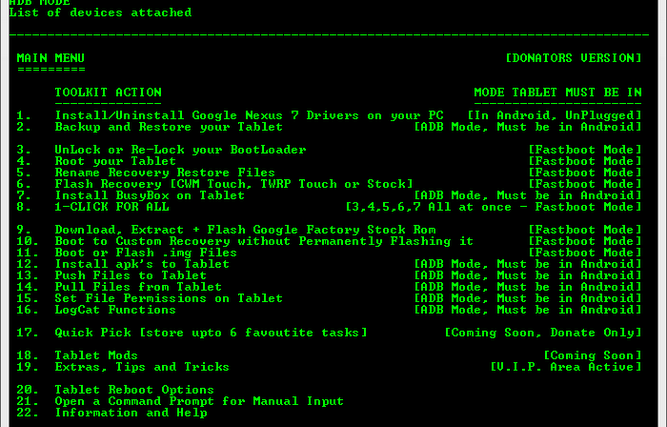
The Nexus 7 Toolkit performs a large number of functions, some of which are included below:
- Install correct adb/fastboot drivers automatically on Windows XP/vista/7 32bit+64bit
- Backup/Restore a single package or all apps, user data and Internal Storage
- Unlock/Re-Lock your Bootloader
- Download Google Stock Image files directly via the ToolKit
- Root any public build of ICS automatically (upto 4.1.1 JRO03D)
- Flash Stock Recovery, CWM Touch Recovery or TWRP Touch Recovery (or boot into them without actually flashing them)
- Push Files from your PC to your tablet
- Mods section to automatically perform certain tasks on your tablet
- Install a single apk or multiple apk’s to your tablet
- Reboot tablet to Fastboot Mode, Recovery or Android in adb mode
In short, the Nexus 7 Toolkit is a must-have tool for Nexus 7 owners interested in rooting or making other modifications to their tablet. Continue reading to find out how you can install and use the Nexus 7 Toolkit.
How to Install and Use Nexus 7 Toolkit
- Download the Toolkit from the official development page.
- Double-click on the downloaded file to start the installation of the toolkit.
- Keep clicking the Next button until the installation starts (don’t change anything in the setup program including the installation path).
- After installation is complete, click on the Close button to launcher the Toolkit. You can also launch it from the Nexus 7 Toolkit icon on the desktop.
- Once the toolkit starts up, type in “no” (without the ” quotes) then press Enter to enter the main toolkit menu.
- Now, in order to perform a particular function, simply enter its corresponding serial number into the toolbox and press Enter. For example, if you want to root your Nexus 7, enter “4” in the toolkit and press Enter as 4 is the serial number corresponding to the option for rooting.
- After selecting a function, simply follow the instructions on-screen.
The Nexus 7 Toolkit is now installed on your computer. Check it out, then let us know how it works for you, in the comments below.


