Perhaps it might have occurred to you at least once that if you could sync a folder located in your device internal storage or external storage to Google drive without actually copying the data one by one. No?
You could also be probably wondering, “Why a guide for this silly thing? Google drive must have the feature.” No, my dear!
Although, it may sound an obvious feature, but it’s missing in the Google Drive Android app. Yeah, we’re painted you surprised already! (Also, hey Google! you know, if you are listening, it would be cool if you could sync feature into Drive app.)
Anyway, many apps that you may be using for a purpose or two, do allow adding a folder to Google Drive, but most of them lack the sync feature, which would allow you to upload content of a folder on device storage to a Google Drive folder. So that when you lose your phone, you can simply download the files from Google Drive. Or if you wanna send someone a file, you can simply share its Google Drive link.
What if one of your apps doesn’t support the data upload to Google drive or any other cloud storage in the free version or for that matter in any version – free or pro. What do you do? Should you copy the files one by one to Google drive, every time you add a new file?
Umm NO!
With Android, there’s always a way.
So, you need to use an app that solves that problem for you, by automatically uploading all content of the folder you specify, to your Google Drive. For example, you have an SMS backup app that can take a daily backup of your messages. You can set the sync for this app’s messages backup folder to Google Drive, so that you always have your messages backed up in Google Drive.
Just head on to the Google Play Store and download an app called FolderSync Lite (free version). The free version has few limitations as it supports only two cloud accounts, has no sync filters and is bundled with ads – as every free app is. However, if you are keen on removing the ads and using more than two cloud accounts, buy the pro version.
FolderSync allows you to effortlessly sync data to and fro between local storage and cloud storage. Though the app is not intuitive for the first time user (don’t worry we got you covered!), but the sync process is fast and reliable.
Ready to get started?
How to sync a local folder on device to storage to the Google Drive
Step 1. Download and Install FolderSync Lite (free version) from the Google Play Store.
Step 2. If you are using an Android version 6 and above, you are asked to grant permission to access photos, media, and files on your device. Tap Allow to grant the permission, or else the app won’t work.

However, asking for permission below Android Marshmallow (6) wasn’t mandatory, so you will directly see the next screen.
Step 3. Tap “Create new Sync” button located at the bottom to synchronize a local folder to the Google Drive.
Step 4. The sync wizard will start. Give your sync folder pair a name to differentiate it from other pairs. Finally, tap Next.
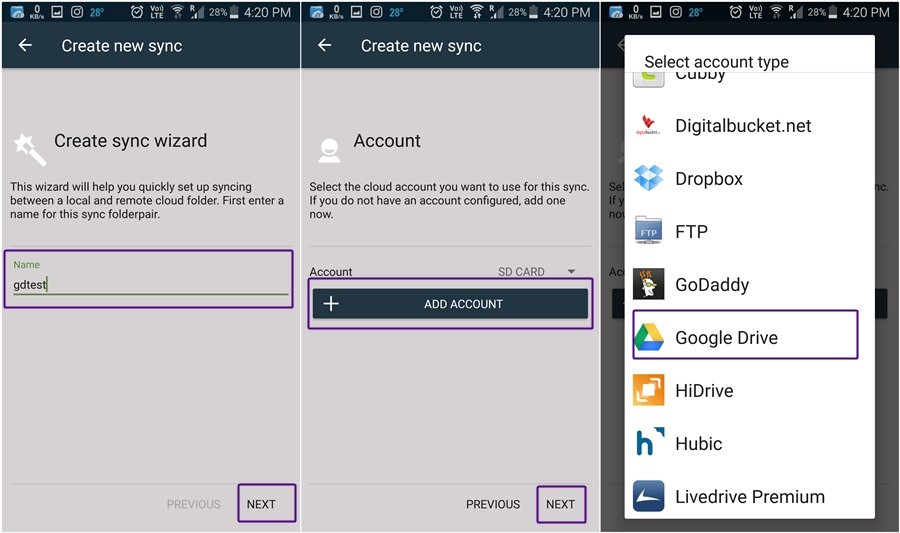
Step 5. Click on “Add Account” to configure your Google Drive account. From the list that appears, select Google Drive.
Psst. If you want to sync the folder to any other cloud service like Dropbox, One Drive, etc., then select that account. The rest of the steps remain the same.
Step 6. The app then asks you to set a unique name for your sync pair. You can name it anything and finally, when you enter the name, make sure you press the authenticate account button and not save. (We know it’s confusing since the SAVE is more prominent while writing the name).

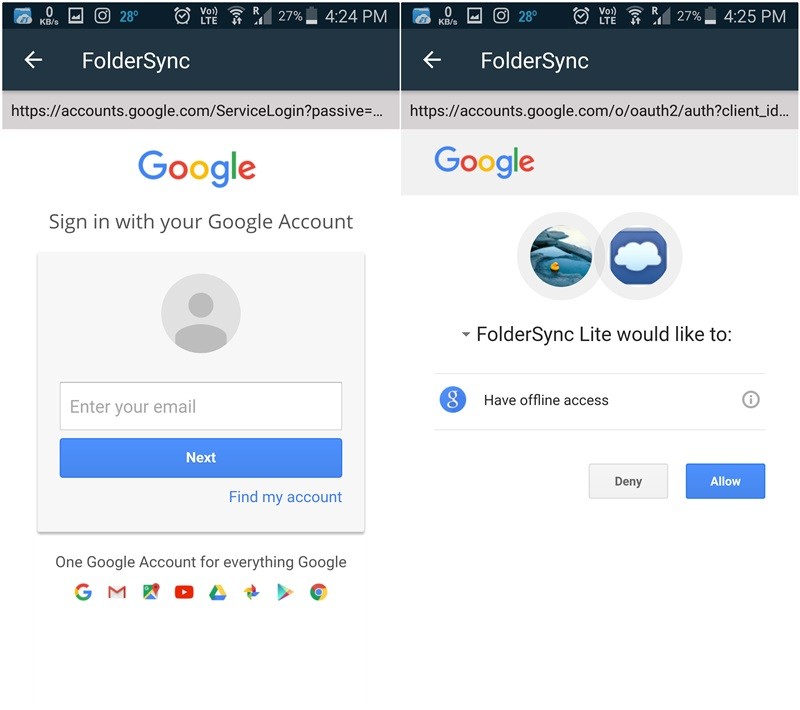
Step 7. You are taken to the Google Sign in Page. Sign in with your account followed by giving permission for offline access.
Step 8. If everything has gone well, you will get a toast saying “Login successful”. Also, you will see your Google Name, Google Drive Quota and Google Drive usage statistics in the next screen. You will also see “Authenticate account” has changed to “Unlink account” which you can use to unlink or remove your Google account from the app.
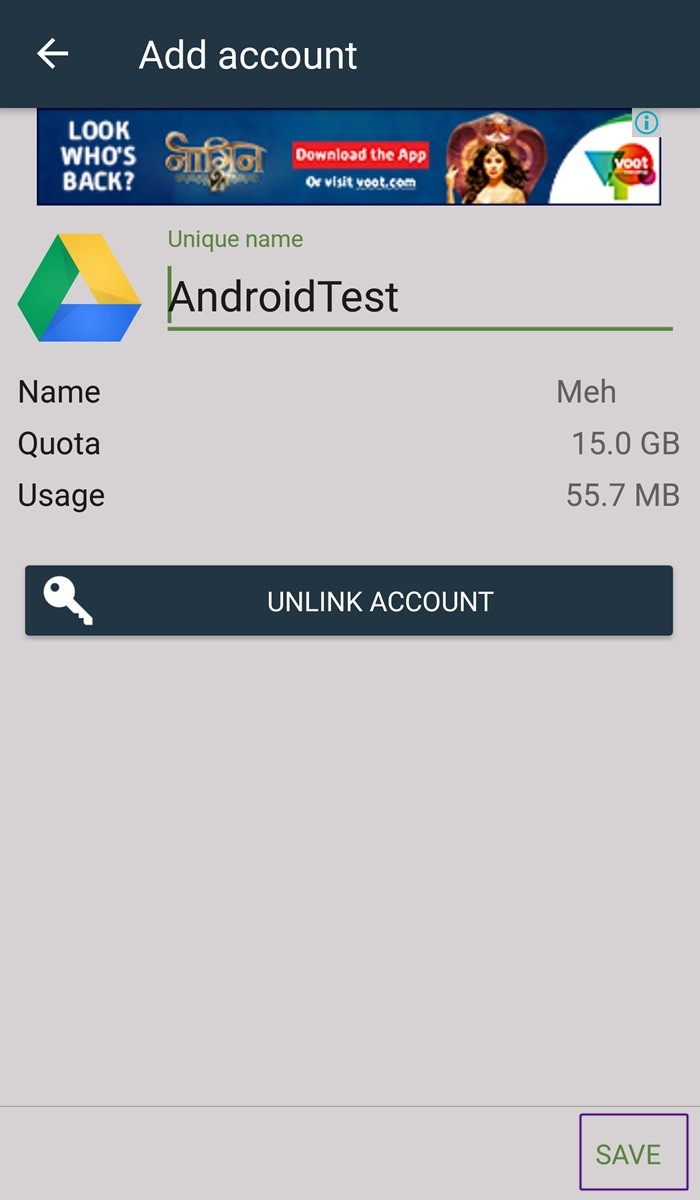
Press the Save button located at the bottom right corner.
Your account is now set up. All you have to do is tell the app which folder to sync to the Google drive.
Step 9. After you tap the Save button, you are redirected to the “create new sync” screen, the one where you started from. However, next to the Account you will see the name you set for this sync. To sync the folder to Google drive, hit NEXT located at the bottom right corner of the screen.

Step 10. Select the Sync type that you want to use for this particular folder. There are three options:
- To local folder: Use this option if you want to sync a folder from Google Drive to your device internal storage. Any changes you make to this folder on your device are not reflected in the Google Drive but the changes you make to the folder in the Google drive, are reflected in your device.
- To remote folder: Use this option if you want to sync a folder from your Android device to Google Drive. Any change you make to this folder in your device is reflected in the Google drive but any change you make to the folder in the Google Drive is not reflected in the app. Note: If you are looking to backup a folder of any other app, use this one, so that that app’s data in a folder on your device gets backup to Google Drive.
- Two Way: Use this option if you want to sync a folder both ways i.e you can change the contents of your folder both in the Google drive and in the device and the same is reflected in the other.
We have selected Two Way option since it is the best-suited one. However, if you want to sync only from local storage to Google drive, go with “To remote folder”. Tap Next.
Step 11. In the remote folder option, select the folder to which you want to sync the data and in local folder select the folder from which you want to sync data. Tap next to go to the next screen.
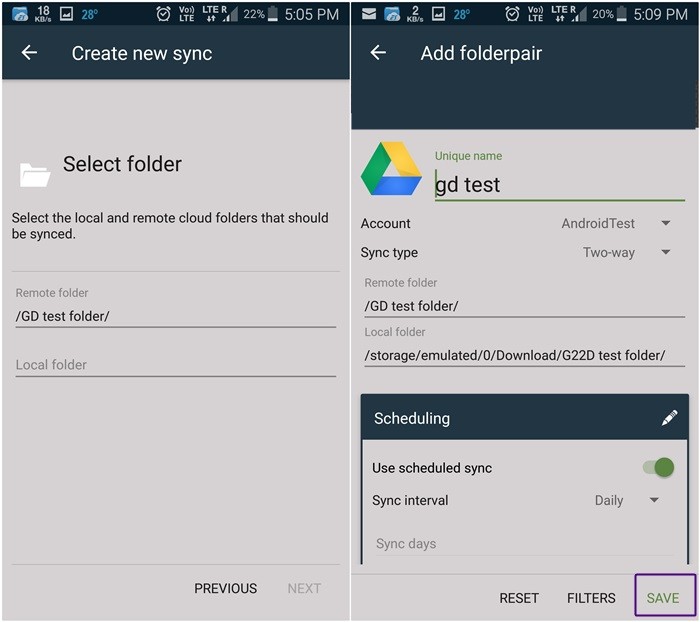
Step 12. Use the scheduled sync option to set the time interval when you want to sync the data. Finally press Save.
That’s it.
Now relax back and let the FolderSync app do its job. Any change you make to this folder in your device will be reflected in the Google Drive and vice versa.
If your message backup takes new backups, the new backup files will be automatically uploaded to Google Drive folder.
Some tips to use the FolderSync app
- To view the sync status and sync history of your folder, tap the Sync Status option in the home screen of the app.
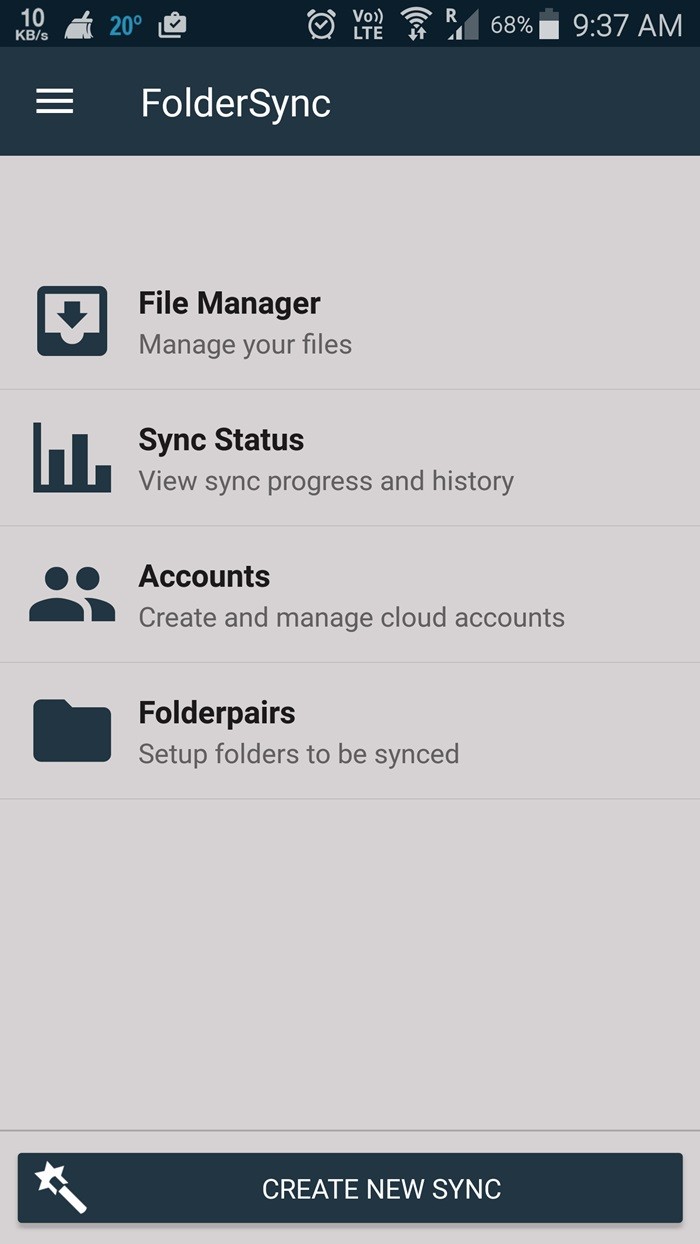
- If you want to add another cloud account, tap the “Accounts” option followed by Plus button located at the bottom. You need to follow the above steps to add another account. However, you can only add two accounts in Lite version. If you want to sync more accounts, you would have to say bye to the free version and buy a pro version.
- If you want to sync more folders, tap the Folderpairs option followed by Plus (Add) button at the bottom of the screen.
- The app gives you multiple sync options to choose from such as “sync subfolders”, “Wifi or Mobile data connection”, “show notifications” etc. You can set the options as per your preference.
- You can change the theme of the app, in case you don’t like the default theme. To do so, tap the three lines located at the top left corner, followed by settings, finally tap the theme option to change the theme.
- Below the theme option, you will find another option called Startup screen. This option allows you to change the startup screen of the app – the first screen that appears when you open the app.
Update 30/03/2019: We have verified that this method to sync a local folder to your Google Drive still works as expected hence you shouldn’t encounter any issues while following the guide.
We hope you liked the tutorial. Think we can do better, let us know in the comments.

Nice article. Just a little something I’d like to clarify. I don’t think there’s any 2 account limit to the lite version. I use it with 4 accounts. I downloaded the app from the play Store, so it’s not cracked or anything. The pro version adds the instant sync & filter options and removes ads.
hey! thanks for a useful post..
some steps have changed. when you hit save after granting access to the gdrive it doesn’t take you to create new sync page automatically.. kindly update your post.. as I am sure not people will read through the steps, even if I write them here..
I am only concerned about data safety… fingers crossed..
cheers! God Bless!
Great article, it really helped me out trying to sync a folder to my pCloud account. One suggestion would be to update the name of the article to something like “How to sync a local folder with Google Drive (or other Cloud account) on your Android device. I had skipped over this article previously as I did not think it was what I was looking for, as it specified it was for Google Drive. After starting to get desperate, as I could not find anything to help my situation, I decided to read this article to see if I could use anything from it to work with my own cloud account, and to my pleasant surprise, this article was EXACTLY what I had been looking for.
As another commenter stated, there are some differences with FolderSync to what is in the article, but I found them to be minor. The only think I experienced with FolderSync, is that while I was able to turn on “Use scheduled sync”, I was unable to set the Sync interval. I do not know if this is the program itself, or a conflict with another app running on my Android device.
Guys great tutorial thanks.
This may need updating though as the app has changed a little since then so you have to configure a few more options enter folder names etc. before transfer can take place.
We will surely look into that. Thanks a lot for the heads up!
If you have a feedback for us, sure tell, we’re listening! 🙂
Great tutorial, got my audio notes folder synced up in no time thank you