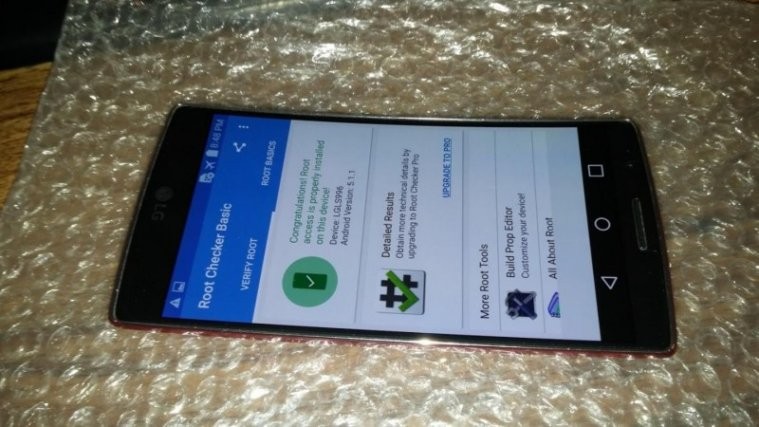
Well, look at the pic above — that’s the Sprint LG G Flex 2 (model no. LS996), and it’s plenty proof that it’s been successfully rooted! It’s second high-end device from LG in as many weeks that’s been rooted, the earlier one being the current flagship LG G4.
The root process hasn’t exactly been detailed out yet, but the brains behind it — randrew87 and Google~Android — promise that a decent how-to is to arrive soon. Moreover, this root method can be used on other LG G Flex 2 sets too, for example AT&T G Flex 2 (H950), on but we are yet to get any confirmation of that.
While the current root trick is fully working on the Sprint G Flex 2 on build no. ZV6, support for software version ZV7 is under processing too. Once the full procedures are out, we will be sure to lay down a guide for you to help you root your Sprint G Flex 2 and other variants like AT&T G Flex 2, on Android 5.1.1.
How to Root LG G Flex 2
Downloads
- Send_Command tools — Link | File: LG_Root.zip (4.85 MB)
- Root package in .tar.gz file format:
- For Sprint 5.1.1, build no. ZV6 — Direct Link | Google Drive Link | File: rootedsystemLS996_ZV6.rar (1.63 GB)
- For Sprint 5.1.1, build no. ZV7 — Direct Link | Google Drive Link | File: rootedsystemZV7_LS996.rar (1.62 GB)
Supported devices
- Sprint LG G Flex 2, model no. LS996, on build no. ZV6 and ZV7
- Don’t try this on any other LG G Flex 2 that set with different model no. and build no. than stated above!
- Don’t try this one any other device of LG or any other company!
Warning: Warranty may be void of your device if you follow the procedures given on this page. You only are responsible for your device. We won’t be liable if any damage occurs to your device and/or its components.
Backup your Android. Backup important files stored on your device before proceeding with the steps below, so that in case something goes wrong you’ll have backup of all your important files.
Step-by-step Guide
Step 1. Download the LG G Flex 2 driver first of all. (G4 driver work!)
Step 2. Install ADB and Fastboot driver.
Step 3. Download the Send_Command tools from the downloads sections above, and also the root package file for your respective build no. Keep these files on PC.
Step 4. Extract the root package in .rar format on your PC now. You can use free software like 7-zip (or trial version of WinRAR) for this. You should get file rootedsystem.img file. This is root file, and when flashed in step 14 below, will root your Sprint LG G Flex 2.
Step 5. Now, transfer the rootedsystem.img file to your G Flex 2’s internal storage, on the very root folder of it, which is parent of all folders like DCIM, Music, Pictures, Download, etc. Don’t paste the file inside any other sub-folder of internal storage! Also, do not rename this file. Keep it as it is.
Step 6. Enable USB debugging on your Sprint G Flex 2. Do this:
- Go to Settings > About phone, and then tap ‘Build number’ 7 times to unlock developer options.
- Go back to Settings, then choose ‘Developer options’. Find the ‘USB debugging’ option and use its toggle button to enable it. Accept warning by tapping on OK button.
Step 7. Connect your G Flex 2 to PC now. You will get a pop-up as shown below on your device when you connect it to PC for the first time after enabling USB debugging. Select ‘Always allow from this computer’ checkbox and then tap on OK button.
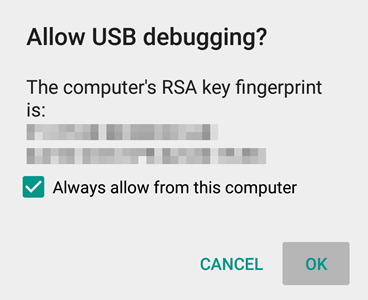
If you don’t get this, it means drivers aren’t installed properly. So, install the driver from step 1 and 2 again.
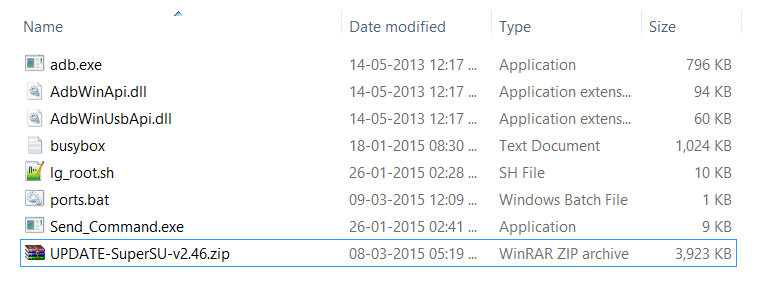
Step 8. Extract the send command tools file you downloaded on your PC. You should get the following files. We’re soon gonna use the Send_Command.exe file, and the ports.bat file — these two are of most importance to us.
Step 9. Now, open command window in the folder in which you have the Send_Command.exe file. For this:
- Open that folder first, and then left click on empty white space in the folder.
- Now, while holding shift key, right click on empty white space to get a pop-up as shown below.
- Now choose Open command window here option from that.
You will see a command window open up, with location directed to folder where you have the send_command.exe file.

Step 10. Reboot your G Flex 2 into Download mode. Make sure your Flex 2 is disconnected from PC, and then do this:
- Power off your G Flex 2. Wait for 5-6 seconds after screen goes off.
- Now, while holding the Volume up button, connect your G Flex 2 to PC using USB cable.
- Wait for drivers to install.
- That’s it. When screen turns on of your G Flex 2, you are in download mode. You would have the text ‘Firmware Update’ written.
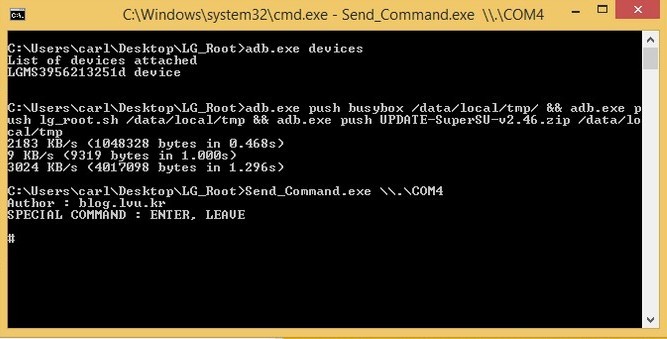
Step 11. Find the COM port through which your G Flex 2 is connected to PC. For this, just double click the the ports.bat file on your PC. Don’t disconnect the G Flex 2 until said so. You will get COM port nos. We are looking for DIAG port no. Note it down, or simply remember it.

→ In the above pic, the COM4 port is useful to us. In this guide, we will use COM4 port as reference but you use the COM# of yours.
Step 12. Use the Send_Command now. Here is how. Btw, do not double click the file to run it. Instead, in your command window (from step 9 above), run the following command.
Send_Command.exe .COM4
→ Don’t forget to replace the ‘4’ in COM4 above with your own DIAG COM Port number.
Once you do this, you will get # sign as the end line in your command window.
Step 13. Run this little command now. Type id and then press enter key. You should get text starting with ‘uid=(0)root gid=(0)root’.
→ Important! If you don’t get text ‘uid=(0)root gid=(0)root’, then press ctrl+c and then do the above step’s command again (Send_Command.exe .COM4). Then run the id command again. You should get the text ‘uid=(0)root gid=(0)root’ now.
Step 14. Run the command given below for your G Flex 2, as per the build currently installed on your device. Check your device’s model no. again, if it’s not mentioned here, do note run the command or else your G Flex 2 will be bricked, and will be useful most probably only as a paperweight.
- For Sprint G Flex 2, mode. no. LS996, and software version ZV6 or ZV7, run this command.
dd if=/data/media/0/rootedsystem.img bs=8192 seek=58368 count=522240 of=/dev/block/mmcblk0
Let the command run. It will take some time to finish.
Step 15. Run the following command to exit the send command.
LEAVE
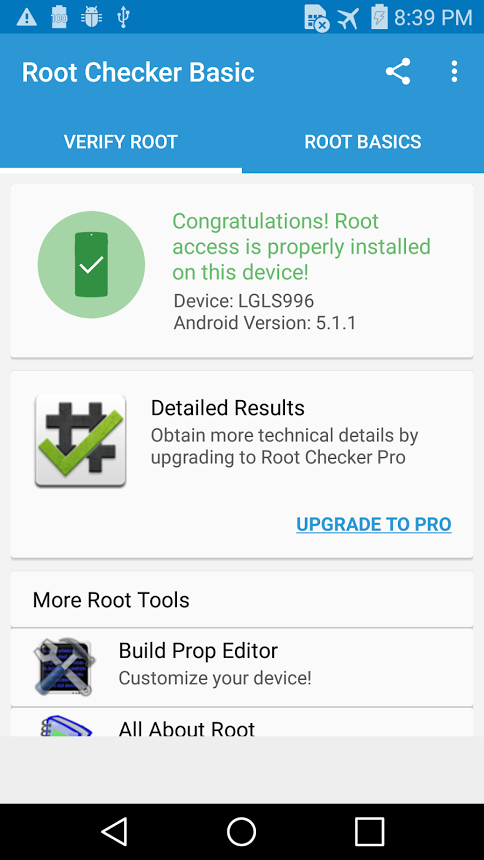
Step 16. Your device should reboot now. Once the restart is complete, you should have root access on your LG G Flex 2. Confirm this with a root checker app. Install it, open it, and tap on Verify button. A pop-up will appear, hit the Grant button, and let the app tell you that you got root access. Kudos to awesome developers! Don’t forget to donate them of you can.
That’s it. If you need any help regarding rooting your LG G Flex 2, sure ask us in comments section below.


Hello will this work for ls996ZVB? thank you
Hello will this work for ls996ZVB? thank you