Rooting your OnePlus 7 Pro gives you a lot of benefits. You can install viper4android sound mod, can tweak the clock to the right side, convert a T-Mobile OnePlus 7 Pro into unlocked one, make the device even faster, and more. Although it is unlocking the bootloader that does the trick technically, we’re taking it synonymous with root.
Even though you can root the device without TWRP (using a patched boot image as given below) but TWRP makes things simpler in the long run even if installing it for the first time seems tricky.
Without further ado, let’s see how to get root access on your OnePlus 7 Pro.
Related:
- 90Hz browser apps for OnePlus 7 Pro
- How to convert T-Mobile OnePlus 7 Pro into global variant
- 120Hz and 90Hz phones
How to root OnePlus 7 Pro with TWRP
Download the TWRP recovery for your OnePlus 7 Pro from below.
TWRP recovery download
- TWRP 3.3.1-32
- .IMG file – twrp-3.3.1-32-guacamole-unified.img
- .ZIP file – twrp-3.3.1-32-guacamole-unified-installer.zip
- TWRP 3.3.1-3
- .IMG file – twrp-3.3.1-3-guacamole.img
- .ZIP file – twrp-installer-3.3.1-3-guacamole.zip
- Check for the latest version available > here
How to install TWRP recovery
Because you need to either install a DM Veruty disabler file or root the device by installing Magisk right after you install TWRP recovery, we have covered the TWRP installation as part of the root guide below.
Hence, see the guide in the section called ‘OnePlus 7 Pro Root’ below to install TWRP.
OnePlus 7 Pro Root
Let’s see how to install TWRP first, and then root the OnePlus 7 Pro.
Warning!
Do not try anything given on this page if you do not know completely what you are doing. In case any damage occurs, we won’t be held responsible.
Compatibility
The download files and the process for installing TWRP and rooting given on this page are compatible only with the OnePlus 7 Pro. Do not try this on any other device as you might end up damaging your device and permanently brick it.
Here’s how you can install TWRP recovery on your OnePlus 7 Pro first, and then root the device (or install DM Verity disabler if you don’t want root).
- Make sure you have unlocked the bootloader of your OnePlus 7 Pro. (→ T-Mobile version here.)
- Download the required files:
- TWRP recovery from above
- Magisk root package
- DM Verity disabler
- Make sure you have enabled USB Debugging on your OnePlus 7 Pro device. You may need to re-do it after unlocking the bootloader.
- Connect your OnePlus 7 Pro device to PC using the USB cable that came with it.
- Transfer these files to your OnePlus 7 Pro:
- TWRP installer ZIP file
- Magisk file (if you want to root)
- DM Verity disabler (if you don’t want to root)
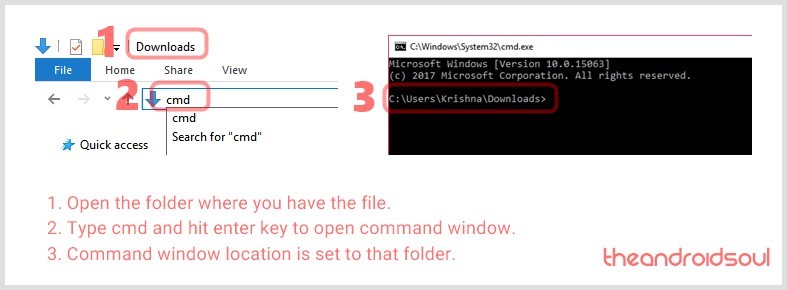
- Now open a command window inside the folder where you have the TWRP file from above. Do this:
- Go to the folder where you have the downloaded files.
- Type cmd in the folder’s address bar.
- Hit the enter key. A command window will open up, and its location will be that folder.
- Connect your OnePlus 7 Pro device to the PC.
- Run the following command into the command window we opened above to boot your device into bootloader/fastboot mode:
adb reboot bootloader
└ If you get a permission dialogue on your OnePlus 7 Pro to “Allow USB debugging”, tap OK.
- Install TWRP recovery on your OnePlus 7 Pro on a temporary basis:
- Once your OnePlus 7 Pro boots into bootloader mode, run the command below to install TWRP temporarily and access it right away.
fastboot boot <name of twrp file here>.img
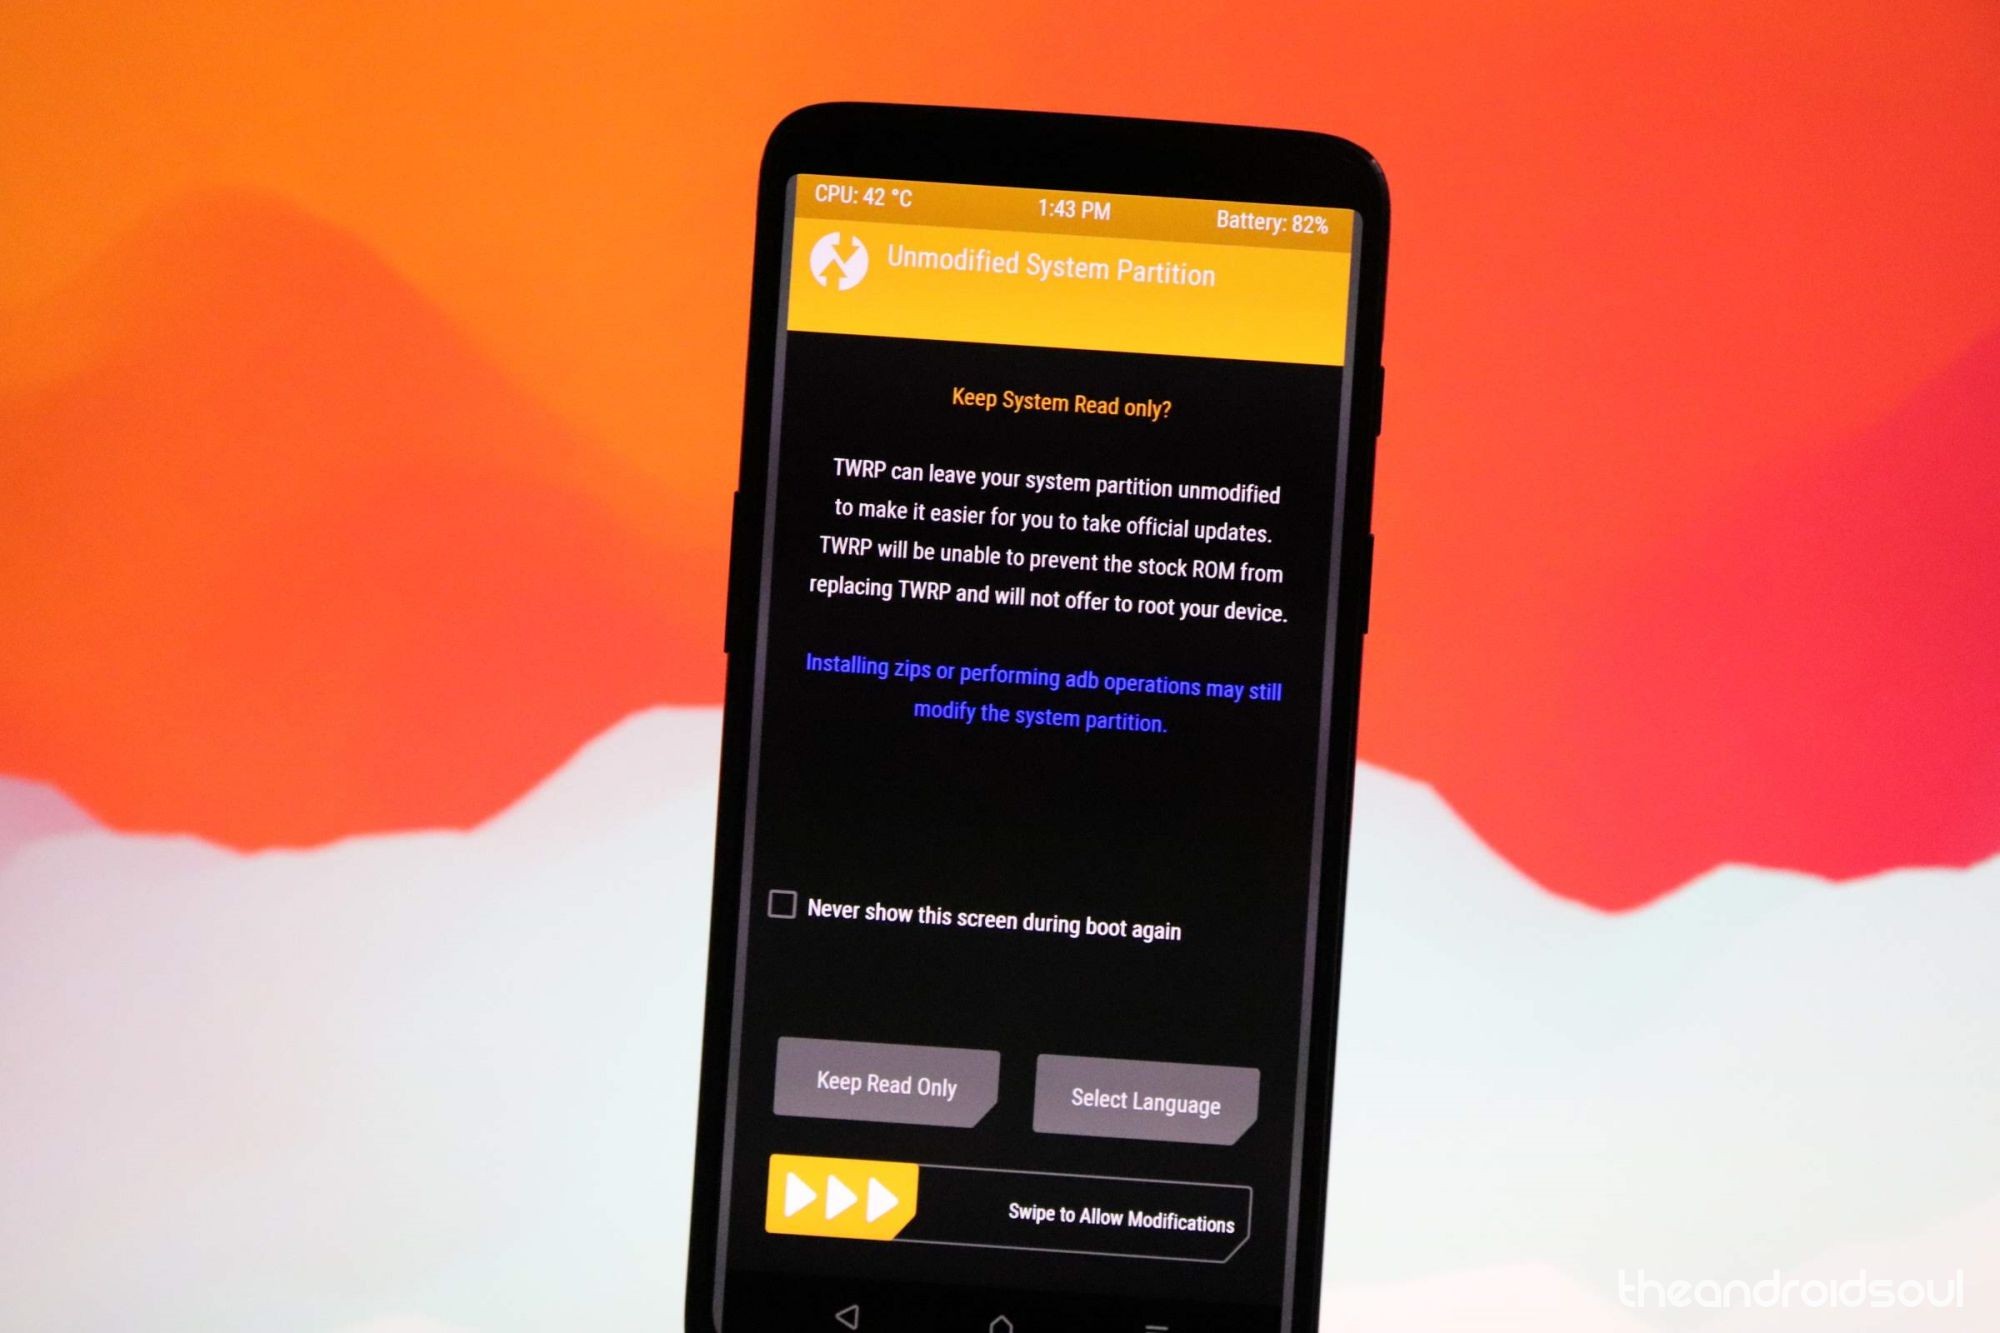
- The device will reboot to recovery mode and you will see TWRP recovery right there. Tap on the ‘Keep Read Only’ button now to not allow system modifications.
- Once your OnePlus 7 Pro boots into bootloader mode, run the command below to install TWRP temporarily and access it right away.
- Install TWRP recovery on your OnePlus 7 Pro permanently. If you are sure that TWRP is working well, you can now install the TWRP recovery permanently. Here’s how:
- On the device, tap on the Install button.
- Select the TWRP ZIP file you transferred right above.
- Perform the Swipe action to confirm and install the TWRP recovery permanently.
- [Careful!] Now, reboot back to TWRP again. Tap on the home button, then on the Reboot button, and then on the Recovery button to restart the device into TWRP.
- Wait, don’t reboot the device yet. You still need to root the device using Magisk, or install a DM Verity disabler file, to not let the system remove TWRP when you restart the device. Yes, to keep TWRP, you need to install either Magisk file or DM Verity disabler file. See the next step for that.
- Root your OnePlus 7 Pro. But if you don’t want to root the device, simply install DM Verity disabler file in place of Magisk root file.
- Go back to the home screen of TWRP.
- Tap on Install.
- Browse and select the Magisk root package file (or the DM Verity disabler file).
- Perform the Swipe action to confirm the installation on the next screen.
- Tap on Reboot system button to restart your OnePlus 7 Pro to Android. If you installed Magisk, you can verify root access on your OnePlus 7 Pro using a root checker app. (Without root or DM Verity disabler, the device will get stuck in the bootloop at the logo screen.)
So, that was all about installing root using TWRP recovery. If you don’t want to install TWRP but wish to root right away, that’s possible too. See the method below for that. Be sure to select the correct patched boot image file as per the software version currently installed on your device at the moment.
How to root OnePlus 7 Pro without installing TWRP
The root method above used TWRP recovery, installing which is tiresome these days as you need to take care of decryption, DM verity check, auto removal, etc. stuff.
This would come handy then that you can actually root your OnePlus 7 Pro without using TWRP recovery as you will us patched boot image file, which depends on the software version currently installed on your phone.
So, when you update your OnePlus 7 Pro, you need to use the new software version’s patched boot image file.
Anyway, here’s how you can root your OnePlus 7 Pro without using TWRP. It’s way easy.
- Make sure you have unlocked the bootloader of your OnePlus 7 Pro. And that you have USB debugging enabled, and fastboot and adb driver installed, all of which is part of the bootloader unlock guide too.
- Download required patched boot image file (as per the current software version on your device):
- OxygenOS 9.5.5/9.5.6/9.5.7: not available
- OxygenOS 9.5.4:
- Connect your OnePlus 7 Pro device to PC using the USB cable that came with it.
- Now open a command window inside the folder where you have the patched boot image file from above. For this, go that folder, and then type cmd in the address bar of that folder’s window, and then hit the enter key. A command window will open up, and its location will be that folder.
- Connect your OnePlus 7 Pro device to the PC.
- Run the following command to boot the OnePlus 7 Pro into bootloader/fastboot mode:
adb reboot bootloader
└ If you get a permission dialogue on your OnePlus 7 Pro to “Allow USB debugging”, tap OK.
- Once your OnePlus 7 Pro boots into fastboot mode, run the command below to install patched boot image file.
fastboot flash boot <name of patched boot file here>.img
- Now, restart your OnePlus 7 Pro by issuing the following command:
fastboot reboot
- Once you are in Android OS, do the below to root your OnePlus 7 Pro (don’t restart before completing the steps below):
- Open Magisk app.
- Tap on Install.
- Tap on Install Magisk.
- Tap on Direct Install.
- Restart the device now. Your OnePlus 7 Pro is now rooted. (The root will be retained even if you reboot the device now.)
That’s all.
Do let us know if you need any help regarding getting root access on the OnePlus 7 Pro.


Most file sharing software is slow and not private. Binfer is a superb file transfer software, without all the headaches of FTP and nuances of torrents.