The One X+ has been getting quite a lot of attention, which is normal considering how good and popular the device has been ever since it was launched. We earlier saw ClockworkMod recovery for the One X+ get released, and now another popular custom recovery, TWRP recovery, has been released for it as well.
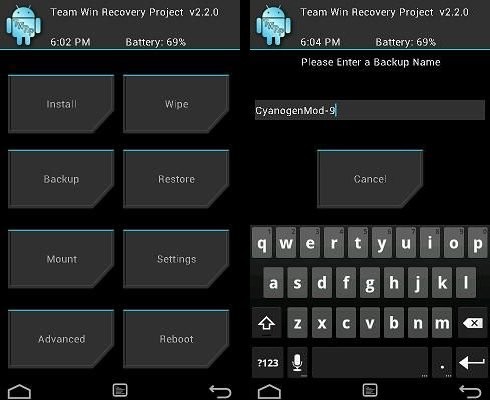
TWRP recovery, while allowing you the basic functionality of flashing custom ROMs just like ClockworkMod, includes quite a few useful features, includes a great interface specially built for touch, an inbuilt file manager, themes support, faster backup and restore times, and a few more small yet useful features that make it the best custom recovery currently available for an Android device, and we’ve created a simple and easy to follow guide to help you flash it on your One X+.
However, take note that the bootloader on the phone needs to be unlocked prior to flashing the recovery, which will void the warranty on your One X+ and also wipe all data off it (which can be backed up and restored later). The recovery has been confirmed to be working fine, so just make sure you are comfortable with losing warranty before trying it out.
Let’s take a look at how TWRP recovery can be flashed on the HTC One X+.
Compatibility
The procedure described below is only for the HTC One X+. Do not try it on any other device.
Warning!
The methods and procedures discussed here are considered risky, so try them out at your own risk, and make sure to read each step carefully before attempting anything. We will not be held responsible if anything goes wrong.
How to Install TWRP Recovery on HTC One X+
- The procedure to flash TWRP recovery involves unlocking the bootloader on the device. Unlocking the bootloader causes all the data on the device to get wiped, including everything on your internal storage. First, backup installed apps and other data such as contacts, messages, bookmarks, etc, by referring to our Android Backup Guide for help. Then, copy everything from the SD card to your computer, which will also include the apps and data you backed up.
- Your phone’s bootloader will need to be unlocked to flash TWRP. You can unlock the bootloader on your phone by following the guide → here. Make sure you took a backup in step 1 as this will wipe all data from the phone and reset it to factory settings. Skip this if you already have the bootloader unlocked.
- If you unlocked the bootloader in step 2, then you should have the drivers for the phone installed on the computer. If not, download HTC Sync Software and install it on your PC, which will install the drivers as well.
Download HTC Sync software - Download Fastboot. Fastboot is what will be used to flash the recovery on the phone.
Download Fastboot | Filename: Fastboot.zip - Extract the Fastboot.zip file you just downloaded to a convenient location on the computer to obtain a folder named Fastboot which will have four files inside it. To keep things easy, extract the Fastboot folder to drive C.
- Download the TWRP recovery image from the source page. You should get a file named TWRPRecovery.img.
- Copy the recovery image you downloaded in step 6 to the Fastboot folder that you obtained in step 5.
- Turn off your One X+. Then, turn on the phone while holding down the Volume Down button till a menu shows up. Here, highlight the FASTBOOT option using the volume keys to scroll, then select it using the Power button to enter fastboot mode. Your phone’s screen should now say FASTBOOT USB.
- Then, connect your the phone to the computer with your USB cable, then wait for Windows to finish installing the drivers (drivers will be installed only the first time). For reliability, ensure that you use a USB port at the back if you are using a desktop computer, as the front panel ports can be loose and cause problems.
- Click on Start menu » All Programs » Accessories, right-click on Command Prompt and click on Run as administrator. If you are using Windows 8, this can be done by right-clicking on the extreme bottom left corner of the taskbar, then selecting “Command Prompt (admin)”.
- Now, we need to flash the TWRP image on the phone. Follow the steps below to do so.
- Change the path in the command prompt to the Fastboot folder which you obtained in step 5. For example, if the Fastboot folder is in drive C on your computer, enter cd C:Fastboot in command prompt (and press Enter) to change the path to the Fastboot folder.
- Then, enter fastboot devices. If your phone has been detected properly, you will see a device ID show up in command prompt. If nothing comes up, make sure you have installed the drivers (see step 3).
- Now, flash TWRP recovery on the phone by entering fastboot flash recovery *filename*.img in the command prompt, where *filename* has to be replaced by the name of the recovery file you obtained in step 6.
- After recovery has been flashed, you should see a “finished”/”OKAY” message in the command prompt. Now, type fastboot reboot and press Enter to reboot the phone.
- TWRP recovery is now installed on your One X+. To boot into TWRP recovery, turn off your phone and turn it on while holding down the Volume Down button. Then, using the volume buttons, scroll to the RECOVERY option, then select it using the power button to reboot the phone into TWRP.
TWRP recovery is installed on your HTC One X+, and will let you tinker with it and flash custom ROMs and other modifications on it with ease. Do let us know if you get stuck at any step and we’ll help you out.

