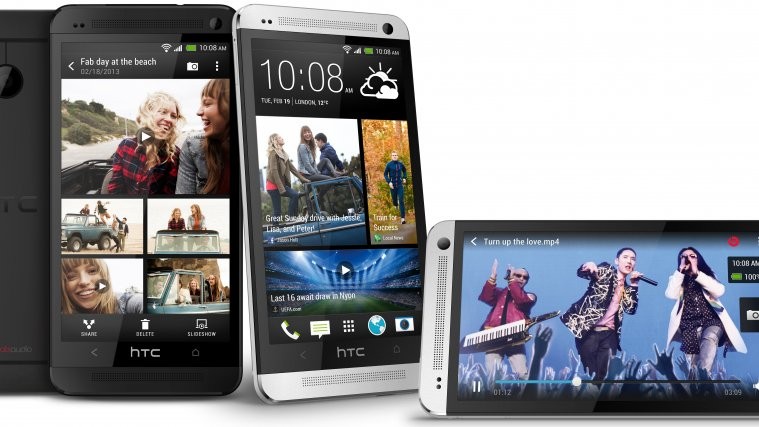
It’s inspiring how fast the amazing developers at the XDA development community work at releasing hacks for various devices, sometimes even before the device gets released, as is the case with the soon to be released HTC One. The popular custom recovery – ClockworkMod (CWM) – is already out for the HTC’s 2013 flagship, paving the way for custom ROMs for the device.
But what is ClockworkMod recovery? ClockworkMod recovery (abbreviated as CWM) is the most popular custom recovery for Android devices, developed by Koushik “Koush” Dutta. CWM recovery replaces the stock recovery that is present on every Android device and extends its functionality with a lot more features and options.
The one thing that CWM is mostly used for is flashing custom ROMs on devices, which are basically custom versions of Android that replace the default software that a manufacturer puts on their devices. Other functions of CWM include the ability to factory reset a device, backup and restore a device’s ROM, and flash custom kernels, hacks, and mods.
So if you’re looking to install CWM recovery on the HTC One but need a little help, you’ve come to the right place – our all-in-one guide for the HTC One has easy to understand step-by-step instructions to help you through the procedure to install CWM.
However, there are a few things you must know before you proceed with installing CWM recovery on your device:
- Flashing a custom recovery requires unlocking the bootloader on the phone, which permanently voids warranty.
- Unlocking the bootloader will wipe all data on the phone, including personal content on the internal storage such photos, music, videos and other files. You can take a backup of everything though and restore it later on.
- Accepting official over-the-air software upgrades from HTC might cause issues, so you’ll have to refrain from installing any official updates after flashing recovery (and also unlocking the bootloader).
So make sure you’re okay with the risks involved in flashing a custom recovery as given above, then continue reading below to find out to CWM recovery can be installed on the HTC One.
Compatibility
The procedure described below is only for the HTC One. Do not try it on any other device.
Warning!
The methods and procedures discussed here are considered risky, so try them out at your own risk, and make sure to read each step carefully before attempting anything. We will not be held responsible if anything goes wrong.
Requirements
- Take a backup of all the data on your phone. Rooting requires unlocking the bootloader on the phone which wipes everything from the phone and factory resets it. Use our Android Backup Guide for help on how to back up apps and other data, such as contacts, SMS, bookmarks, etc. Then, after you’ve backed personal data up, copy everything off the phone’s storage to a computer.
- NOTE: Backup is optional and you can skip this step if you do not wish to back up anything.
- You’ll need to have the drivers for the phone installed on your computer. Download the HTC Sync Software and install it on your computer, which will install the drivers as well.
Download HTC Sync Manager- NOTE: Skip this step if the HTC Sync software is already installed on your computer.
- Unlock the bootloader on your phone using this guide. Unlocking bootloader wipes all data from the phone so make sure you take a backup as mentioned in step 1.
- NOTE: If you’ve already unlocked the bootloader on your device, you can skip this step.
- Make sure the “Fast Boot” option is disabled in the phone’s Settings » Power menu. If it is enabled, you’ll be unable to make the phone boot into the required mode for flashing recovery.
Flash CWM Recovery
- Download Fastboot files, which will be used for flashing the recovery.
Download Fastboot | Filename: Fastboot.zip - Extract the Fastboot.zip file on your computer to get a folder named Fastboot with four files inside it.
- Download the touch version of CWM recovery from the source page. The file should be named something like “recovery-clockwork-touch-*.*.*-m7.img”, where *.*.* will be the current version of recovery.
- Copy the CWM file that you downloaded to the Fastboot folder so that you now have a total of 5 files inside.
- Turn off your phone. Then, boot into HBOOT/bootloader mode by holding down the Volume down + Power buttons together till the screen turns on. Then, press the power button once to select “FASTBOOT”, after which “HBOOT” will change into “FASTBOOT USB”.
- Then, connect your phone to the computer with your USB cable, then wait for Windows to finish installing the drivers (drivers will be installed only the first time you connect the phone to the computer). For reliability, ensure that you use a USB port at the back if you are using a desktop computer, as the front panel ports can be loose and cause problems.
- Now, perform the following steps in the command prompt to flash CWM.
- Open the Fastboot folder. Here, press and hold down the SHIFT button on your keyboard, then right-click on an empty part of the screen. Then, click on the “Open command window here” option in the right-click menu to open a command prompt window.
This is only an example, your fastboot folder location will differ. - Type in fastboot devices in the command prompt and press Enter. If your phone has been detected properly, you will see a device ID show up in command prompt. If nothing comes up, make sure you have installed the drivers, disconnect phone, remove and re-insert battery, and retry the procedure from step 5.
- Now, flash CWM recovery on the phone by entering fastboot flash recovery *filename*.img in the command prompt, where *filename* has to be replaced by the name of the recovery file that you have downloaded. For example: fastboot flash recovery recovery-clockwork-touch-6.0.0.0-m7.img
- After the recovery is flashed, you’ll get a finished/OKAY message in command prompt.
- Disconnect the phone, then using volume button, scroll down to highlight “HBOOT”, then select it using the power button.
- Then, highlight the “RECOVERY” option, then press power button to reboot the phone into CWM recovery. Once recovery boots up, simply select the “reboot system now” option to reboot the phone into Android.
- Open the Fastboot folder. Here, press and hold down the SHIFT button on your keyboard, then right-click on an empty part of the screen. Then, click on the “Open command window here” option in the right-click menu to open a command prompt window.
- ClockworkMod recovery is now installed on your HTC One. Make sure to read the “Booting into ClockworkMod Recovery” section below to find out how you can boot into CWM when needed.

Booting into ClockworkMod Recovery
Whenever you want to use CWM recovery, you can boot into it via Fastboot mode. The procedure to boot into CWM recovery is given below.
- Turn off the phone.
- Then, boot into HBOOT/bootloader mode by holding down the Volume down + Power buttons together till the screen turns on.
- Press the Volume Down key a few times till “RECOVERY” is highlighted, then press the power button to select this option. The phone will then reboot into CWM recovery, where you can tap on options to select them.
- Rebooting back into Android from CWM recovery can be done by selecting the “reboot system now” option in the main menu of CWM.
ClockworkMod recovery is now installed on your HTC One, and you will be able to flash custom ROMs, hacks, kernels, take backups of and restore ROMs, and make other modifications such as factory resetting the device. If you run into any problems, let us know in the comments and we’ll help you out.


