Considering that firmware modification has been as old as the Android OS itself, getting into the game for newbies can be quite intimidating. For instance, flashing certain custom ROMs require multiple steps, such as extracting the official boot image and flashing it on to the device before finally completing the process and flashing the custom ROMs files along with it.
While in some guides you’ll find online include the boot.img files included other times you might need to modify the boot image yourself and then repack it. Since the Android operating system for mobile phones is derived from Linux, the only way to do so is using a Linux-based platform or emulating one on your Windows PC.
Scripts to unpack and repack the boot.img file
XDA user CNexus sieved through the internet to find and compile a list of tools for unpacking and repacking the boot image file, all of which can be downloaded using the link given below.
Commands you should know
- boot_info file included in the package allows you to the base address and the ramdisk address of the boot.img file which you will later need for repackaging.
- split_boot (split_bootimg.pl) helps you extract the ramdisk and zImage from the boot.img file into a separate folder.
- unpack_ramdisk allows you to unpack the ramdisk file using the following command:
Usage: unpack_ramdisk <ramdiskFile> - repack_ramdisk feature will let you repack the ramdisk file from the given directory using the following command:
Usage: repack_ramdisk <ramdiskDirectory> [outputFile] - mkbootimg command helps you create a brand new boot.img file from the ramdisk and zImage files you have (useful for creating modified boot.img files).
- umkbootimg does the very opposite and splits up the kernel and boot image.
- unpack will simply extract the boot.img file in one directory and the ramdisk in a separate directory for convenience.
Windows compatibility: Things to know
- If you don’t have a Linux operating system up and running, you can emulate it on your Windows PC using this official guide.
- The tool has been tested to work with Debian but not confirmed to work with Cygwin.
- All of the scripts in the .ZIP file must be saved in a folder in the path of the Linux system you’re running for them to be detected (example: ~/bin)
How to use the unpack and repack boot and extract ramdisk file
Well, we got to use the split_boot file as it holds the script to first get unpack the boot.img file, get the ramdisk file from it, and then extract the ramdisk file.
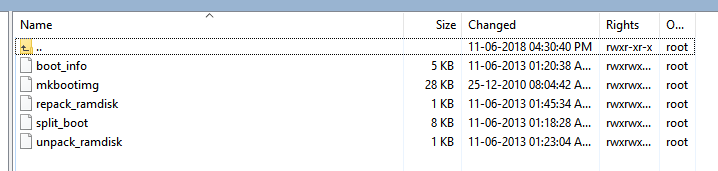
- Download the boot tool from here.
- Now, extract it to a separate folder to get these files.
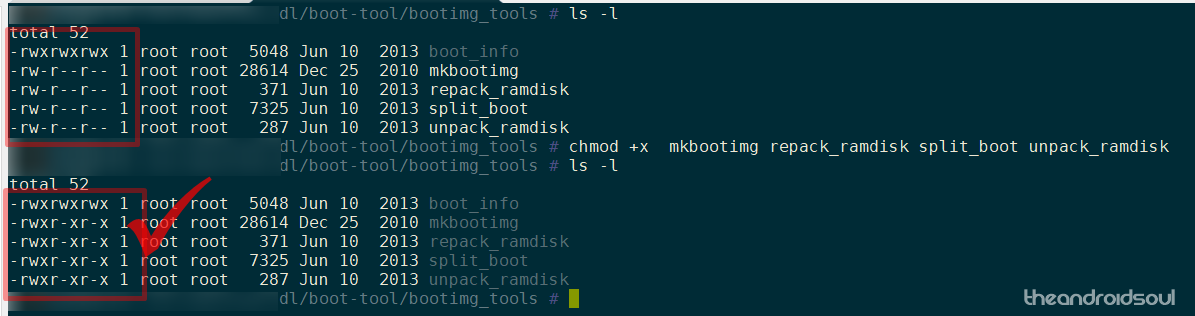
- Now, provide the required permission to these files. So, run the command below in a folder where you have all the files.
chmod +x boot_info mkbootimg repack_ramdisk split_boot unpack_ramdisk
- Place the boot.img file that you want to extract in the same folder as these files on your PC.
- To extract the boot image file and ramdisk file, run the command below.
./split_boot boot.img
- This will create a new folder called boot in your current folder. The boot folder will contain the boot image kernel file, the ramdisk file, and a ramdisk folder that contains data extracted from the ramdisk file.
- That’s it. Make changes to the ramdisk folder’s file as you need.
- Copy all the main files of the tool (boot_info, mkbootimg, repack_ramdisk, split_boot, and unpack_ramdisk) to the boot folder which contains the ramdisk folder.
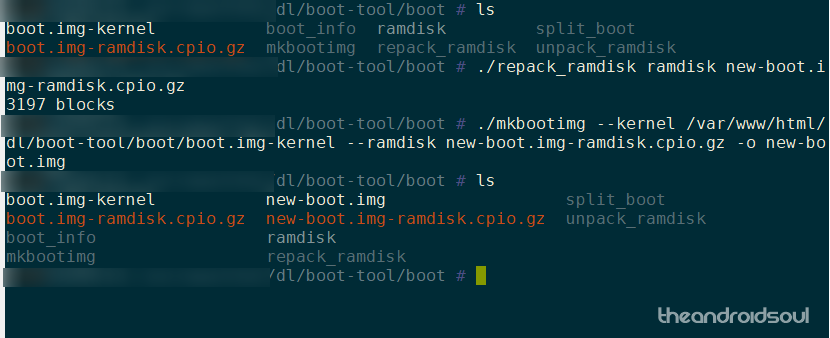
- Repack the ramdisk file using the command below. This will create a new ramdisk file called new-boot.img-ramdisk.cpio.gz in the boot folder. (You can change the output filename from new-boot.img-ramdisk.cpio.gz to any of your choice.)
./repack_ramdisk ramdisk new-boot.img-ramdisk.cpio.gz
- Repack the boot file using the command below. This will create a new boot image file called new-boot.img in the boot folder.
./mkbootimg --kernel /var/www/html/dl/boot-tool/boot/boot.img-kernel --ramdisk new-boot.img-ramdisk.cpio.gz -o new-boot.img
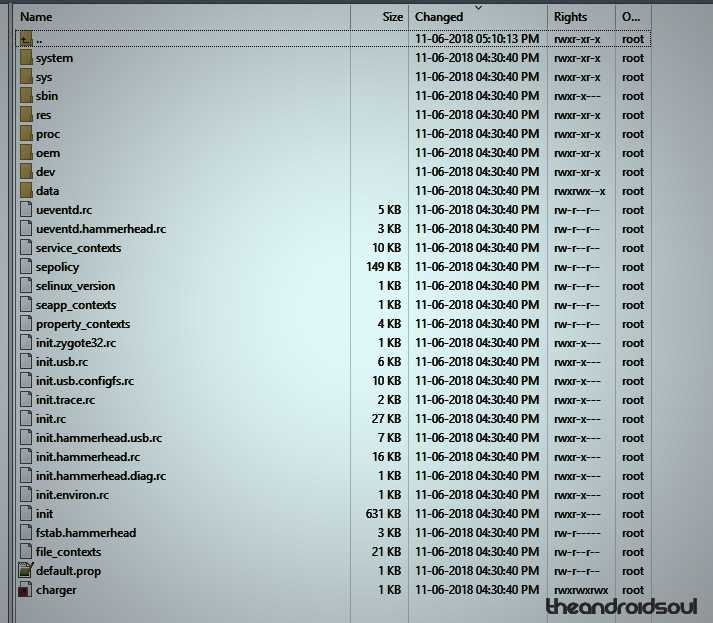
- That’s it. Job done! You have successfully unpacked and repacked the boot and ramdisk files. Your directory would look like this now. Notice the new boot and ramdisk files in the screenshot below.

So, how was it? Were you able to use the tools easily?
While most mainstream users will seldom find the need to unpack, modify and repack the boot.img file even when flashing a custom firmware, it’s handy to have this tool at your disposal either way.
