Want to save the recording of a WhatsApp call? Well, WhatsApp doesn’t allow that but there are some workarounds available for you. Read on to learn how to record and save a WhatsApp call. However, be sure to check the laws of your country to confirm whether you are allowed to record the calls or not as this could bring up some privacy issues.
In order to record a voice call, we’ll be using the Cube ACR app which works across WhatsApp, Skype, and Facebook Messenger. The app is one of the best call recorder apps available on Android. It supports VoIP voice calls and recording of calls in HD quality to make the things convenient. Let’s get to know how to record WhatsApp voice calls using Cube ACR app.
RELATED: Best voice recorder apps on Android


How to record WhatsApp calls on Android
Step 1: Download and install the Cube ACR app from Google Play. After the installation is complete, open the app.
Step 2: Tap on the ‘Next’ button at the bottom.

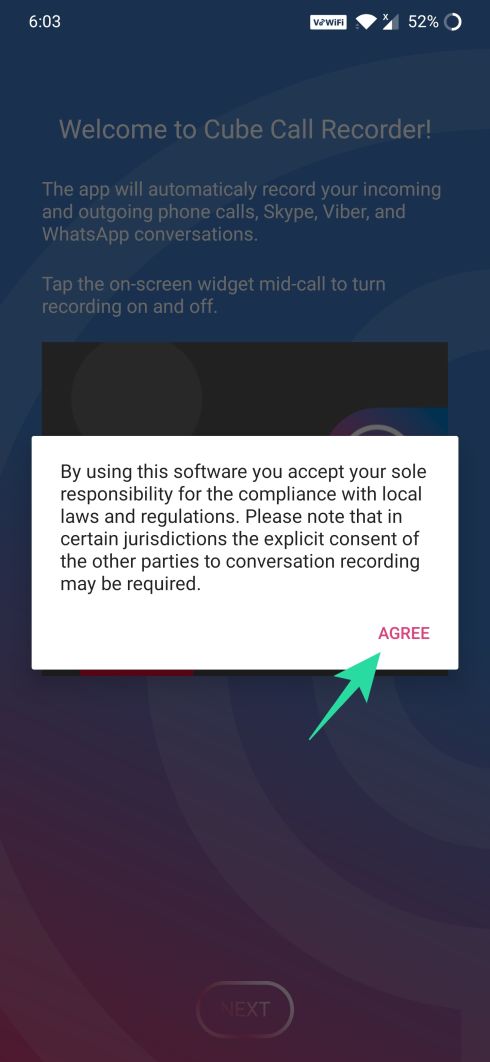
Step 3: Tap on Agree once you’re done reading the terms of the app.
Step 4: Give the app the necessary permissions by tapping on ‘Grant permissions’.
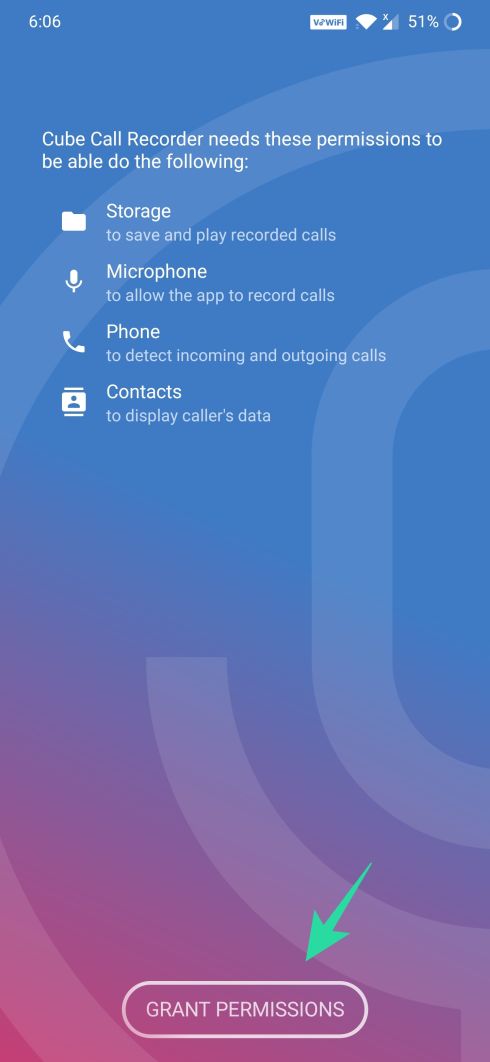
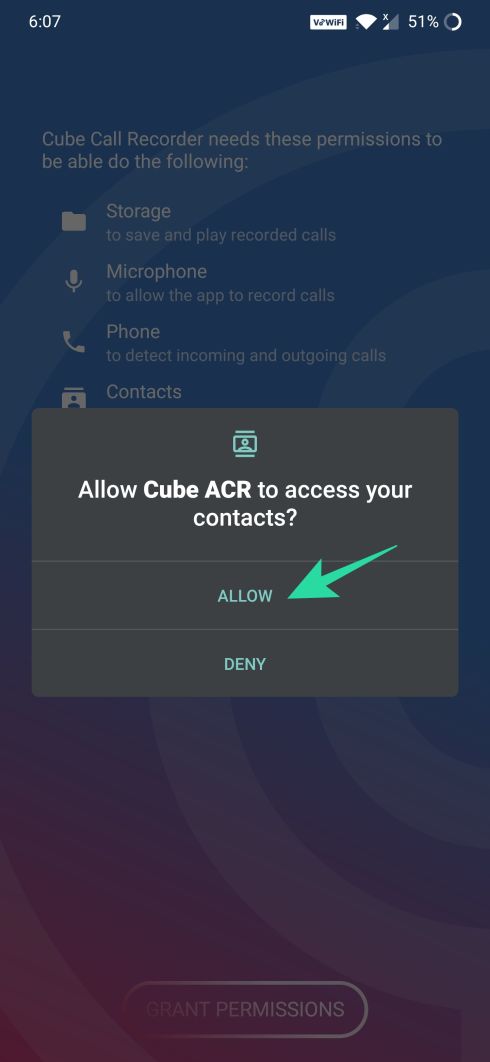
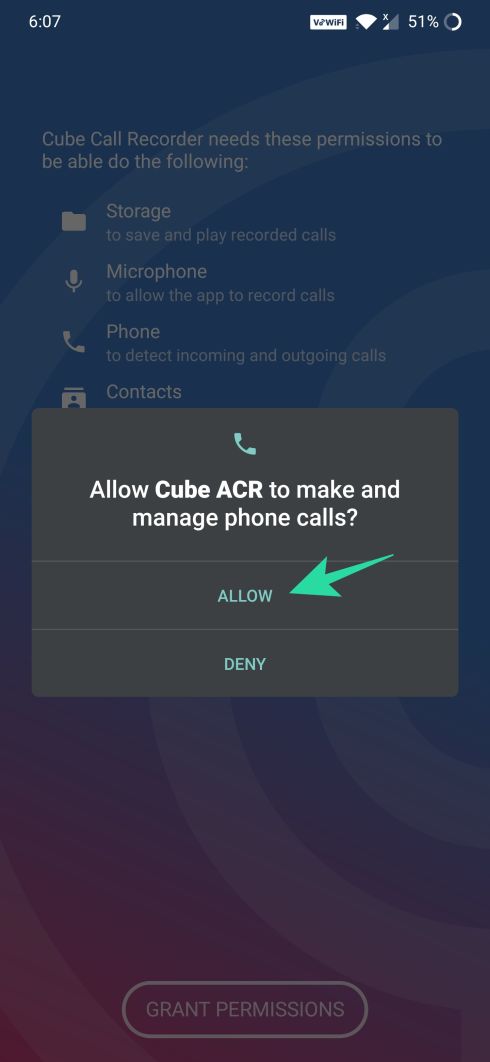
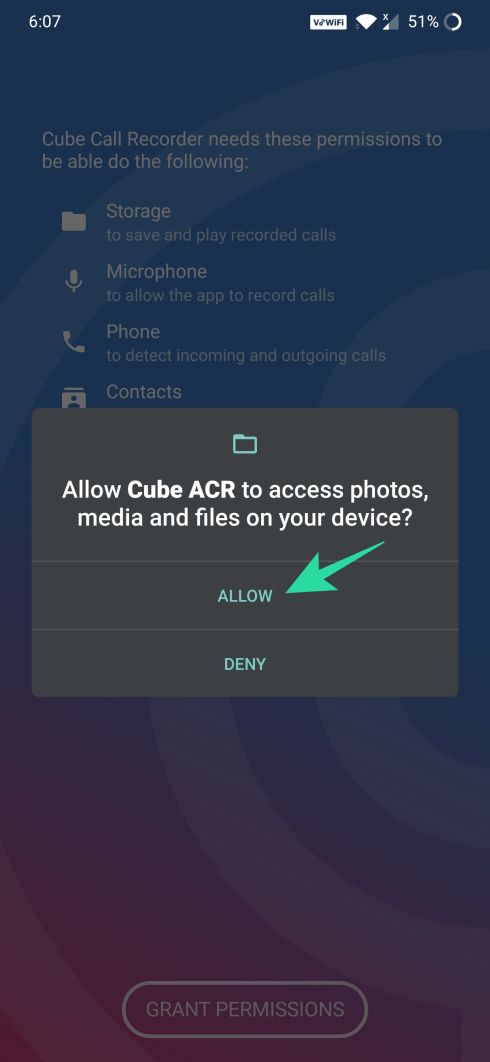
Step 5: You will now be prompted to allow the app access to contacts, phone, storage, and microphone. To do that, tap on Allow for the different permissions.

Step 6: Allow the app accessibility to read your call log by tapping Enable App Connector at the bottom.
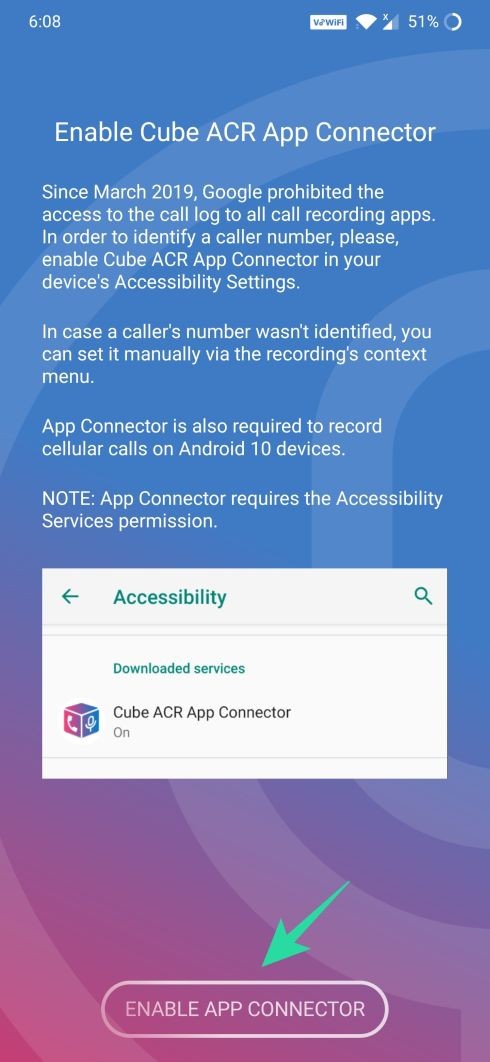
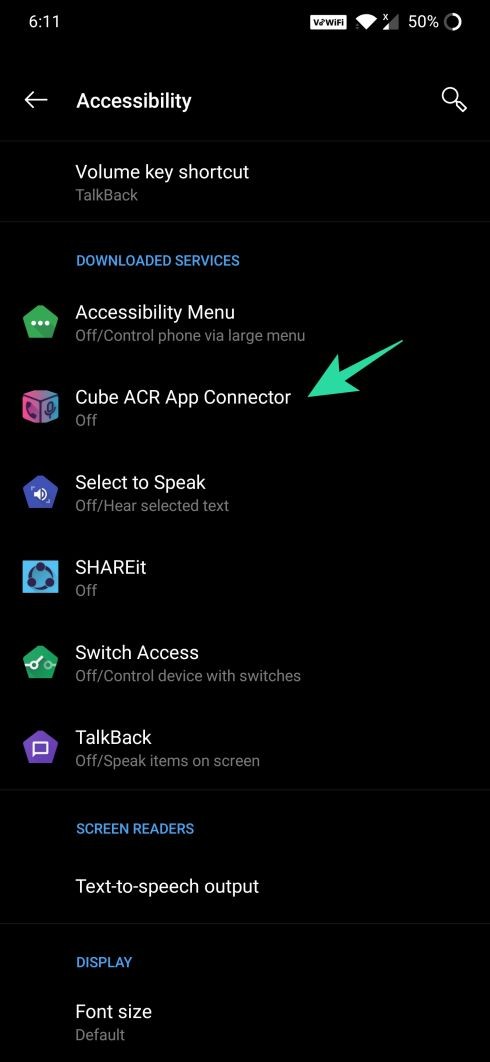
Step 7: Under Downloaded Services, select ‘Cube ACR App Connector”.
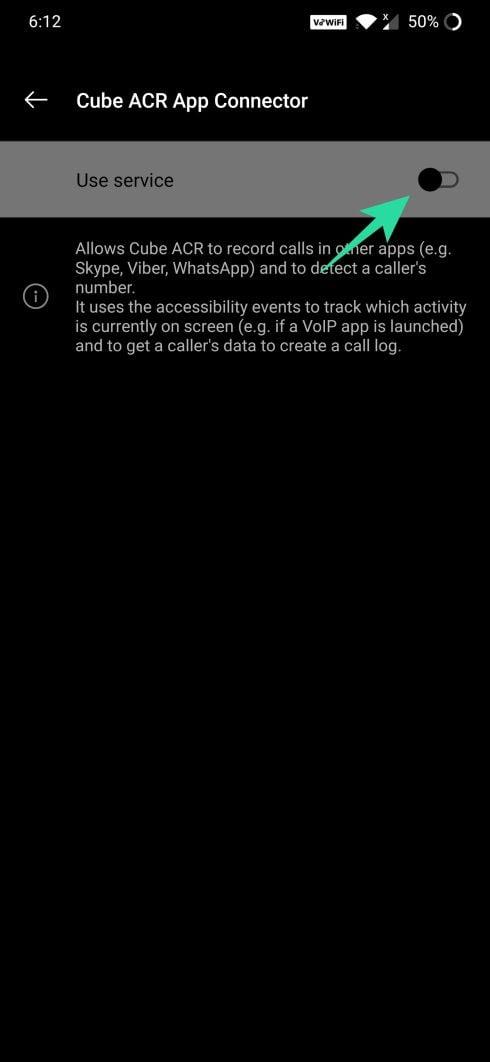
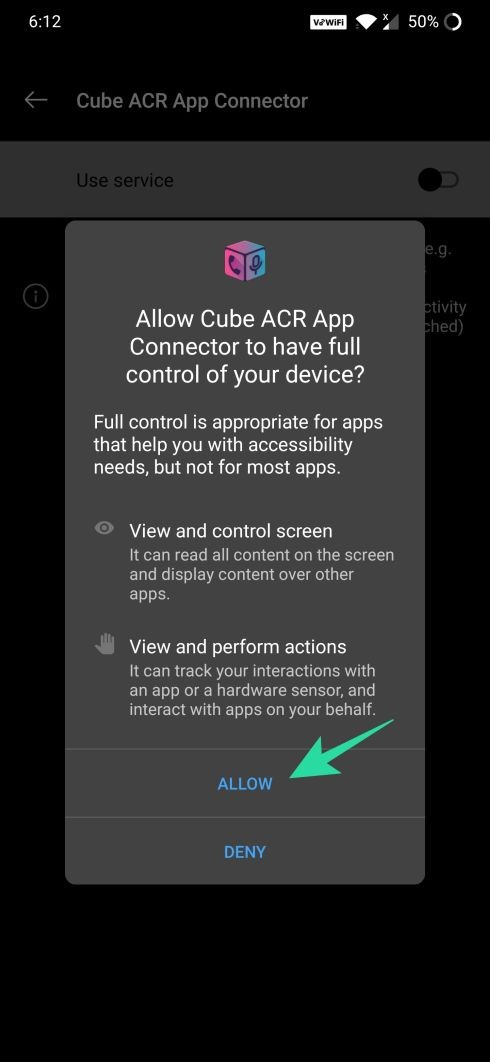
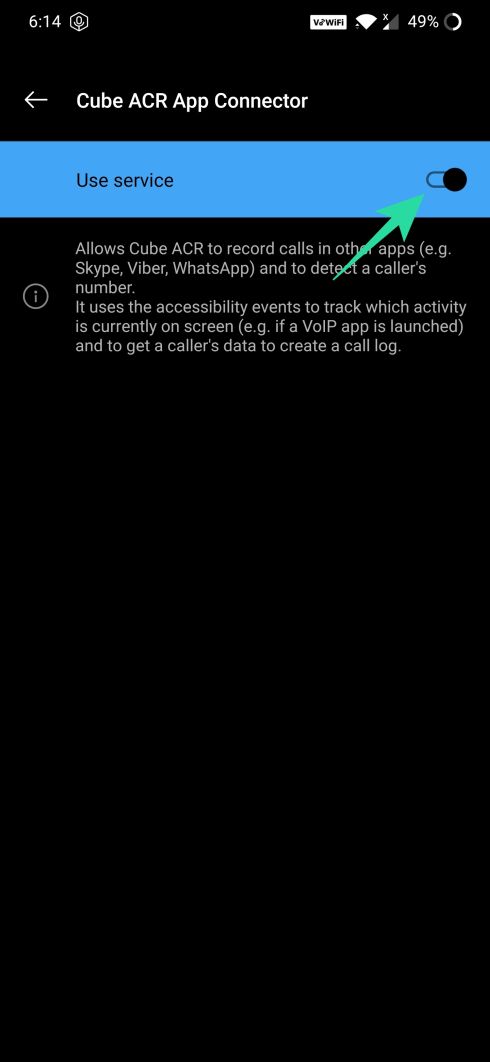
Step 8: Tap the Toggle adjacent to ‘Use Service’ to ON position and tap Allow.
Step 9: Head back to the app.
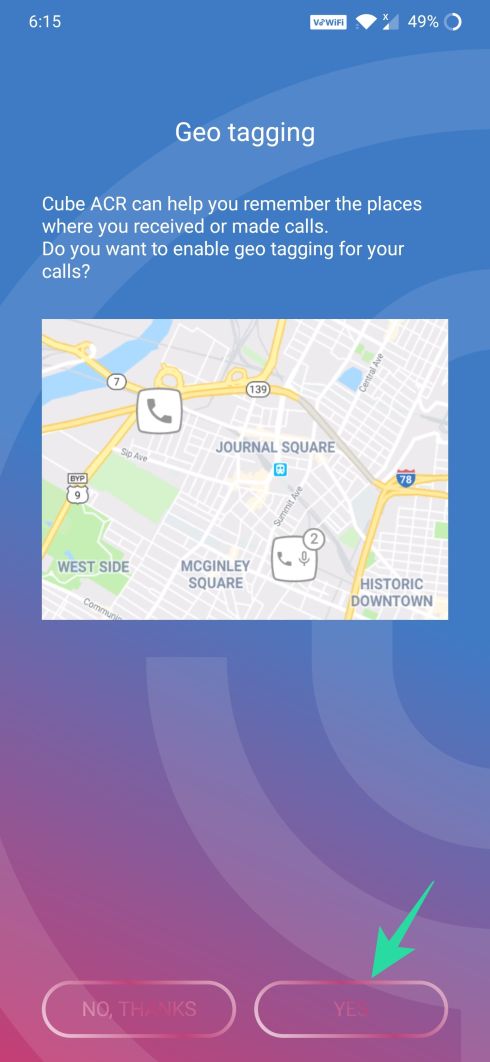
Step 10: Now, if you wish to add the Geo-tagging feature to your calls, tap Yes or tap No, Thanks.
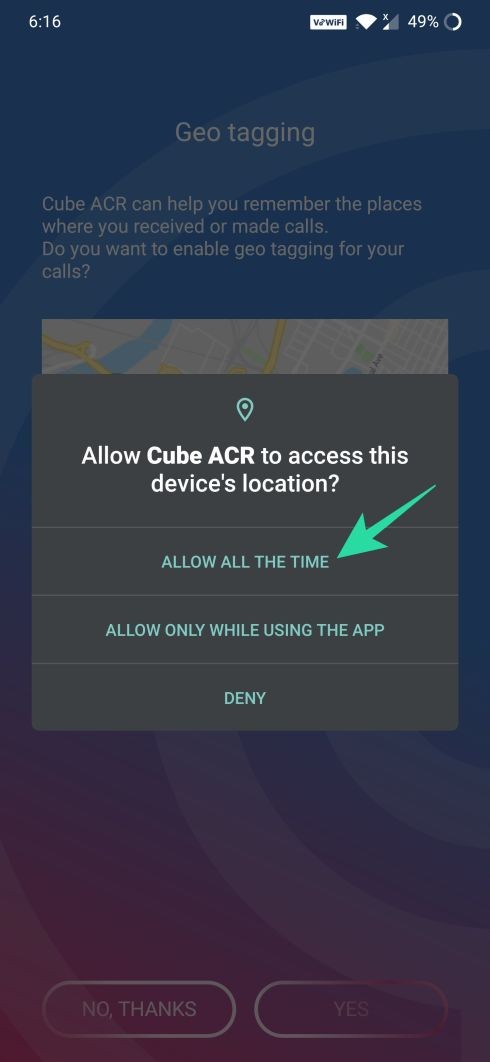
Step 11: If you end up adding the Geotagging feature, you will have to tap on ‘Allow all the time’ option on the next screen.
Step 12: Call recording is now enabled automatically. On the next screen, tap on WhatsApp.

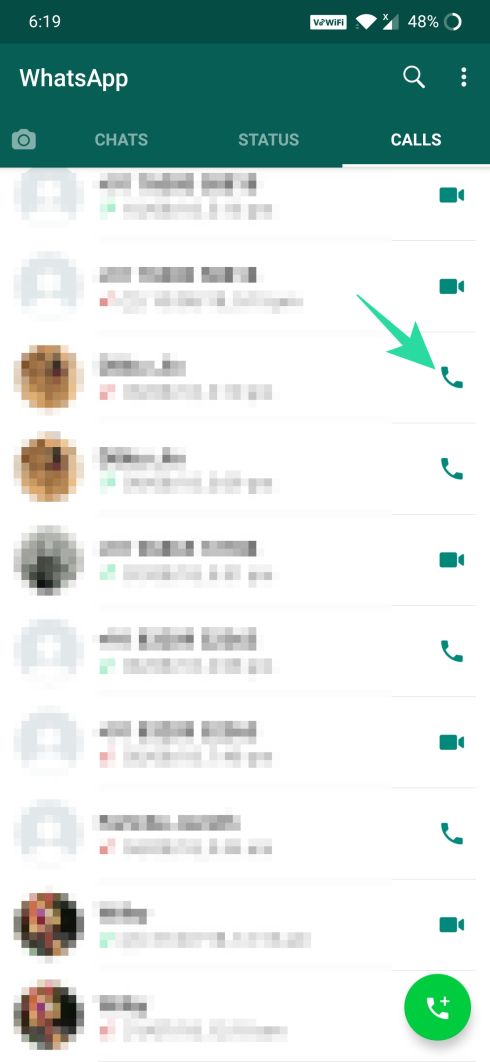
Step 13: Select a contact to connect to and then tap on the Call icon adjacent to it.
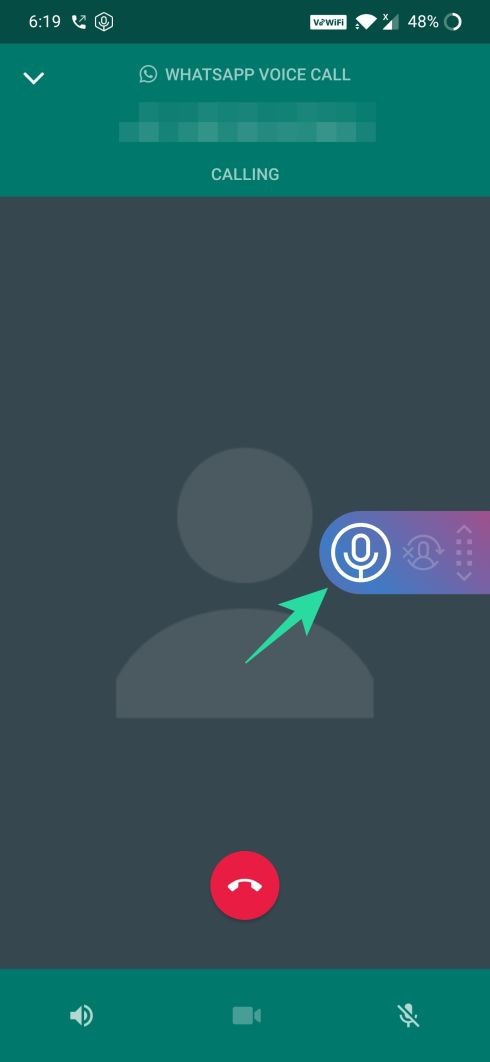
You should now be able to see the Recording widget every time the call connects and will automatically disappear when the call ends.
Where are WhatsApp call recordings saved
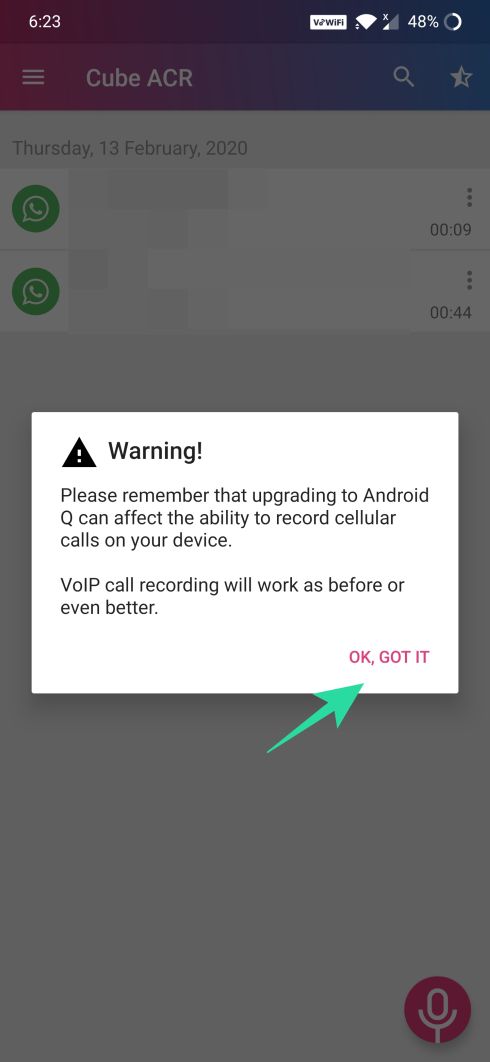
Step 1: Open the Cube ACR app.
Step 2: Tap on ‘Ok, Got it’.
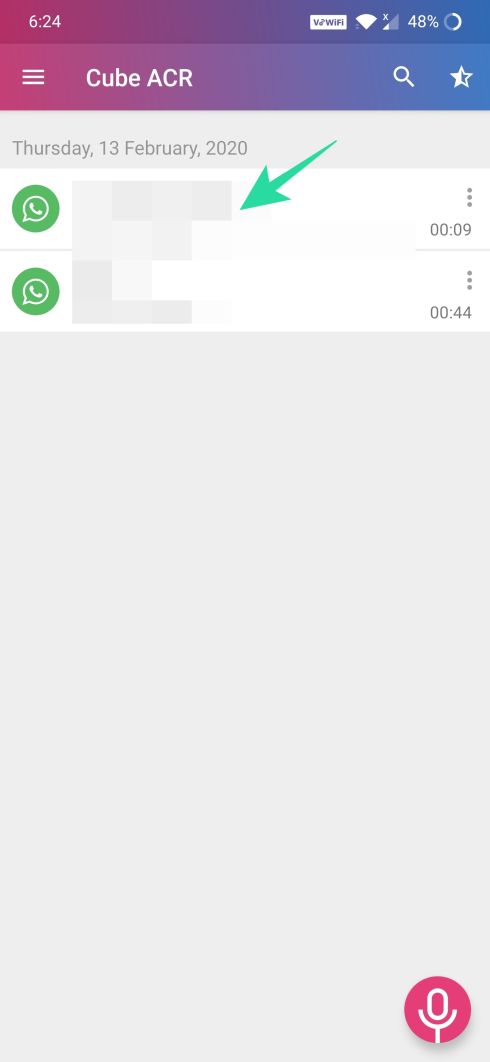
The recordings will be displayed on the app’s home screen with the time stamp and contact details.
Step 3: Tap on a recording to open additional controls.
Step 4: Tap the Play button to hear the recording.

You can also perform other actions to the saved recording including – favoriting, locating, commenting, sharing, and deleting the recorded files. You can find these options by tapping the 3-dot icon on the right portion of each of the recordings.

How to change the location where call recordings are saved
While you can find your recordings on the home screen of the Cube ACR app, you can also view them on your internal memory. In addition to viewing them through your native file manager, you can also change the directory in which the app saved your call recording and even save them on the external memory like an SD Card. Here’s how you can change recorded files and how to change the default directory for saving your files.
After finding the recordings using the above-mentioned steps, let’s change the directory to a user-specified one.
Step 1: Open the Cube ACR app.
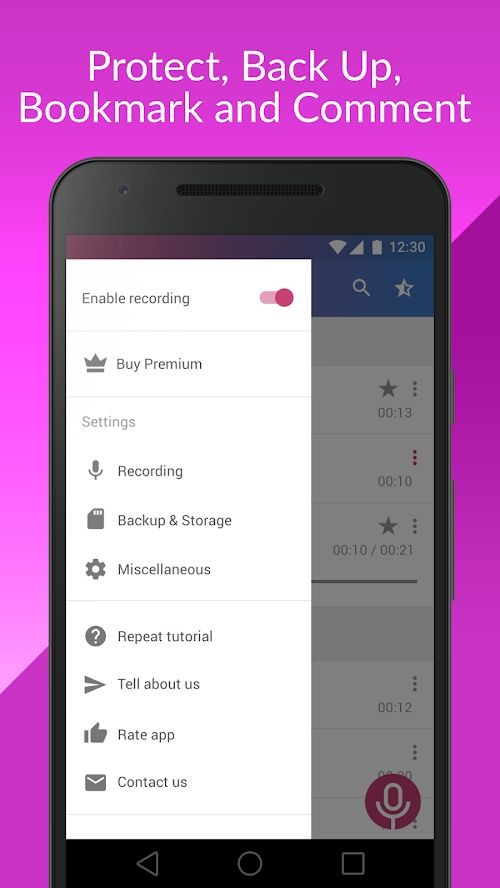
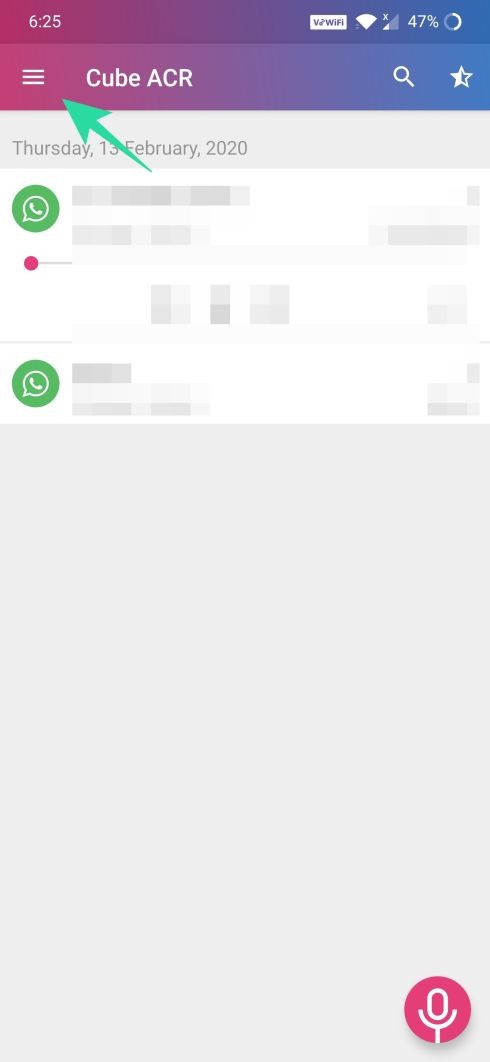
Step 2: Tap on the hamburger icon at the top left corner.
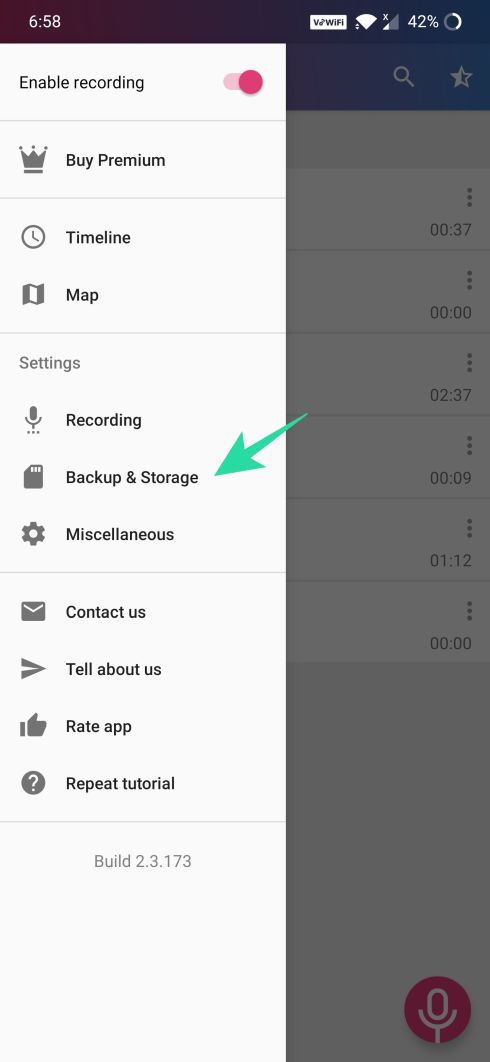
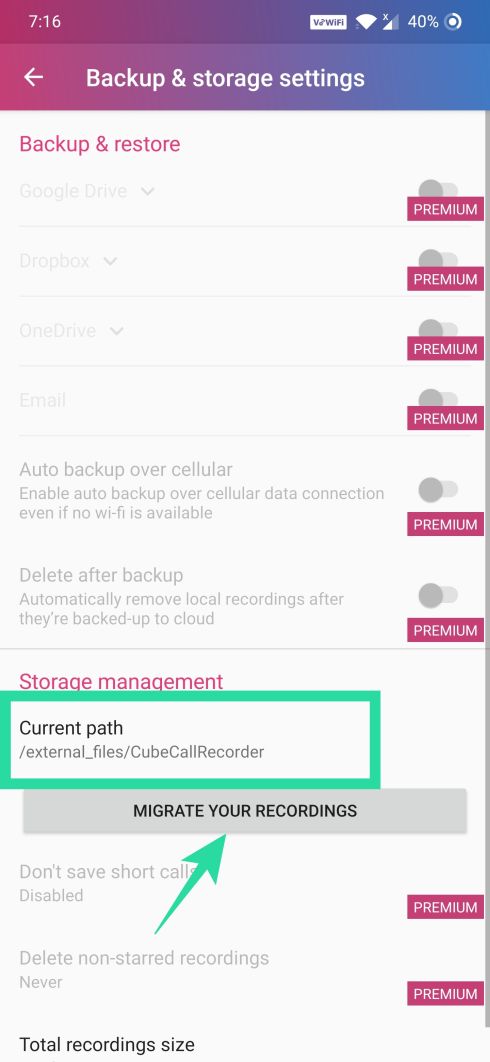
Step 3: Select the Backup & Storage option from the menu.
Step 4: Under the Storage management section, tap on ‘Migrate your recordings’.
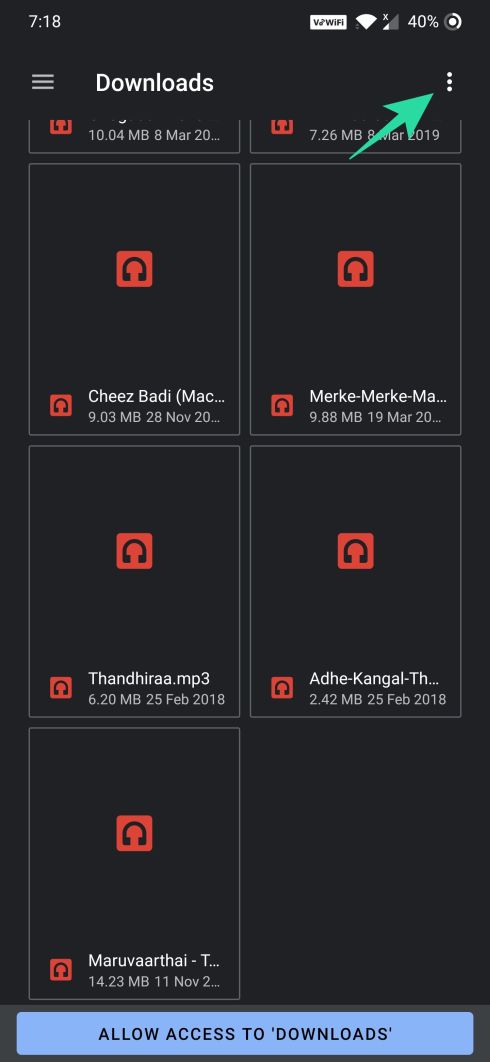
Step 5: Make sure the recording is not running during this process and then tap Select. This will open the Downloads folder.
Step 6: Here, tap on the 3-dot icon at the top right.
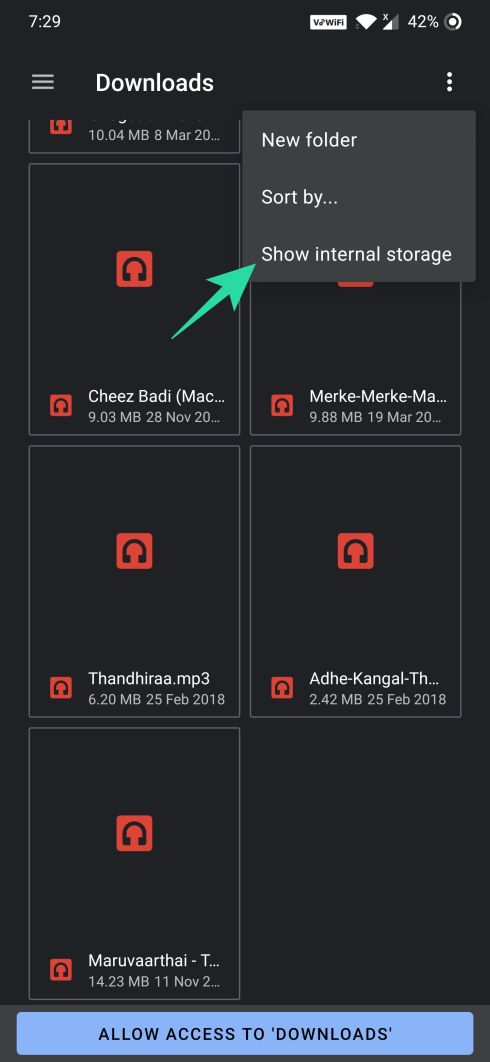
Step 7: Select the ‘Show internal storage’ option from the menu.
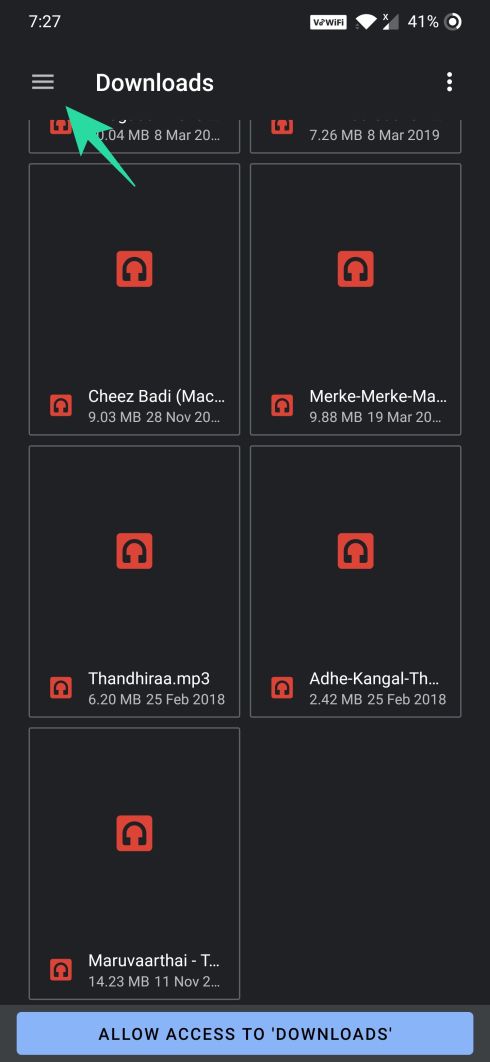
Step 8: Now tap the hamburger menu icon from the top left and select the internal/external memory where you wish to save the recordings.
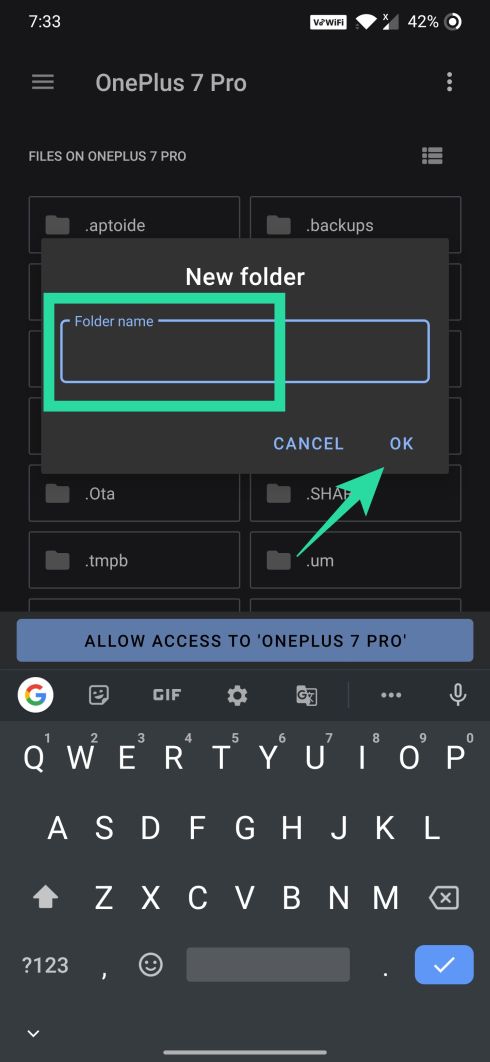
Step 9: To create a directory, tap on the 3-dot icon at the top right and select the ‘New folder’.
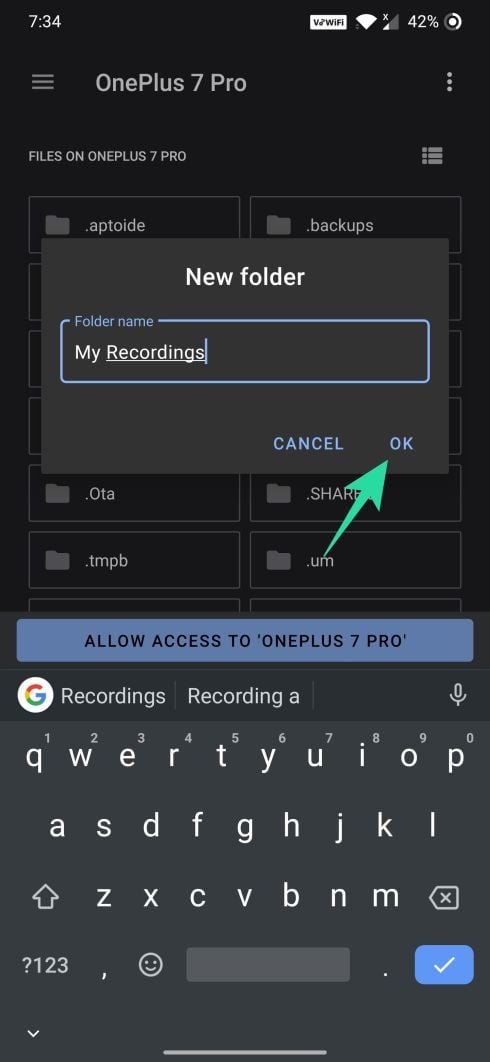
Step 10: Enter the name for the new folder and then tap on OK.
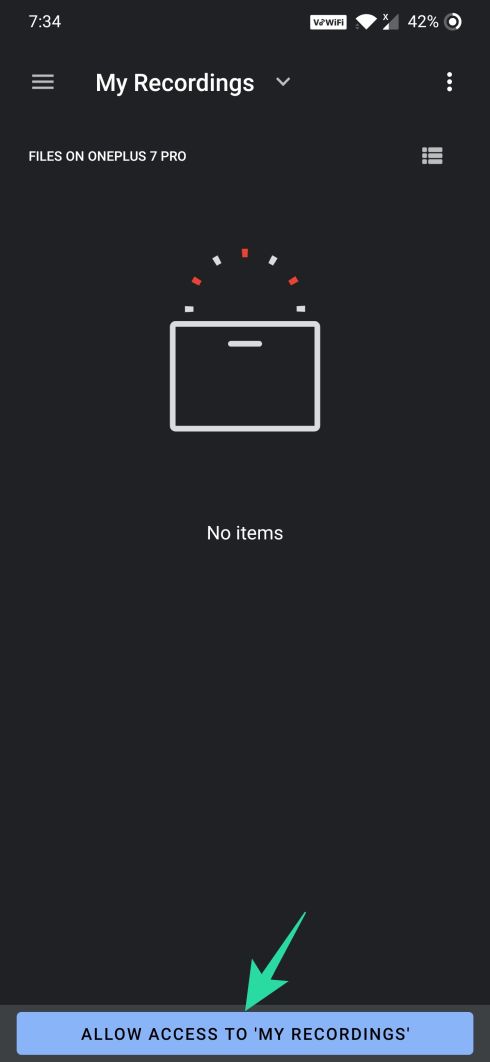
Step 11: You need to grant access to the directory you selected for saving the recordings. You can do so by tapping the ‘Allow access to {Created folder}’ button at the bottom of the screen and selecting Allow.
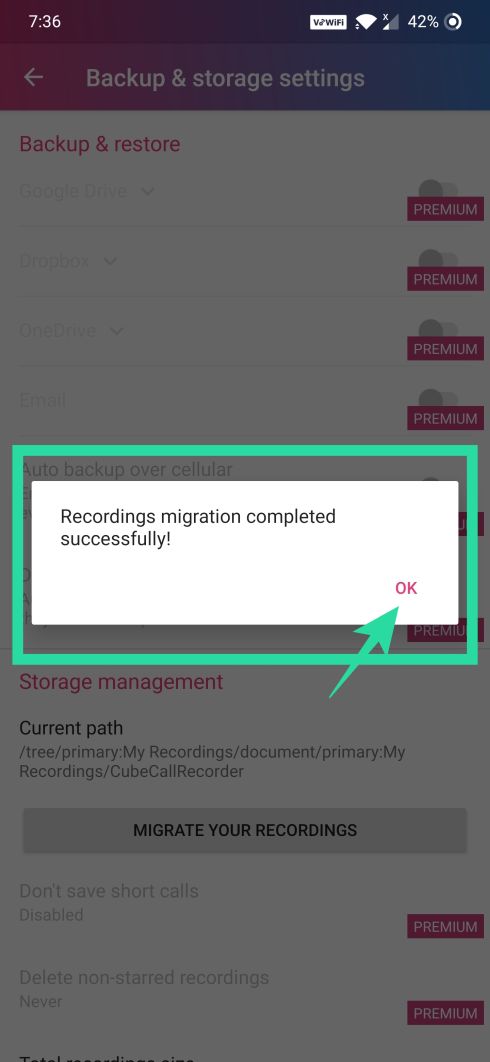
Newly recorded files will now be moved to the new directory which you just created. You can verify the current path under Storage management.
How to delete WhatsApp call recordings
Deleting a file is equally easy as the rest of the functions mentioned above. You can delete your recording by tapping the 3-dot icon adjacent to any recording and selecting the Delete option.
Some tips for WhatsApp call recording using Cube ACR app
Tips are very useful when it comes to making things easier and the following tips can make things easier for you while using the Cube ACR app.
- Hide Recording widget: Open the app, tap the menu button > Miscellaneous > Hide recording widget > Toggle it off.
- Enable Dark Mode: Open the app, tap the menu button > Miscellaneous > Dark theme > Toggle it on.
- Search recordings: Tap the search button > type the name or the contact number to find the recordings by that contact or number respectively.
Do you record your audio calls? If yes, which app do you use to record and manage the recordings? Let us know in the comments below.