
Zoom meetings have gotten integrated into the average workday to an unbelievable extent. With the sheer volume of virtual meetings, it is sure to eventually get confusing, as to what happened in which meeting.
Luckily, Zoom allows users to record Meetings and save them for later viewing. While some meetings are short and sweet, some of them tend to go on till eternity. In such cases, it is best to edit out the parts that are boring, or blank, to keep the real matter ready to be accessed. Read on to learn how to edit a Zoom Meeting recording.
The Zoom meeting recording needs to be enabled by the host, otherwise, the participants can’t record it on their devices. But there’s a workaround that as you can still record a Zoom meeting without the host permission, but you are gonna need some tools for that.
► How to record a Zoom meeting without host permission
How to edit a Zoom recording for free
While there is a myriad of video editing software available, we like to use Kapwing.com. It is easy to use, allows you to save projects, and is free. Zoom saves video recordings in the MP4 format and audio recording in an M4A format. Both these formats are widely compatible with most editors making it all the easier for us.
Follow this guide to edit your saved Zoom meeting video.
Step 1: Locate the file on your local PC. By default, Zoom saves all recordings to the local Documents folder on Windows. Alternatively, you can open the Zoom recordings folder by heading over to Zoom > Settings > Recording, and opening the location of your recording.
C:\Users\User Name\Documents\Zoom

Step 2: Go to Kapwing.com and sign in. Signing in allows users to save projects. This is especially helpful when working with longer projects.
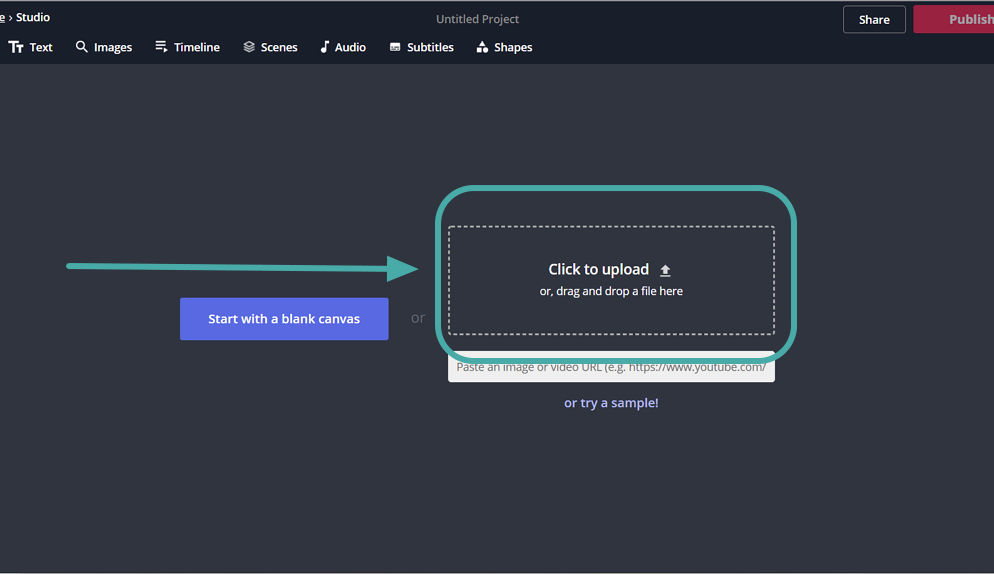
Step 3: Upload the video file into Kapwing by clicking ‘Upload’, locating the video, and clicking ‘Open’. Alternatively, you can drag the video directly from its destination folder. This may take a few minutes depending on the size of the video.
Next, see the section right below to edit and trim the video recording.
How to trim a Zoom video recording
Once the video is uploaded on to Kapwing (see steps 1 to 3 right above), you can change the length of the video either by trimming the edges or making cuts in the video. Follow this guide on how to trim a video on Kapwing.
Step 1: Click on the video. This will bring up the ‘Trim’ option on the right-side panel.

Step 2: Clicking on the ‘Trim’ button will bring up a slider. This slider can be adjusted from the left or right, depending on how much you want to trim off the video.
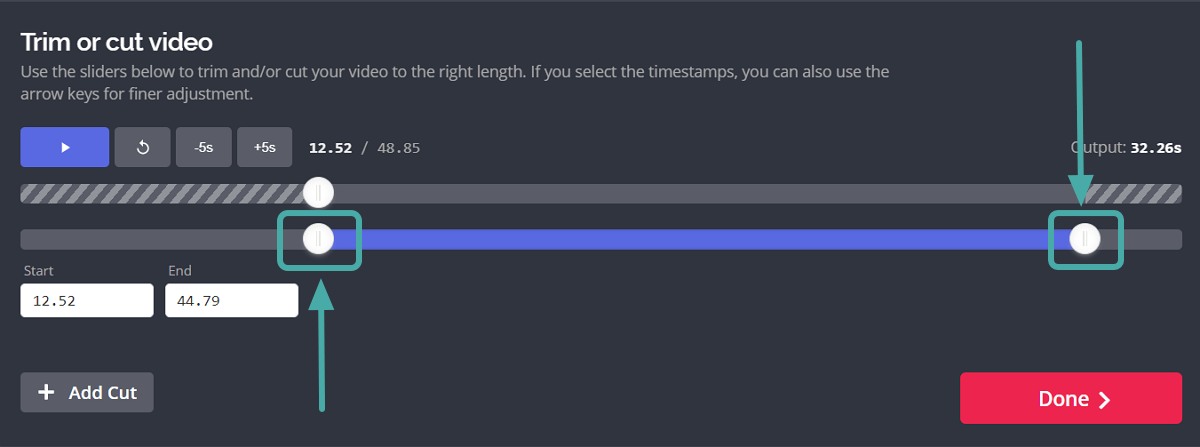
Step 3: To cut out portions within the video, click the ‘Add cut’ button at the bottom. Using the new slider, locate the portion you would like to cut out of the original video.

Step 4: Click ‘Done’ to complete the process and go back to the cut video.
Step 5: Click ‘Publish’ in the top right corner, save the edited version of the video. This takes a while to process. Note: If would like to change the output size of the video, to make it better suited to share on social media, select one of the Output sizes before clicking ‘Publish’

Step 6: You can now download the video to your local directory or re-edit it if you are not yet satisfied with the result.
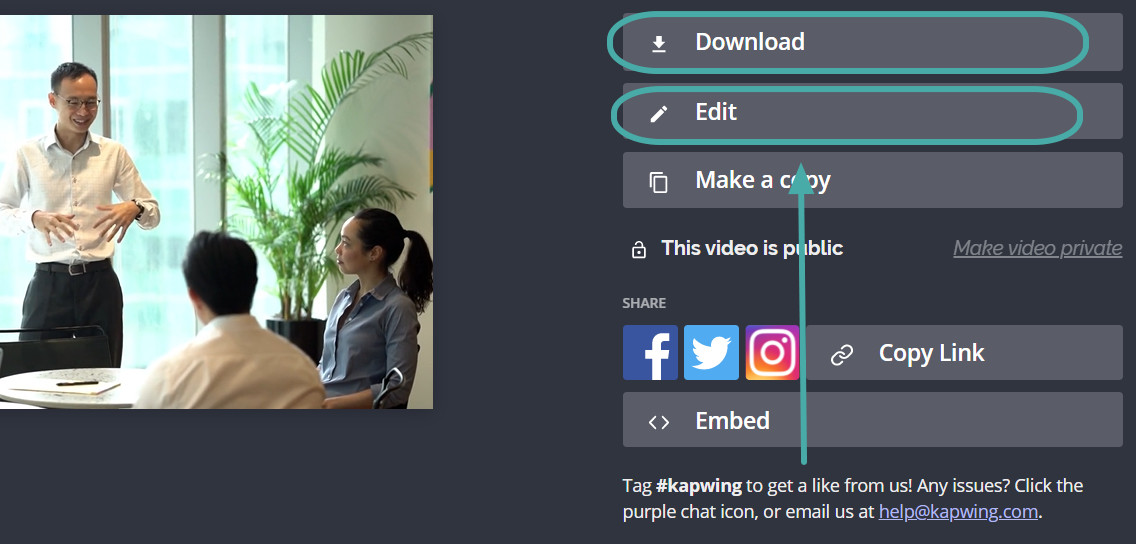
Note: Hitting ‘Edit’ will send the video back to the editor. You can trim off portions that you do not want, and hit publish again. Once you are satisfied with the recording, click ‘Download’.
How to edit Zoom recordings on iMovie on macOS
Step 1: Download and install the iMovie app on your Mac from the Mac App Store. Once you’ve installed the app, open it.
Step 2: Click on the Create New button (the one marked with ‘+’ icon) and select Movie.


Step 3: Tap on the Import button in the top toolbar and select the location of your Zoom recording which is Documents > Zoom > [Zoom folder with your recordings to edit].


Step 4: Once you’ve selected the files to add for editing, click on Import Selected.

Step 5: Drag the selected files to the project timeline at the bottom. The recording is now ready for editing. You can pinch outwards on the video timeline on the trackpad to expand the view for easy editing.

If there are multiple recordings you want to add to the same video, you can also drag them to the project timeline and drag them in the way you want to arrange them.
Step 6: For trimming the start and end points of the video, you can either hover over the start and end line and then drag it to the desired points or move the pointer to the vertical center of the start/end point and drag it toward the center of the clip.

Step 7: You can add themes to your clips to give them transitions and titles. You can do so by clicking on Settings in the upper-right corner of the project timeline, then Theme, selecting a theme, and clicking Change.

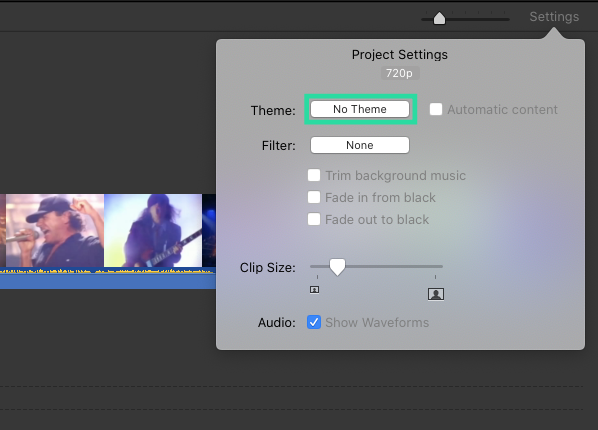
Step 8: Similarly, you can also modify the appearance of Zoom recording by adding filters on iMovie. You can do so by heading over to Settings > Filter and selecting the desired filter.


Step 9: After you’re done editing the recording, click on the Share button at the top right corner and select File.


Step 10: Now choose all the parameters of the video file you want to save like Title, format, resolution, quality, and compression type.

Step 11: Once that’s done, click on Next, choose where you want to save, and then click Save.

That’s it! Your Zoom recordings will now be saved to the selected destination on your Mac.
How to edit Zoom recordings in cloud or online
Zoom’s cloud recording feature allows users to save their recordings directly on the cloud. To access your saved recordings follow this guide below
Step 1: Log in to the Zoom web portal, then go to ‘Settings’ in the top right corner.
Step 2: Select ‘Recordings’ from the left-hand side panel, and then ‘Cloud Recordings’. Here you will find all the recordings saved to the Zoom cloud. Clicking on the recordings with open a player with a slider similar to our app above. Adjust the slider to cut out the portion of the video you would like to get rid of.

How to edit a Zoom audio recording
If all you need is to listen to the recording of a meeting, Zoom has you covered for that too. When you hit record, Zoom not only records a video of the meeting also a separate audio track. This track can be found in the same location as the video recording.
Similar to the video recording, the audio recording can be edited to get rid of long blank pauses and trim down the length. You can also boost portions of the recording that sound too low. We will be editing our audio recording using the Bearaudio online tool.
Follow the steps below to edit a Zoom audio recording.
Step 1: Head over to bearaudiotool.com.
Step 2: Locate the audio file on your local device. By default, Zoom saves audio recordings in the ‘Documents’ folder of a PC.
- Windows — C:\Users\User Name\Documents\Zoom
- macOS — /Users/User Name/Documents/Zoom
Step 3: Drag the audio file from the local destination on to the website.

Step 4: To trim off the ends of a recording, simply click and drag from the endpoints. Once you have selected the portion to get rid of, click the ‘Cut’ button.
Similarly, to trim out any portion within the recording, click and drag to select the portion, then click ‘Cut’.

How to boost volume in a Zoom audio recording
In the clip above, you will notice there is an area towards the middle where the audio waves seem to dip. This means the volume has dropped in this area. Follow this guide to boost the volume of certain parts of a Zoom audio recording.
Step 1: Select the portion that you want to boost by clicking and dragging over it.

Step 2: In the bottom left corner, click the ∧ button to increase the decibel.

Step 3: Once you have adjusted the decibel, click on the number in the middle. This applies the changes to the selected portion of the track.

Notice the difference in the audio waves from before and after the decibel boost.

Step 4: Click the ‘Save’ button at the bottom of the player. Here you can choose the output format of your audio recording.


Don’t forget to rename the new recording, so that you do not get it confused with the original. Editing Zoom recordings is a good way to clear up the clutter. A lot of meetings have blank pauses in the beginning while waiting for people to join.
Did you enjoy reading this article? Have you tried editing a recording before? Let us know in the comments below.


Have you actually edited with Kapwing and iMovie? I have been trying to edit with Screenflow and it absolutely, positively does not work. The Screenflow people say it is a known issue related to the way Zoom records, If Screenflow can’t do it, and Screenflow is popular, I’m wondering about these others.