
There are times when you want to hide sensitive information from a photo before sharing it with friends and family members, or even on social media. In those cases, cropping a photo may not be the best solution, which is why blurring that part of the image is the best thing to do.
Also, you may want to blur an image to highlight yourself in a portrait photo. Another simple case could be the need to make a photo square using the very same image with blur to fill out the added area around it. Whatever be the case, here are some of the techniques to blur an image on Android.
RELATED: How to add a photo frame on Android
How to blur a portion of an image
- Download and install the Blur Photo app and open it.
- Tap on Background Blur.
- Select the photo you wish to edit. If you are unable to locate your photo, change the directory by tapping on the folder names above.
- After selecting the photo, tap and hold on the screen to display the selection marker.
- Move the selection marker over the area which you wish to blur.
- The background of the selected area will be blurred manually.
- Useful tips:
- To see the original image for comparison, tap the comparison icon in the bottom right, right above the color menu.
- Tap on the Effect menu in the bottom left to change the type of blur and its strength.
Effect Preview 1 Effect Preview 2 Effect Preview 3
- You can use the Unblur menu to remove (undo) the blur effect that you do not want.
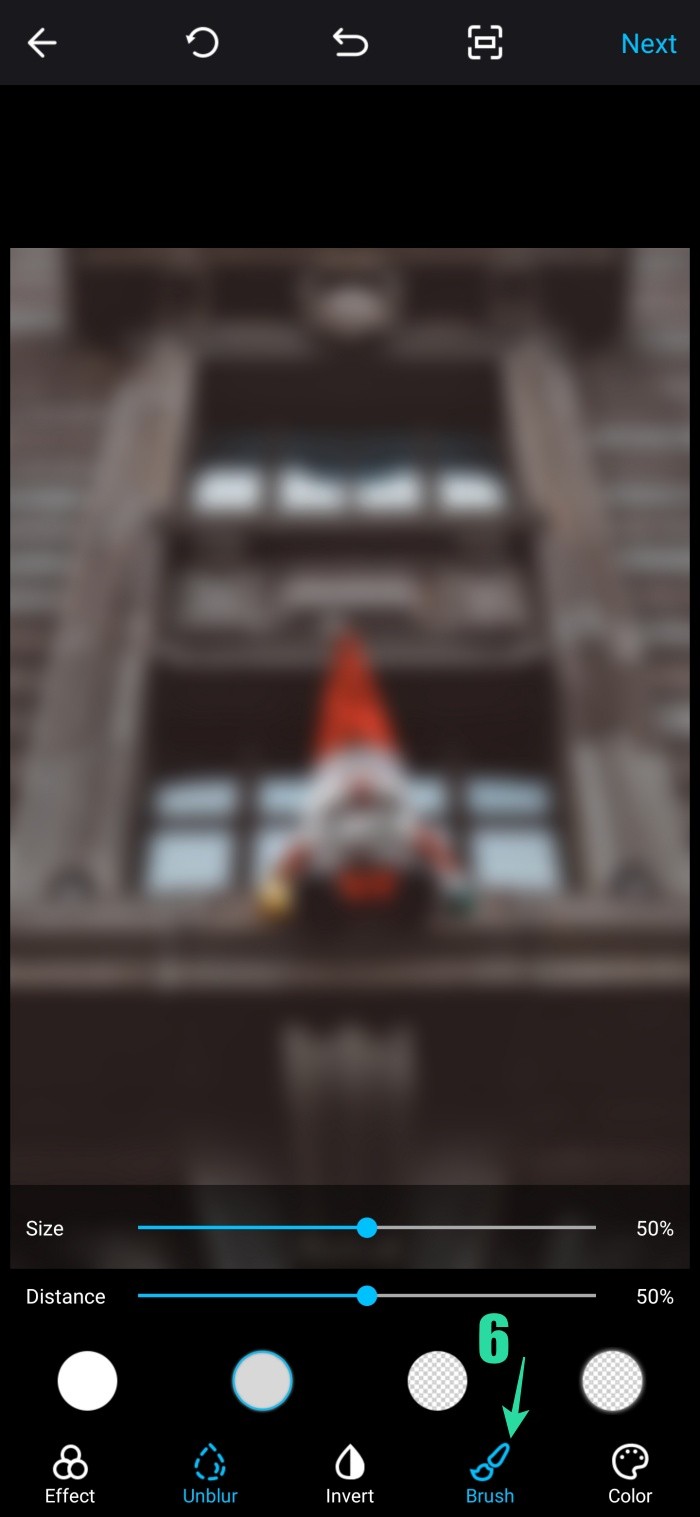
- Also, you can increase or decrease the size of the brush in the Brush menu.
- You can even change the color of the blur and its strength in the Color menu.
- After blurring the selected area, tap Next on the top right to add more effects to the final image.
- You will be able to see some advanced editing options like crop/rotate, photo effects, filters, and curve.
- Don’t forget to tap on Save on the top right to save the edited image.


RELATED: Best Anti-theft Android apps
How to use Shape Blur (Square, Triangle, Heart, Apple, and more)
- Download and install the Blur Photo app and open it.
- Tap on Shape Blur and select a photo to edit.
- Tap on Shape to check the different shape tools available.
- Use two fingers to zoom in and out to increase and decrease the size of the shape.
- Adjust the strength and border as you find fitting.
- You can use the Invert menu to blur the portion inside the shape.
- Tap on the Effect menu to change the Blur type and strength.
- Even the color of the blurred area can be changed under the Color option.
- After adding effects to the photo, tap on the Next at the top right to save it.


RELATED: Best Google Play games and Apps
How to use the Invert and Unblur options together to blur a large area quickly
There is always a situation where you need to blur the 70-90% portion of the image and display the rest. In that case, you don’t need to manually highlight the entire area to blur it. Invert option plays a big role in such scenarios. For example: imagine you click a photo in a carnival or a landscape image with a lot of details in it but would like to display only a certain portion of that image to your friends or family. Below mentioned steps will help in these conditions.
- Download and install the Blur Photo app and open it.
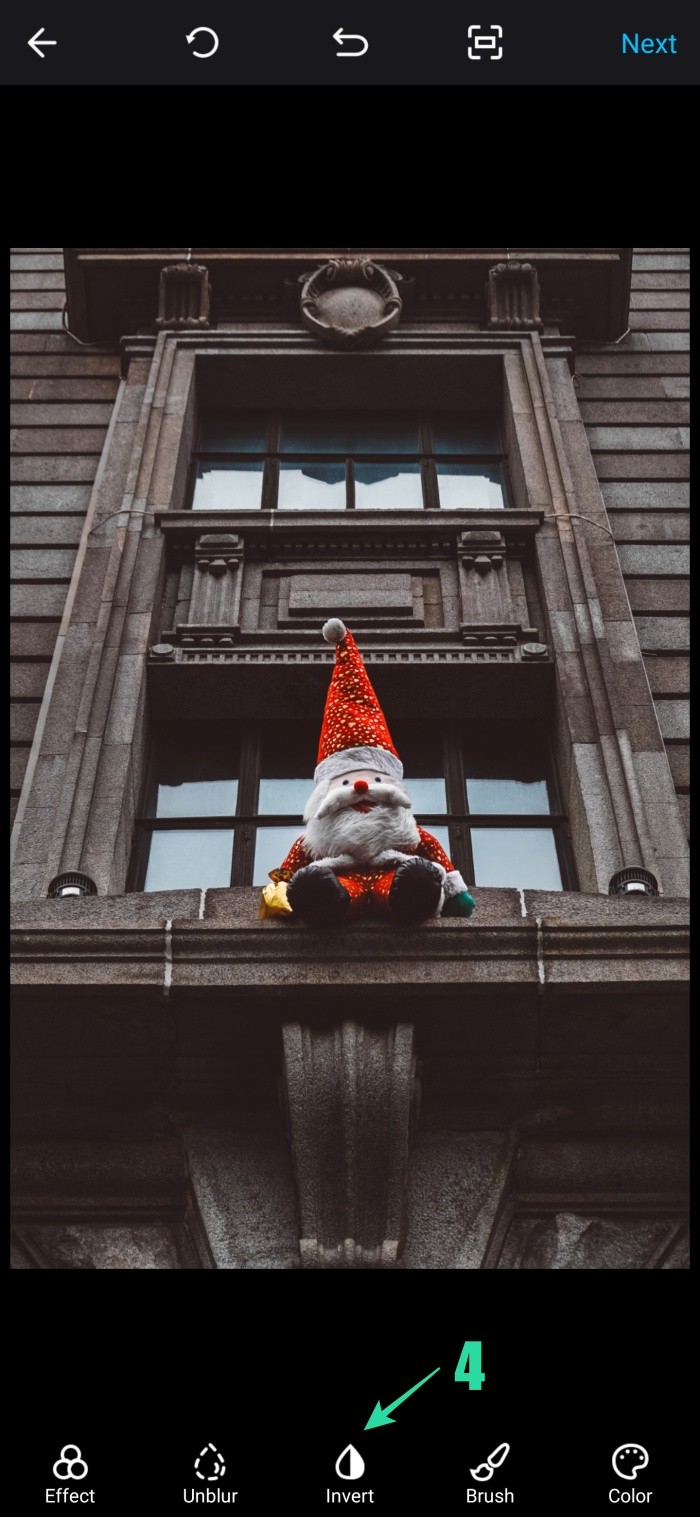
- Tap on Background Blur or Shape Blur option and select a photo for editing.
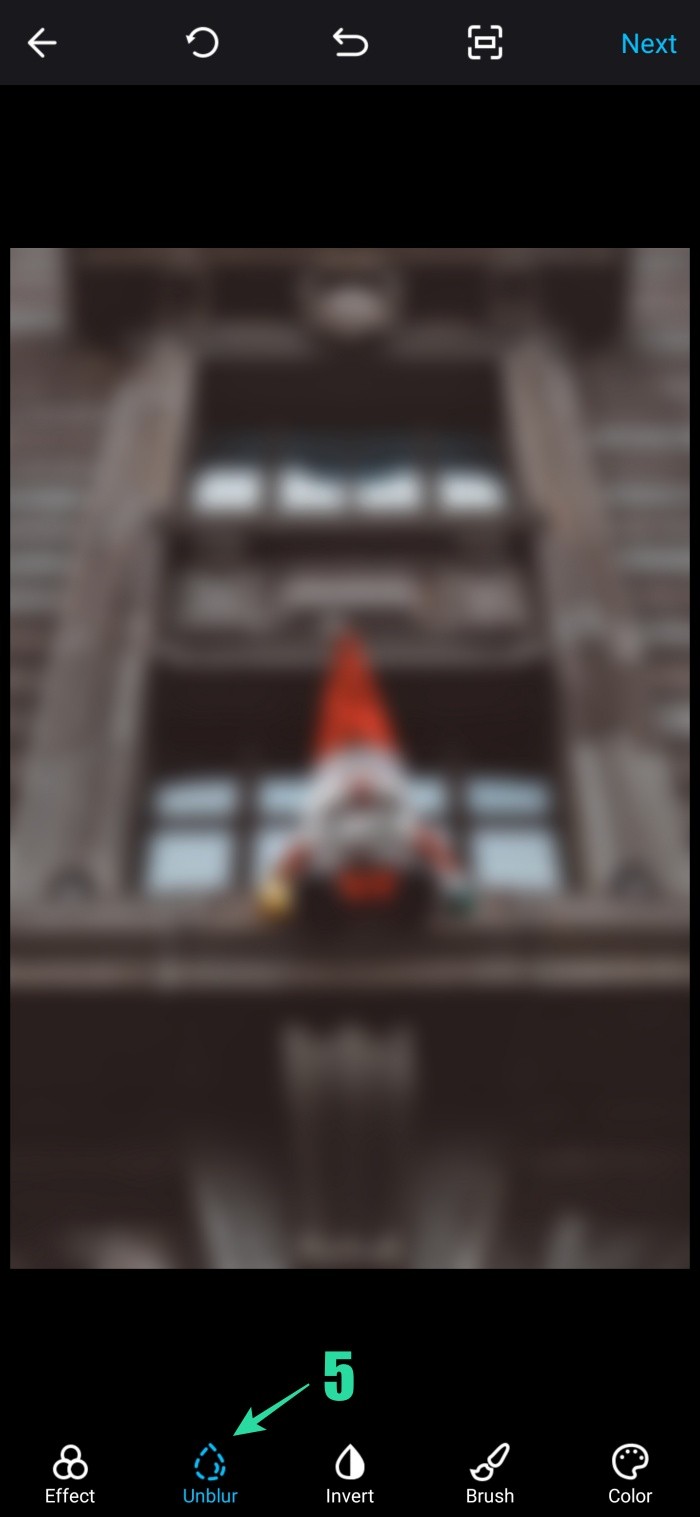
- Tap on Invert to blur the entire image in a tap.
- Tap on Unblur to select this menu.
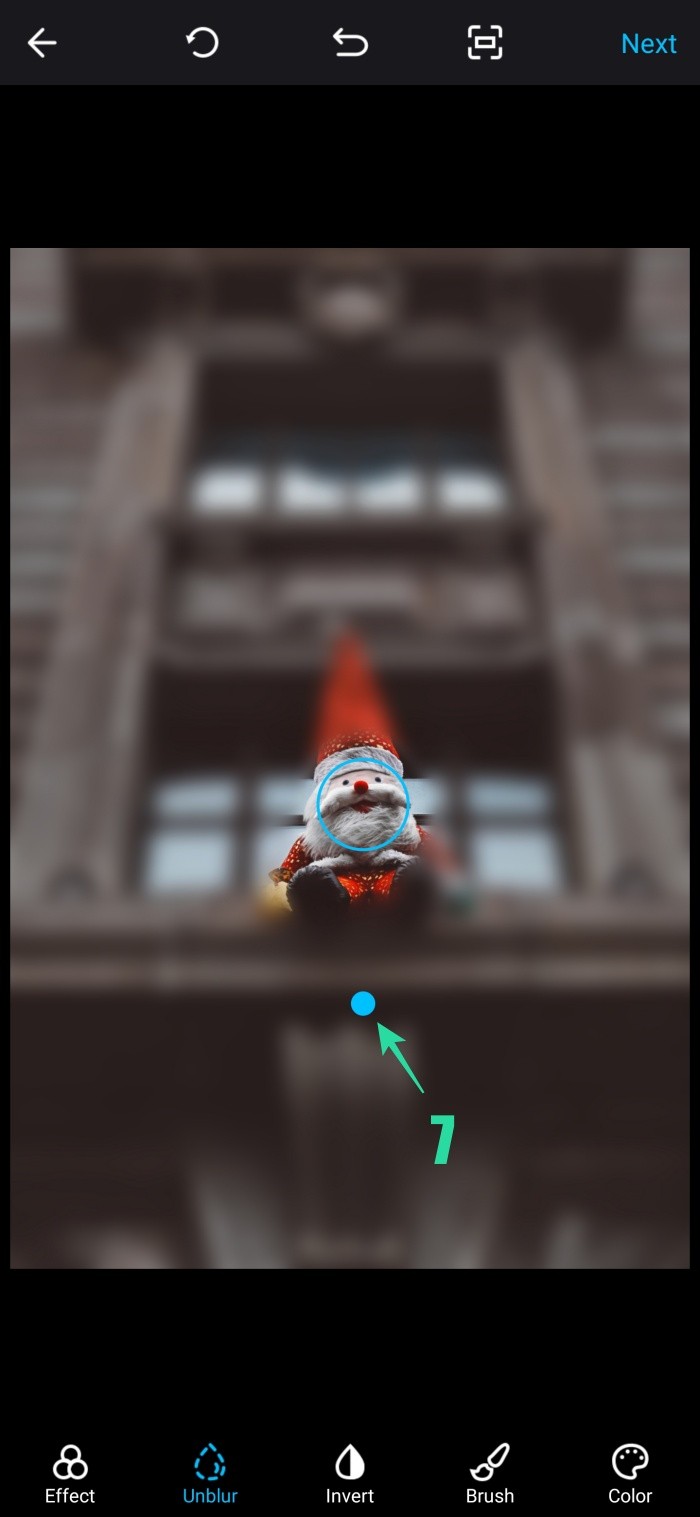
- Now, drag your finger to remove blur from the subject you do not want to be blurred while leaving everything else blurred.
- That’s it! Tap the Next to save the image and share it easily.
How to select and blur a portion of an image using the mosaic tool
- Download and install the iMarkup app from the Play Store and open it.
- Tap anywhere in the center to select a format.
- Tap on Photo and then tap on All Media at the top left.
- Scroll to select the respective folder and tap on it.
- Tap on the photo you wish to blur.
- Tap on Mosaic to open the edit tools.
- Now, tap and swipe on the screen to blur a portion.
- Tap inside the selected area and move it to the respective position. You can also change the resolution of the selected area by tapping on the Dot at the right bottom of the selection square.
- Tap on the Tint ([icon name=”tint” class=”” unprefixed_class=””]) icon and move the slider from 1 to 5 for changing the strength of the blurred portion.
- Tap on the Effects icon and select any one of the effects available.
- Tap on the Eraser to delete the blur effect from an unwanted portion of the image.
- You can also add a blur effect manually to an area by tapping on the Hand ([icon name=”hand-o-up” class=”” unprefixed_class=””]) icon.
- You can also undo ([icon name=”reply” class=”” unprefixed_class=””]) or redo ([icon name=”share” class=”” unprefixed_class=””]) an effect.
- Tap on the Tick ([icon name=”check” class=”” unprefixed_class=””]) after editing the photo.
- Tap on the Export icon and select the size, quality, and format of the image before saving the image.
- Click OK when done. You can preview the image by clicking on the edited photo.
- Select any of the social media icons if you wish to share the image directly or tap on the Home ([icon name=”home” class=”” unprefixed_class=””]) button to return to the main screen for editing another photo.


RELATED:
- How to use PicsArt photo editor app like a pro
- Best photo editing apps on Android
- How to create a square pic with blurred background on Android
- How to crop a photo in Google Photos app
- How to use Snapseed photo editor app by Google


