Those of you who were born in and around the early 90s will remember those music videos back in the days that had distorted-like effects to make it look like the camera malfunctioned at the time. This was the time when the music industry started evolving and adapted to then-experimental genres like electronic, house, and noise.
While creating intentional glitches in videos used to be a complex procedure a decade or two ago, the last few years have seen the rise of video editing apps for use on mobile phones and making a video with glitch effects is easier than ever. In this article, we’re going to guide you in creating glitch videos on your Android phone with ease.
How to add Glitch video effects on Android
Note: This guide needs you to install a third-party app on your Android smartphone. But we’ve made sure the recommended app offers the most functionality compared to others on Google Play.
Why did we choose Video Editor – Glitch Video Effects?


While the app itself is extensively flexible for day-to-day video editing, there has been one prominent reason why we selected the Video Editor – Glitch Video Effects app for creating glitch effects on videos. And the reason is that the app was awarded the Play Users’ Choice App of 2019 when Google announced the Google Play Best of 2019 awards for apps on Android. The app has over 10 million downloads on Google Play with an overall rating of 4.6 stars out of 5 from 73.7k users, at the time of writing this.
Another thing going on for this app is that it allows you to perform the same customizations when editing pre-recorded videos as it does for when recording a video using the built-in camera. Other than that, Glitch Video Editor has over 100 filters and effects that can be applied in real-time. The app lets you change the aspect ratio of videos for sharing across various platforms and you can import audio from your phone’s storage to add it to a video.
How to create videos with Glitch effects
Step 1: Download and install the Video Editor – Glitch Video Effects app from Google Play.
Step 2: Tap on Record.

Glitch Video Effects will now ask you to allow permissions for using the app.
- Alternatively, you can tap on Edit to add a pre-recorded video that you wish to edit with glitch effects. From here, once you have selected a video, you can head over straight to Step 7.

Step 3: Allow all three permissions for the app: Camera, Storage, and Microphone.


You will now be taken to the camera interface of Glitch Video Effects.
Step 4: Edit other settings before shooting a glitch video.
- Adding filters: Tap on the RGB (red-blue-green) icon at the top right to add filters when shooting real-time.
- Switching cameras: Tap on the circle arrow icon to switch from back camera to front camera and vice versa.
- Turning ON flash: By tapping on the lightning icon you can switch ON flash before recording a video.


Step 5: Slide over to the glitch effect you like best for the video you’re about to record.


Step 6: Press and hold on the circle at the bottom to start recording a video.

The video will be recorded during the time you kept the record button pressed. After the video has been recorded, you will be taken to a new screen to edit the recorded content.
Step 7: Select from the following edits before moving on the final editing page:
- Trim: Tap and hold the left and right purple arrows to cut parts of the beginning and end of the recorded video.
- Ratio: You can change the aspect ratio of the recorded video from several preset ratios – 1:1, 9:16, 16:9, 4:5, 5:4, 4:3, 3:4, 2:3, 3:2, 1:2, Story (for Instagram, Facebook, and Snapchat), Facebook Post, and YouTube Cover. If you wish to see the default aspect ratio intact, select Original from the options.
- Background: After you’re done cropping and resizing the video, you can choose to change the background of the frame by selecting from different options available.
- Blur: This will add a blurred background around the video in such a way that the space around them will be filled with blurred portions of the video. You can choose from over five different options for blurred backgrounds.
- Color: If you wish to set a background for a recorded video but do not want it to have blurred spaces around it, you can choose from various preset colors as a background for the edited video. You can set one colored background from around 50 colors available for choosing.
- Gradient: Besides blurred and colored backgrounds, you can opt to spice things up by adding colorful preset gradients to the back of the recorded videos. Glitch Video Effects offers a selection of a few dark-colored gradients and a handful of bright gradients to apply as a background.
- Blur: This will add a blurred background around the video in such a way that the space around them will be filled with blurred portions of the video. You can choose from over five different options for blurred backgrounds.
- Speed: Recorded videos can be sped up or slowed down in this section. The slider on the screen lets you select a video speed between 0.5x and 2.0x, even after recording a video.
- Rotate: Tap on the Rotate button at the bottom right to rotate the video once in the clockwise direction.


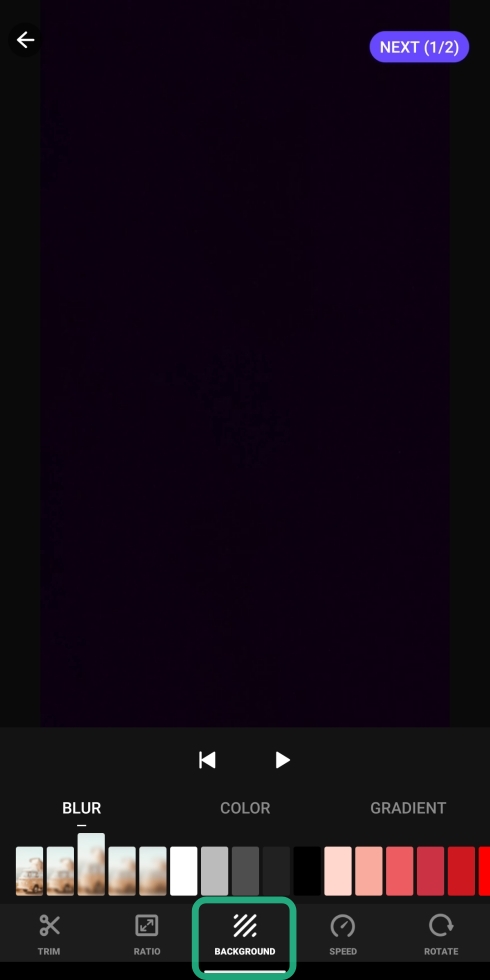


Step 8: After completing the editing in the current page, tap on Next (1/2) at the top right.

Step 9: Apply finishing touches to the video by modifying the following edits:
- Glitch: While you might have already added a glitch effect to your recorded video, you can add another later of glitch effects on top of it.
- Single glitch effect: You can add a single glitch effect to the video by pressing and holding the preferred effect until the slider reaches the end of the video.
- Multiple glitch effect: You can tap and hold a glitch effect for portions of the video. Hold on an effect first and then select and hold another effect to apply it for the next portion. This way you can add multiple glitch effects on your video easily.
- Filter: You can add permanent overlays to the video using the preset options available under this section.
- Music: Besides the glitch effect, you can add songs to your video selecting from the options down below.
- Select an already available music track: You can select from the tracks available on the app to add them to your video.
- Import an audio file: By tapping on Import, you can select a song from your own library or local storage to add it to the recorded video.
- Control original volume: Slide through the purple-colored bar to adjust the sound output from the original video.
- Select an already available music track: You can select from the tracks available on the app to add them to your video.
- Text: Tapping on the Text tile will take you to a new window where you can add a text on top of the recorded video. Tap on the purple T+ button at the bottom to add text to a video. After that’s done, hit the tick mark to save the text edit.


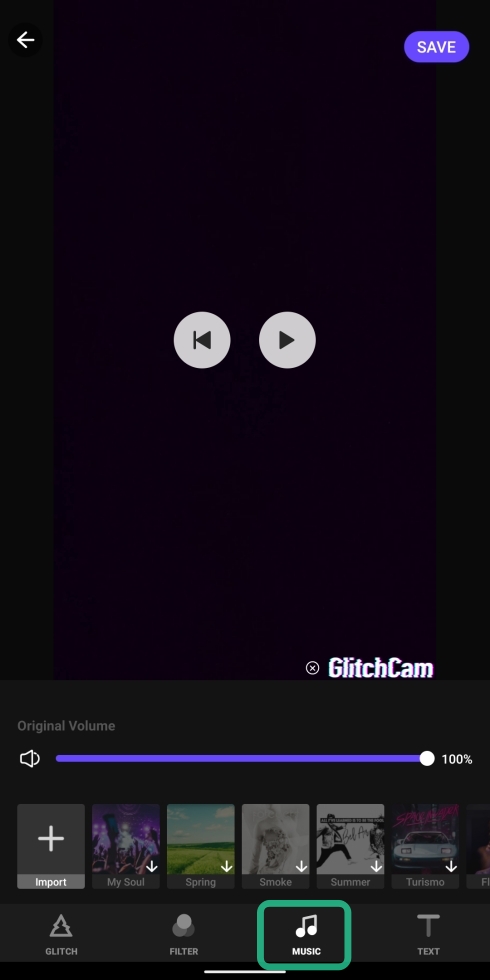


Step 10: Tap on the Save button at the top right.

Your edited video is now saved on your internal memory. You can share the video with other platforms by tapping on the relevant tile available under Share to section.

Do you often make glitch art videos on your phone? If so, which app do you use to do that? Let us know in the comments down below.