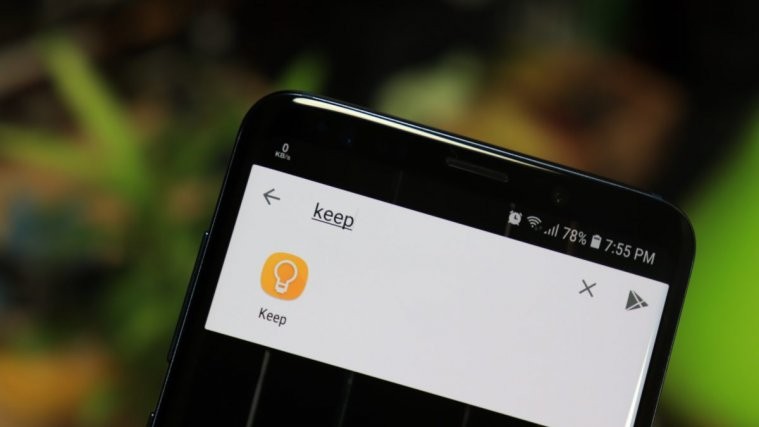
Before the glorious era of smartphones came along, people used to carry around notepads and pens to write things down like cavemen. In the golden age of smartphones that are capable of doing more than us humble humans can, the art of notetaking has been completely taken over by apps, and Google Keep sits at the top.
While there are dozens of other notetaking apps for Android, the seamless integration of Google Keep, support across all platforms, and its barebone simplicity are what make it so good. But these are all the things you’re already aware of, but do you really know everything that Google Keep is really capable of? Here are our two cents on the coolest Google Keep features that exist right now, but you might be completely oblivious to them.
Never forget a thing
Those of you who have already embraced Google Assistant might be familiar with the fact that you can use it to set reminders of all sorts. But more importantly, the Reminder feature comes built into the Google Keep app as well, so you never lose the track of anything, whether it is based on location or by time.
Once you’ve created a note that you’d like to be reminded about, press the Reminder icon on the top-right corner of the screen. Using the Add reminder window, you can set the date, time, and the place for which you want to set the reminder for. Since you can add images, checklists, and so much more to notes, it offers more interactive reminders.
Set a recurring reminder
Setting a reminder is neat, but it’s even neater to make them recurring. Yes, it’s possible to set recurring reminders with Google Keep, and it’s a lot easier than you might think. Irrespective of whether you have a medication you need to take every week or a chore you can’t seem to remember, Google Keep most likely has the solution for you.
To create a recurring reminder, tap on the reminder button at the top, right after jotting down the note. Now, tap on the ‘Does not repeat’ dropdown menu.
Here, you’ll find some presets, such as ‘Does not repeat,’ ‘Daily,’ ‘Weekly,’ ‘Monthly,’ ‘Yearly’ and ‘Custom.’ By picking the ‘Custom’ option, you can set the repetition of the reminder and even up to a particular date.
Search every nook and corner
Google Keep’s rebranded look makes it super easy to search your notes. When you have spent years and years accumulating a large pile of digital notes, a bit of assistance certainly comes in handy. Not only does Google Keep allow you to sort your notes by ‘Reminders,’ ‘Lists,’ and ‘URLs’ but it also allows you to sort them by ‘Things’ — Food, Music, Groceries — and colors.
To access the pleasantly wide variety of search options, tap on the search bar, pick your sorting tool, and tap on it. That’s it! Your Keep library would be sorted right away.
Pin your notes
If you’re an intensive Google Keep user, you might already have a gazillion of notes buzzing around. Most of them might have even fulfilled their fate and are now only making it difficult for other notes to catch your attention. So, to give your special or recurring notes the attention they deserve, consider pinning them to the top. That way, these notes will have their own little section and won’t get lost in the sea of other, not-so-useful notes.
To pin a note, press and hold it and tap on the pin icon at the top of your screen.
The notes will then appear at the top, under the ‘Pinned’ banner.
Hashtag your ideas
When you’re jotting down your thoughts on Google Notes, it’s pretty important to be organized. Failing to do so would lead to a pile of potentially excellent ideas and no follow up or execution. Thankfully, Google Keep allows for excellent ways to organize your ideas, all using simple hashtags or ‘Labels.’
If you wish to add a label to the note you’re currently working on, all you have to do is add a “#” follow that by the label name, and tap on ‘Create Label.’
Alternatively, you could tap on the vertical ellipsis button at the bottom right and hit ‘Create Label’ to create one manually. Now, to access the labels or topics you created, tap on the hamburger menu at the top-left of the main Keep page. You’ll see all the labels you created right on the left-hand panel.
Recover accidentally deleted notes
When you’re dealing with hundreds of notes on a daily, it’s not uncommon to delete some of the important ones, accidentally. And if you’re a forgetful person like we are, you could spend a considerable amount of time looking for the deleted item. Thankfully, Google Keep keeps track of the items you have deleted over the last 7 days and allows you to fetch them.
To find your deleted notes, all you have to do is tap on the hamburger menu at the top-left corner, and go to the ‘Deleted’ tab.
You’ll find the recently deleted notes, one by one. Tap on one of the previously deleted notes to open. Now, hit the vertical ellipsis button at the bottom right corner and hit ‘Restore.’
Turn on dark mode
After the release of Android 10, Dark mode seems to have become a necessity for us all. Almost every app out there supports Dark mode in one form or another and Google Keep is certainly not an exception.
To turn on Dark mode in Google Keep, first, launch the app and tap on the hamburger button at the top-left corner of the landing page. Now, go to ‘Settings’ and tap on ‘Theme.’
Finally, either pick ‘Dark’ or ‘System default’ if you’re already using the system-wide Dark mode.
Change reminder defaults
If you’ve ever set a reminder in Google Keep, you’ll know that there are a few basic preset time options there. These options come in handy when you’re in a hurry and don’t want to spend time picking it from scratch. The defaults are ‘Morning’ at 08:00 hrs, ‘Afternoon’ at 13:00, and ‘Evening’ at 18:00. If the time slots do not work for you, you could change them as you see fit.
To change the presets, first, launch the Google Keep app, tap on the hamburger menu at the top-left corner, and go to ‘Settings.’
Now, under the ‘Reminder Defaults’ text banner, tap on ‘Morning, ‘Afternoon,’ or ‘Evening’ to change the time.
Family shopping list goes digital
Why do you need a post-it note on the fridge to remind you of getting eggs when Google Keep can create a to-do list for you? But that’s just the surface of what this notetaking app is really capable of, especially when you bring in the ability to share your shopping list with other members of the household.
After creating your shopping list with Google Keep, press the menu button and select Collaborators from the menu window. You can then enter multiple email address of the people you’d like to share the list with, and they can add, remove, and even cross off items on the list from their Google Keep app. Needless to say, this can be done for all kinds of notes that you create with the app.
Related: Google Assistant Tips and Tricks
Your personal stenographer
Isn’t it a dream of so many of us to have a personal assistant running around taking down hand-written notes of the things we speak? To an extent, Google Keep does help you do this by acting as your very own stenographer, putting Google’s speech-to-text algorithm to good use. Unlike most notetaking apps that just give you the ability record voice notes, Google Keep turns it into readable text in real-time.
From the main screen of the Google Keep app, press the microphone icon at the bottom-right corner of the screen. The voice detection engine from Google will pop up, at which point you can begin to narrate the things you want Google Keep to write down for you. The speech will automatically be converted into typewritten text, along with a tiny voice note bar at the bottom of it.
Grab text from an image
At this point, you’d feel that everything cool there is about Google Keep has already been covered, but wait until you try out this golden nugget. While you may already know that Google Keep allows you to add multimedia files such as images to the notes, were you aware that the app also comes with the ability to grab text from images right away?
While the technology behind optical character recognition (OCR) is being actively developed by Google, one of the best mainstream uses it offers is with Google Keep. Press the image icon on the bottom-right corner of the screen and choose to Take photo or Choose image. Once you’ve added the image, press the three-dot menu icon and select Grab image text and the app will bring all of the written content in the image as typewritten text right in front of you with impressive accuracy.
Turn notes into documents
The simplified user interface of Google Keep is more than cozy enough to make anyone fall in love with it. Thanks to its media integration, you can even write entire essays on it without ever feeling the need to boot up your computer. However, you can’t really send out your English essay or an important email from Google Keep.
This is why the app comes with seamless integration with another work apps from the same creator – Google Docs. Press and hold a specific note on the Google Keep main screen to convert it into a Google Docs file (Word document) and press the three-dot menu button on the top-right corner. From the drop-down menu, select Copy to Google Docs, and the note will automatically be converted into a document file and ready for viewing right away.
Related: 10 Google Apps you’ve probably never heard of
Doodle it away
Typing can do a real number on your fingers, and why go running your fingers around when you can simply doodle things up? Especially useful on devices like the Galaxy Note 8, Google Keep comes with the ability to create a drawing note from scratch using the main screen, or even add doodled notes to existing ones.
Press the pen icon on the bottom-right corner of the screen to bring up the canvas, where you’re free to use a pen, a marker, or a highlighter. What makes this part of the app unique is the fact that you can grab your created doodles, move them around, and even maximize/minimize them. Once again, the Grab image text feature is made available, which can convert your doodles into typewritten text effortlessly.
Be super organized
The whole point of notetaking ever since it was invented, was to help you become even more productive and keep things organized. Google Keep does come with a casual user interface, but there are multiple ways you can have your precious notes organized – through color-coding and labels as well.
To begin organizing your Google Keep notes, open the specific note and press the three-dot menu button to select from the available colors. You can also press and hold down on a note and choose the Canvas icon from the top to select a color directly. Secondly, press the Labels button and choose from the available labels, or add a new one. Similarly, you can do this from the home screen by pressing and holding down a note and selecting the Label icon.
Be honest, which one of these Google Keep hidden secrets did you have no clue about, or are you a know-it-all? We’re waiting to hear back from you in the comments section right down below.


