
Update [March 04, 2019]: T-Mobile has released the Android Pie update topped with One UI custom skin for its Galaxy Note 9 units. The update arrives as software version CSB3, and is already available for download below. Look for the software version N960USQU1CSB3 below for download links.
Update [February 11, 2019]: We have now added the link to the firmware file for Android Pie update for the Note 9 handsets in the US. The update is identified as software version CSAA, with the file version being N960USQU1CSAA.
Update [January 14, 2019]: Firmware file for the Android Pie update for Galaxy Note 9 is now available, but only for the N960F model. So, the installation guides for the N960F and N960U models is now different. The CSA2 update is now available for download, BTW.
Check the downloads section below to download the CSA2 firmware file now, and install it on your Note 9 model N960F using the guide given for the stable update below.
Update [January 12, 2019]: We have added new builds for both the stable and beta ROMs. For N960F, we have added a new update CSA2 that can be installed over the CRLT build. Second, for the N960U/U1/W, we have added CSA7 and CSA6, both of which are to be installed ARJA build.
Installing ARJA requires special Odin software (also available for download below) and will result in factory reset when installed. So, be sure to create required backups already before you installing Oreo ARJA build, and then Android Pie CSA3 build.
Update [January 04, 2019]: Stable version of the Galaxy Note 9 Android Pie update is now available. The official update for the public arrives as software version N960FXXU2CRLT. OTA update CRLT can be download and installed manually using the guide below, though, so if you do not have the patience to wait for Samsung to push the update to your device, you can install it manually on your own now.
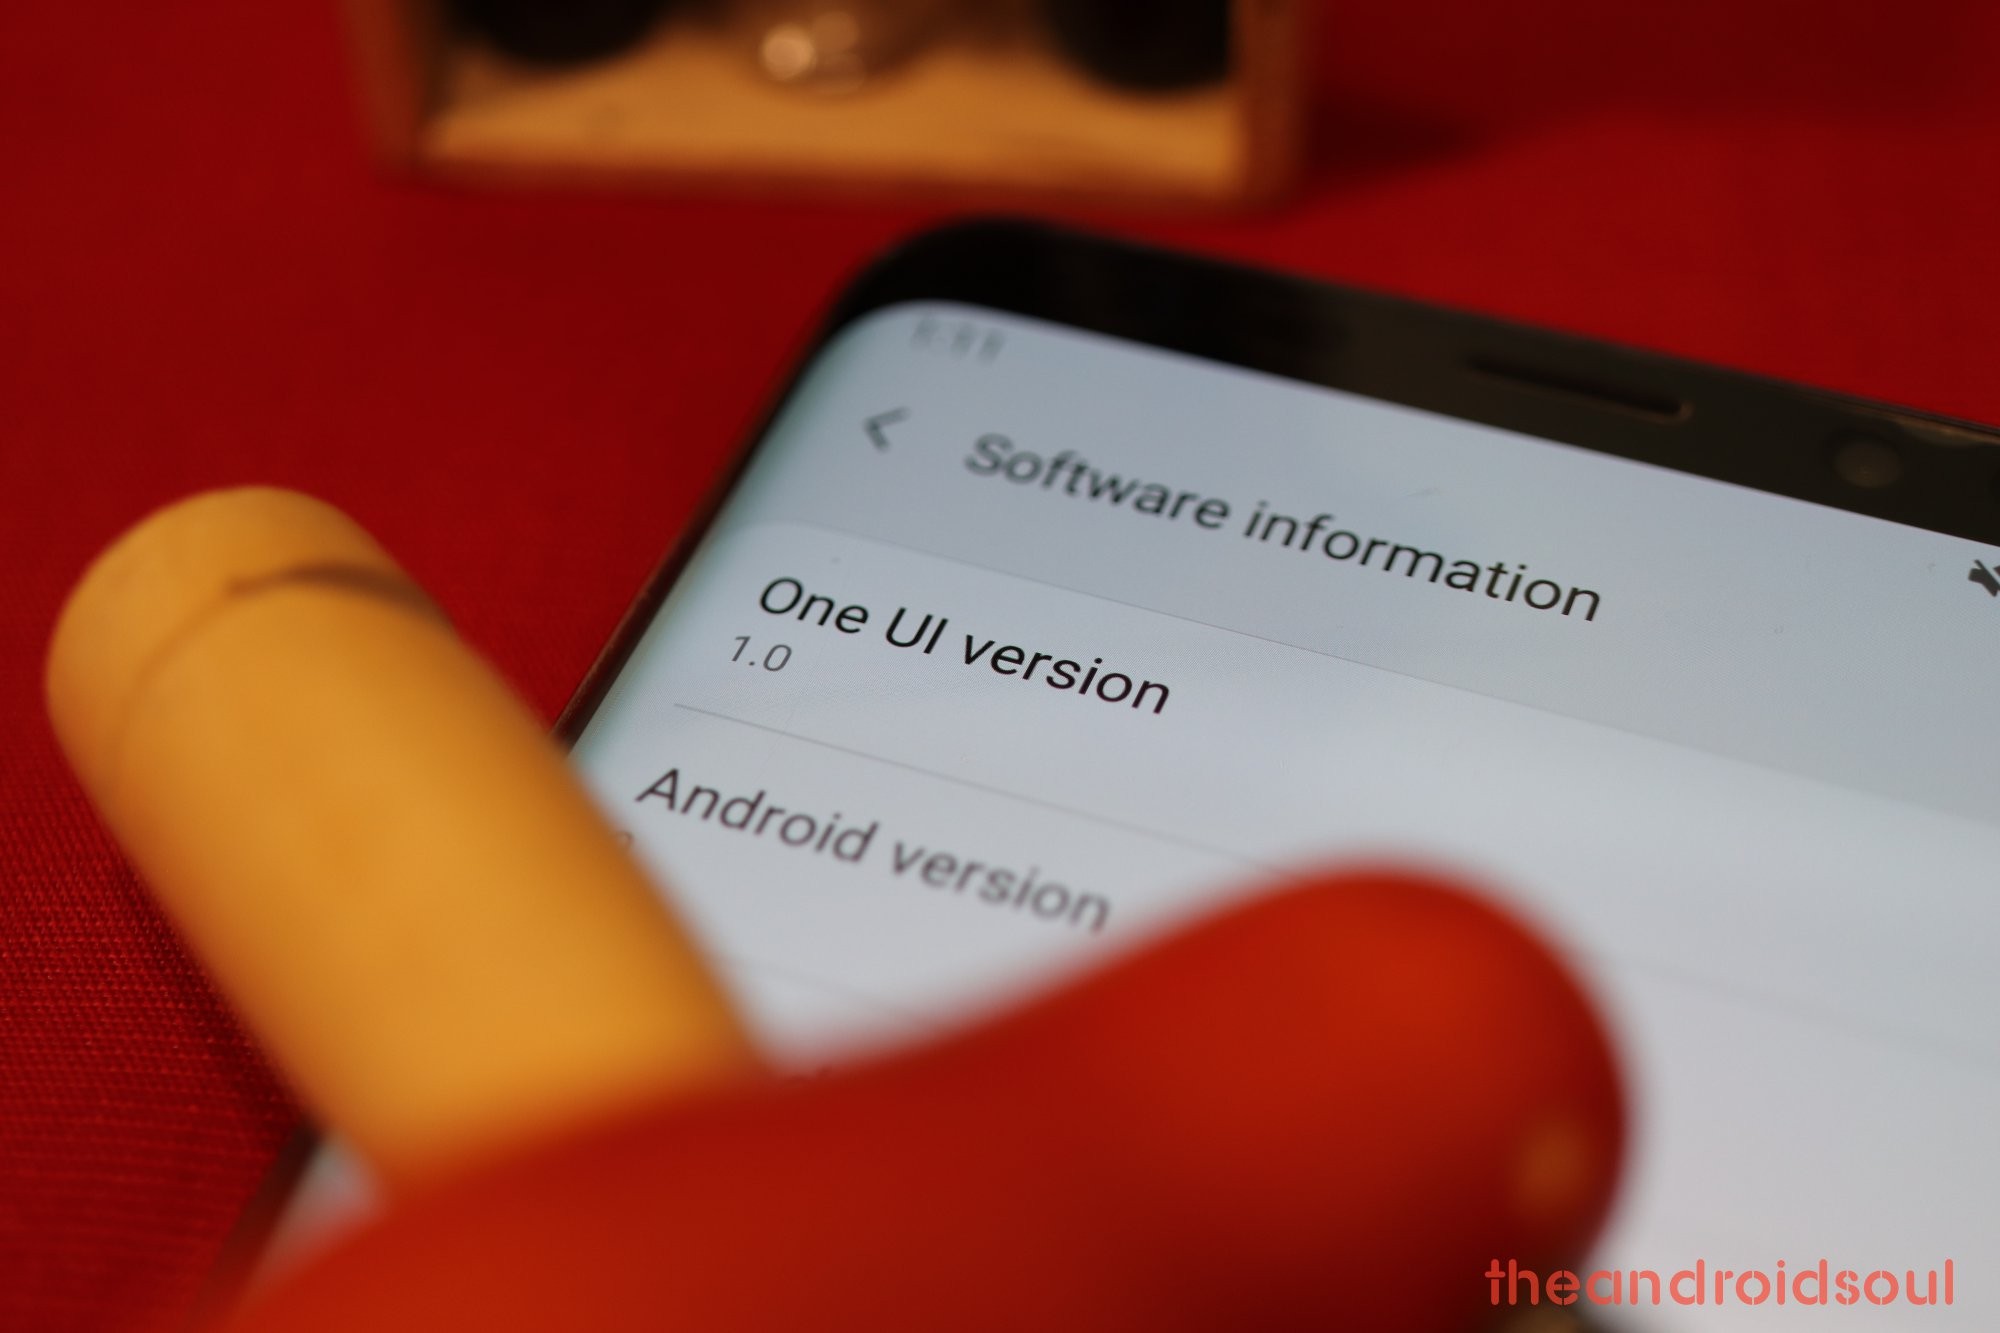
Samsung’s One UI is the hottest thing right now when it comes to the software side of the Samsung phones. Because, well, if you talk hardware, things are admittedly even far exciting as you have the revamped Galaxy S10 in the works, and the mind-boggling Galaxy Flex foldable phone that may be priced so steeply you will start to appreciate the $1000 costing Galaxy Note 9.
While the Galaxy Note 9 will definitely receive the Android Pie update directly from Samsung a bit later, the good thing is, you can not install it manually on your device, if you have the model no. SM-N960U with you.
Related:
- When will Galaxy Note 9 receive Android Pie update with One UI
- Samsung Galaxy Note 9: All you need to know
Warning!
Do not try anything given on this page if you do not completely know what you are doing. In case any damage occurs, we won’t be held responsible.
Compatibility
This guide is compatible only with Galaxy Note 9 smartphone from Samsung. Do not try this on any other device from Samsung or any other OEM as you might end up damaging your device and permanently brick it.
Make appropriate backup all your important data, music and video files, and everything else as there are chances your devices will be wiped while doing this.
Downloads
- Global model, SM-N960F:
- Stable update firmware – version CSA2 (Released on January 11, 2019)
- See the guide for installing the stable update below for this.
- Works with N960F and N960FD models for all countries and carriers
- US model, SM-N960U:
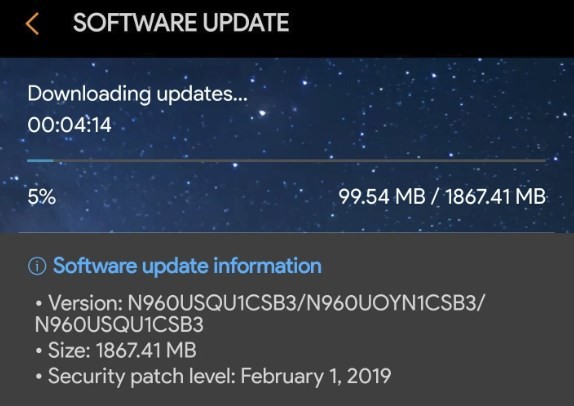
- Stable update firmware – version CSB3 (Released on March 04, 2019)
- Old version – CSAA (Released on February 01, 2019, CSB3 build is preferred over this one)
- See the guide for installing the stable update below for this.
- CSB3 is T-Mobile one, while CSAA is an AT&T firmware primarily, but they work on all Note 9 sets in the US with model no. SM-N960U (may not work on U1 models)
- Stable update firmware – version CSB3 (Released on March 04, 2019)
Related: Galaxy Note 9 firmware download (Android Pie file added)
How to install Android 9 Pie with One UI on your Galaxy Note 9
Step 1. Download the firmware file of stable Android Pie update from the downloads section above. Make sure you have downloaded the correct firmware file on your PC.
Step 2. Install Samsung USB driver (method 1 on the linked page) first of all. Double-click the .exe file of drivers to begin the installation. (Not required if you have already done this.)
Step 3. Also, download Odin PC software (latest version).
Step 4. Extract the firmware file now. You can use free software like 7-zip for this. Install 7-zip, then right click on firmware file and under 7-zip, select ‘Extract here’. You should get files in .tar.md5 format now. (You may a bunch of files, and you will find text like AP, BL, CP or CSC etc. written at the beginning of those files.) We will be loading this file into Odin, to be installed on the device.
Step 5. Extract the Odin file. You should get the Odin exe file (other files could be hidden, hence not visible).
Step 6. Disconnect your Galaxy Note 9 from PC if it is connected.
Step 7. Boot your Galaxy Note 9 into download mode:
- Power off your device. Wait for 6-7 seconds after the screen goes off.
- Press and hold the three buttons Volume down + Bixby + Power together until you see the Warning screen.
- Press Volume Up to continue to download mode.
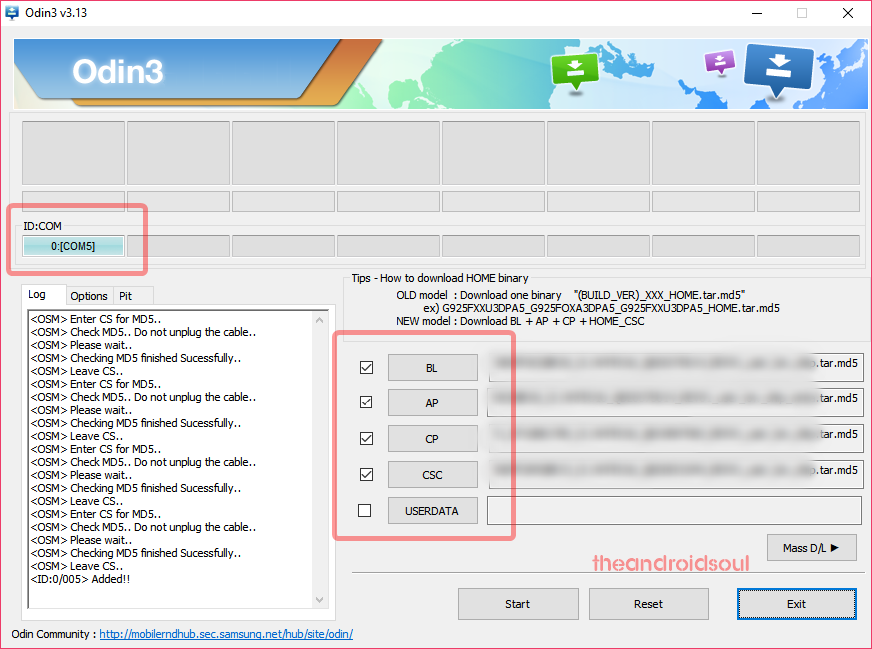
Step 8. Double click on Odin .exe file (from step 5) to open the Odin window as shown below. Be careful with Odin, and do just as said to prevent problems.

Step 9. Connect your device now using the USB cable. Odin should recognize your device. It’s a must. When it recognizes, you will see Added!! message appearing in the Log box in the bottom left, and the first box under ID:COM will also show a no. and turn its background blue. Look at the pic below.

- You cannot proceed until you get the Added!! message, which confirms that Odin has recognized your device.
- If you don’t get Added!! message, you need to install/re-install drivers again and use the original cable that came with the device. Mostly, drivers are the problem (look at step 2 above).
- You can try different USB ports on your PC too.
Step 10. Load the firmware files into Odin. Click the AP button on Odin and the select the .tar.md5 file from above. See the screenshot below to find how the Odin window will look like after you have loaded the files.
- Click on BL tab, and select the file beginning with BL text.
- Click on AP tab, and select the file beginning with AP text.
- Click on CP tab, and select the file beginning with CP text.
- [Different!] Click on CSC tab, and select the file beginning with HOME_CSC text. If HOME_CSC file isn’t available, then select the file beginning with CSC text.
About CSC file: Using the HOME_CSC file won’t reset your device, and data on the phone shouldn’t be deleted. However, when we select a regular CSC file, and it results in CSC on the device being different than that in the CSC file, your phone will be formatted automatically. You can even choose to ignore loading the CSC file, that may do alright too. But if it doesn’t work out, repeat the whole process and select CSC file this time around.
- Info: When you load files, Odin checks the md5 sum of firmware file, which takes time. So, simply wait until that’s done and the firmware file is loaded. Don’t worry if Odin gets unresponsive for a while, it’s normal. Binary size will also show up in Odin.
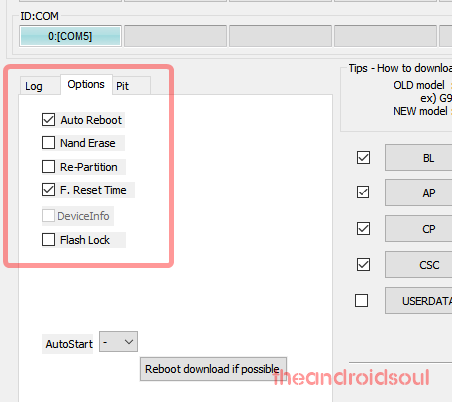
Step 11. Click on Options tab, and make sure Re-partition checkbox is NOT selected. Don’t use the PIT tab, ever.
Go back to the Log tab now, as it will show the progress of the firmware installation when you hit the start button in the next step.
Step 12. Verify that everything is okay as mentioned above. When satisfied, click the Start button on Odin now to start flashing the firmware on your device.
Wait till installation is finished, after which your device will reboot automatically. You’ll get PASS message as shown below upon successful installation from Odin.

Some errors you may run into, and with respective solution.
- If Odin gets stuck at setup connection, then you need to do this all again. Disconnect your device, close Odin, boot device into download mode again, open Odin, and then select the file and flash it again as said above.
- If you get FAIL in the top left box, then also you need to flash the file again as stated just above.
Done!
Do let us know if you need any help regarding installation of Android Pie update on your Galaxy Note 9.


Is there any more updates to this beta after the release of CRKE? If so, where can I find a download of it?
How do you go from CRKE to the next android pie beta
Just seeing when we will get the next beta to update. Really would like to see it show up soon
Please help. I have the note 9 N960u, and I do not see the oem option, can I still install the beta? Or is it going to give me some fatal error?
How can I convert the Note 9 N960U to the N960F via firmware?
While the Galaxy Note 9 will definitely receive the Android Pie update directly from Samsung a bit later, the good thing is, you can not install it manually on your device, if you have the model no. SM-N960U with you.
Is CSA3 an official beta release or a leak? I thought all official Betas began with Z?
Will I get official updates if I install the stable update on my N960F?
Is there any possibility to update without a PC (ODIN) or do i still have to wait until i’ll get the update by OTA?
I’ve already downloaded the zip-file to my phone.
Well lads
I have a N960F and odin 3.13.1 fails each and every time trying to install CSA2 (pie)
i have ARL2 baseband installed and build number is M1AJQ.N960FXXS2ARL3 with oem bootloader unlocked and still fails
I have followed the above instructions to the letter
Can anyone shed some information
thanks
Are you going to be putting up the ODIN files for CSAA?
No go on AT&T SM-N960U, unlocked by third-party
keeps failing
Worked like a charm! Thanks again! Just make sure you have the latest version of odin and it should run smooth.
Great guide! One thing I will add to this is if you are installing on an ATT phone, when it gets to the PASS part and reboots you can unplug the phone, I had to tell the boot loader to reboot then it got to the ATT screen and stayed there for about 5 mins (scared me.) Thanks!!!
So in the instructions it says in this section is compatible only with n960f… so doing this with the n960u will not would or will work just the same?
If I install this AT&T firmware on my Verizon US model Note 9, will I still receive the OTA update from Verizon? Also, is anybody else unable to turn on their hotspot after installing this?
I just downloaded the March 4th update, it gave me the AT&T Carrier and my phone is unlocked, is my phone still unlocked because the AT&T carrier came up when i booted my phone…
Where is the installation guide for the SM-N960U? Even though it says “This guide is compatible only with model no. SM-N960U of the Galaxy Note 9.” I don’t see the guide. There is a guide only for SM-N960F…
Hey, I just downloaded the US model, SM-N960U; March 4th Stable update firmware – version CSA2 on my Unlocked Samsung Note9, after updating the update, It seems like my Mobile Network is ‘disconnected’ but the update worked, is there any ways to fix this? Like I’m not able to get calls but I get messages.
I used this to update my phone several weeks ago. But now, Verizon is sending out their OTA updates. My husband, who has the exact same phone as me, has already received his update days ago, but I still havent. I’ve manually checked in settings lots of times. Still nothing.