
Our PCs are a part of our private lives and they can be as cluttered or as organized as we want them. Those that want a bit of organization may have to do what’s needed to manage their files beforehand, allowing them to find files easily whenever required and avoiding the buildup of unnecessary junk.
But those that keep their files saved willy-nilly have to put in the same amount of work later (perhaps even more so) when they need to find a single original amongst a heap of duplicates, or get rid of them all to recover lost space and speed things up. That is, unless they’re using applications to automate the process.
So, if your mess has become too much to tolerate and you require an app to find and delete duplicate files for you, here are a few recommendations that you can benefit from.
You can also clean up duplicate files on your PC using native Windows tools like Search, Search Parameters, Command Prompt, etc. — check the link right below for that.
However, sometimes the options available natively may not be enough. For instance, if you don’t know where to look for duplicate files, there’s a high chance that you’re never going to find them.
Fortunately for us all, that is why duplicate file finder applications exist, and what a boon they are! But not all of them are made similar – some have more features, others have a better GUI, and others still have it all, albeit at a price. Here are a few recommendations to help you clean out your PC easily.
6 Best Duplicate Files Finder apps
- Auslogics Duplicate File Finder
- CCleaner
- Easy Duplicate Finder
- Duplicate Files Finder
- SearchMyFiles
- Duplicate Cleaner Free
1. How to use ‘Auslogics Duplicate File Finder’
The Duplicate File Finder by Ausloics is easily our top pick for the purpose. It has a clean GUI and options enough to hunt down duplicate files even in the remote areas of your PC.
Download: Auslogics Duplicate File Finder
Do be cautious while installing the application. The installer will attempt to install other Auslogics programs as well if you’re not careful, so don’t forget to untick the boxes when the screen comes up.
As soon as you launch it, the application will take you straight to the search screen to select the file types that you want to search and the drives in which to search them.
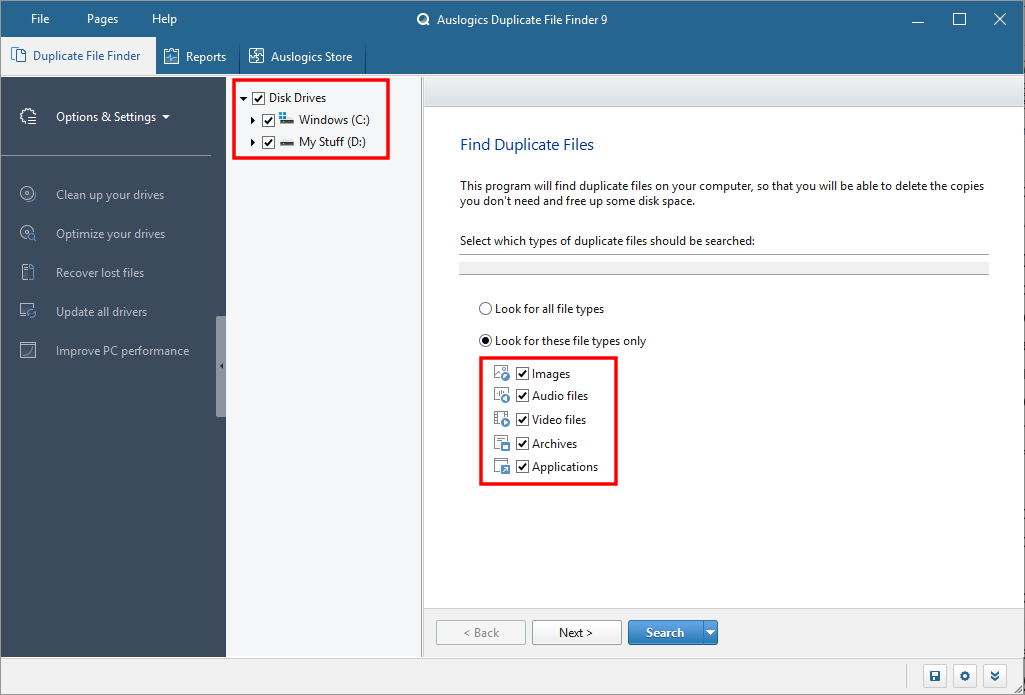
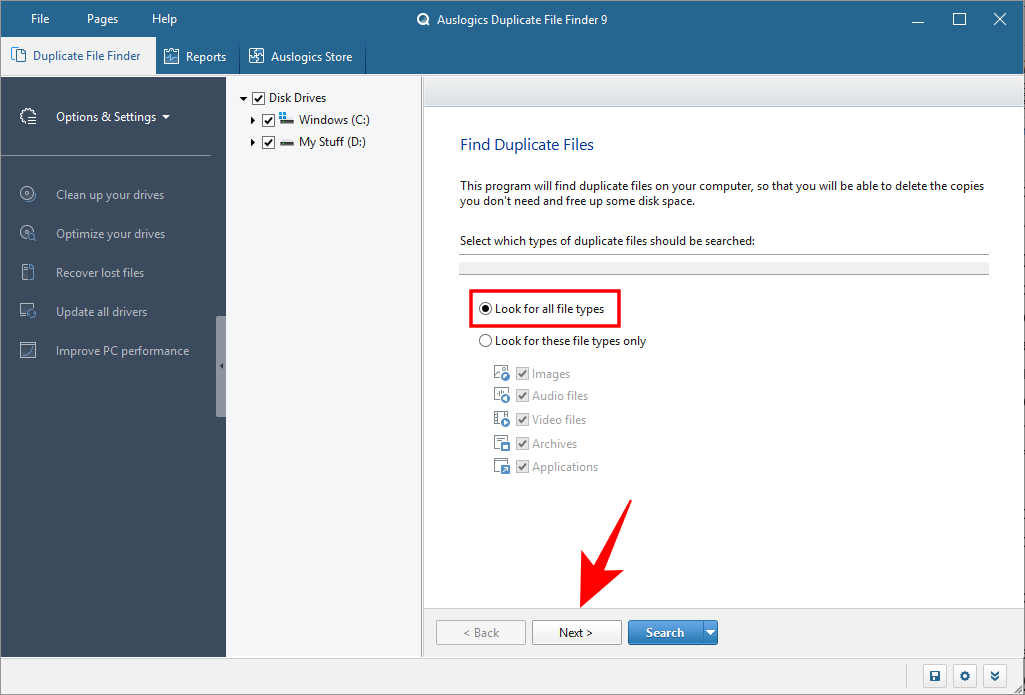
By default, the file types selected are Images, Audio files, Video files, Archives, and Applications. To search for all file types, select the option above it – Look for all file types. Then click Next.
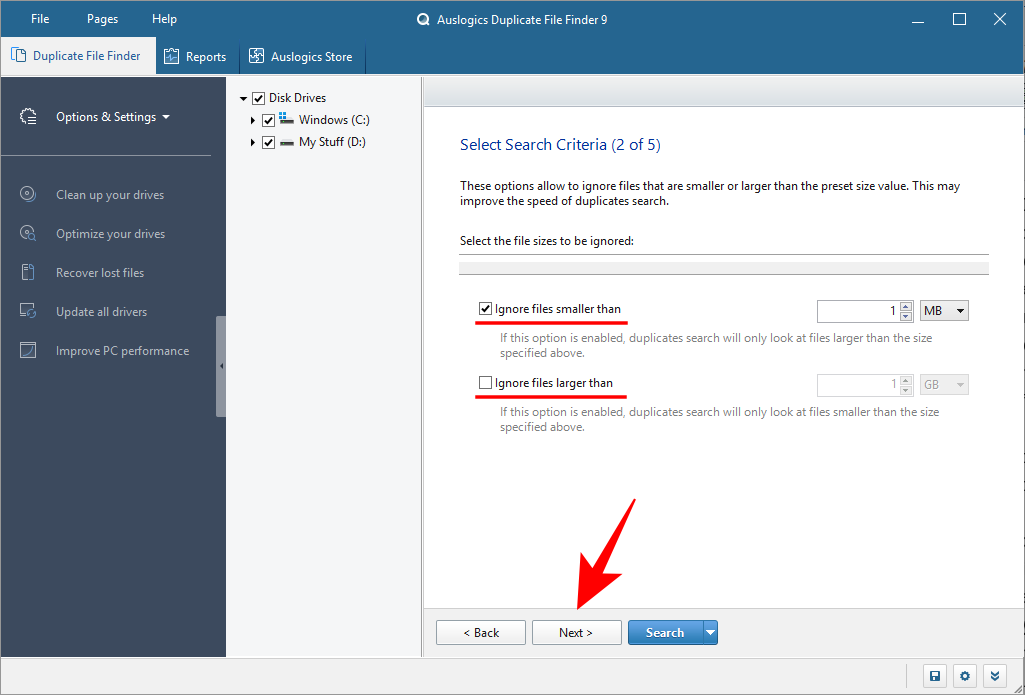
The next screen allows you to select the range of files to search. By default, the search will “Ignore files smaller than 1 MB”. You can change the range as you see fit. Then click Next.
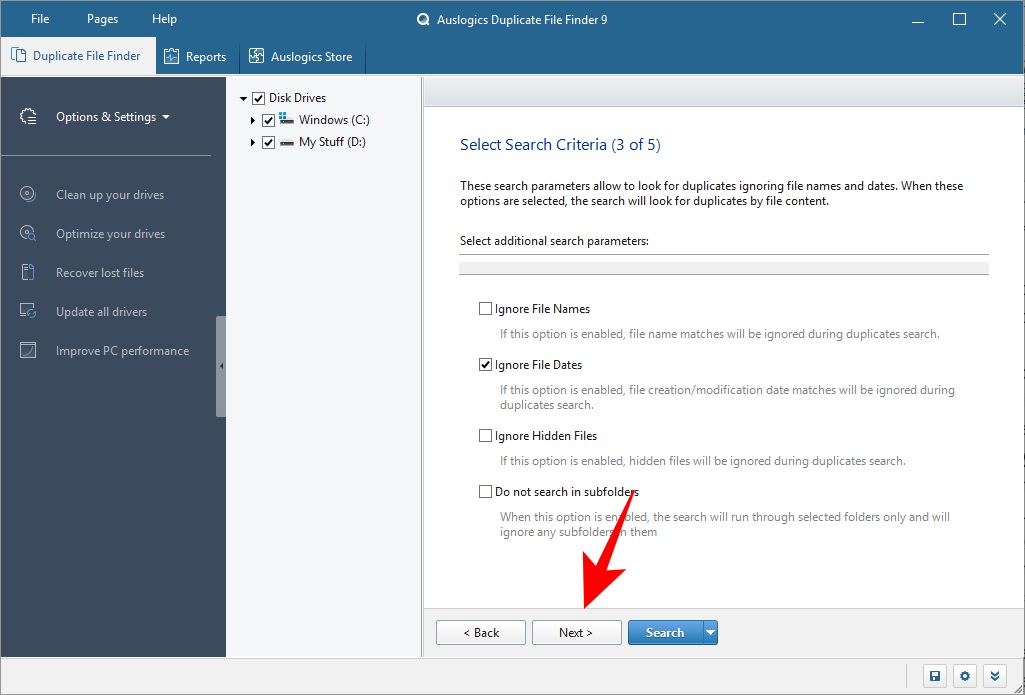
The next screen will allow you to further customize your search, by choosing to ignore File Names, Dates, Hidden files, and subfolders. Click Next to proceed.
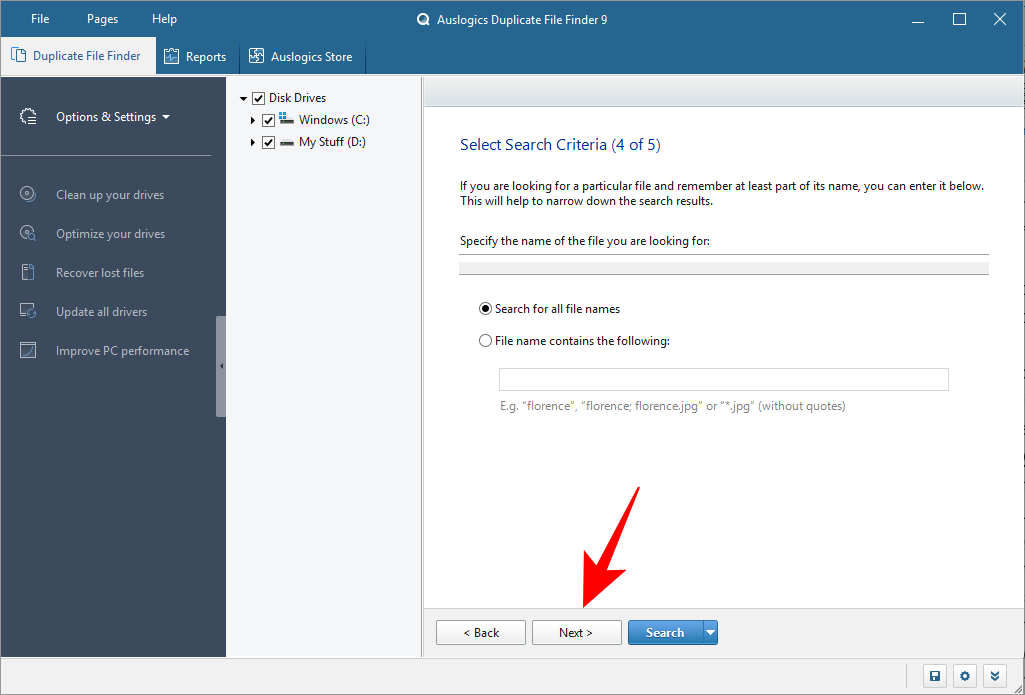
The next screen will let you narrow down your search by looking for files with a particular name or even a fragment of it. We’d recommend searching for all file names (default), and just click Next.
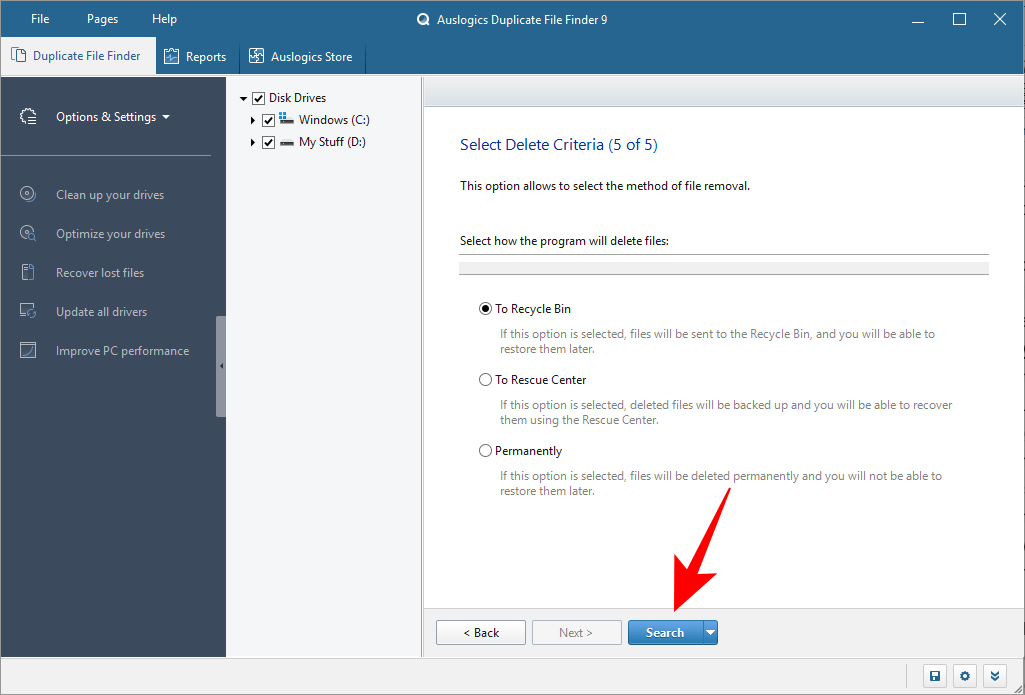
The last screen lets you select how the program will delete files, whether it will put them in the “Recycle Bin”, back up the files, delete them, and allow recovery through the “Rescue Center”, or delete them “Permanently”. Once you’ve gone through the search settings, click on Search.
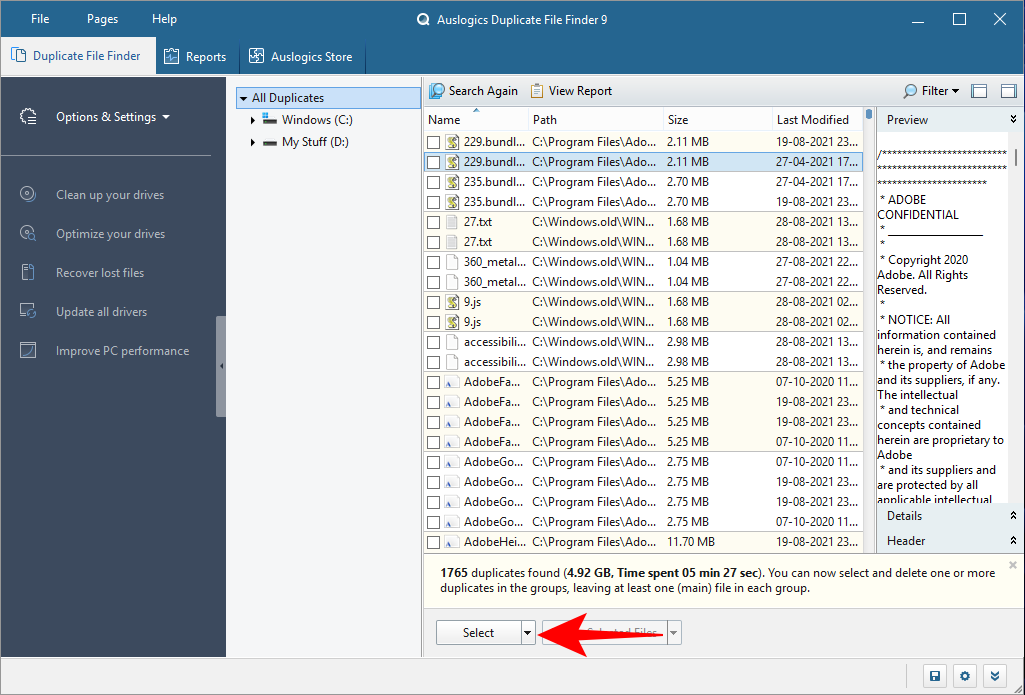
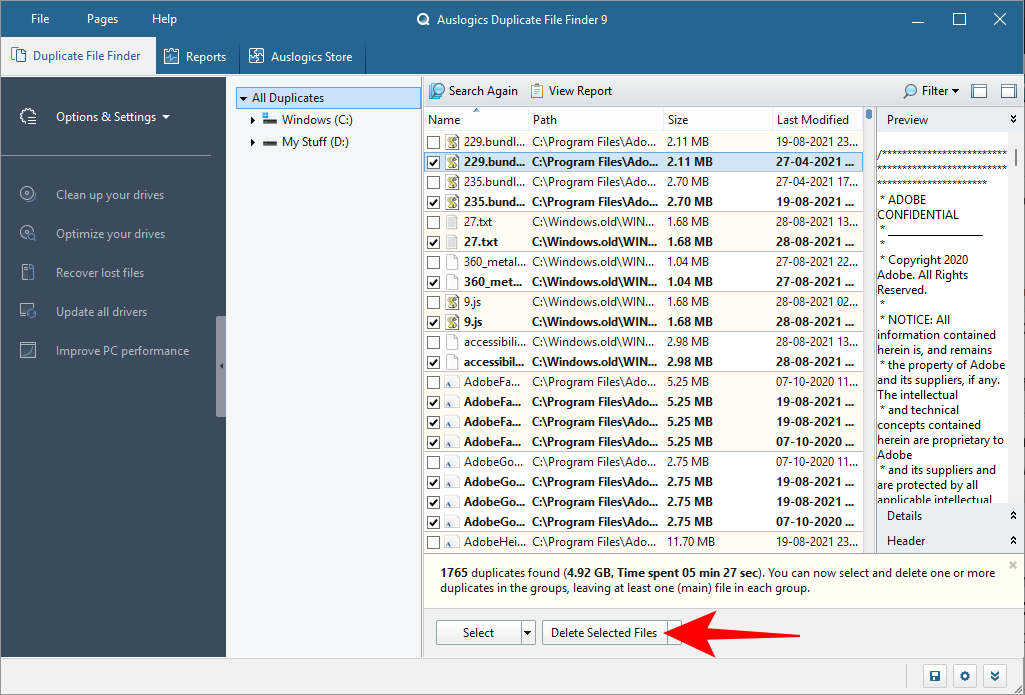
Depending on the number of files on your system and the search settings, this may take some time. Once the search is complete, you’ll find a list of files and their duplicates. To select only the duplicates, click on the arrow next to “Select” at the bottom.
Select an option (“Select All Duplicates in Each Group” is recommended).
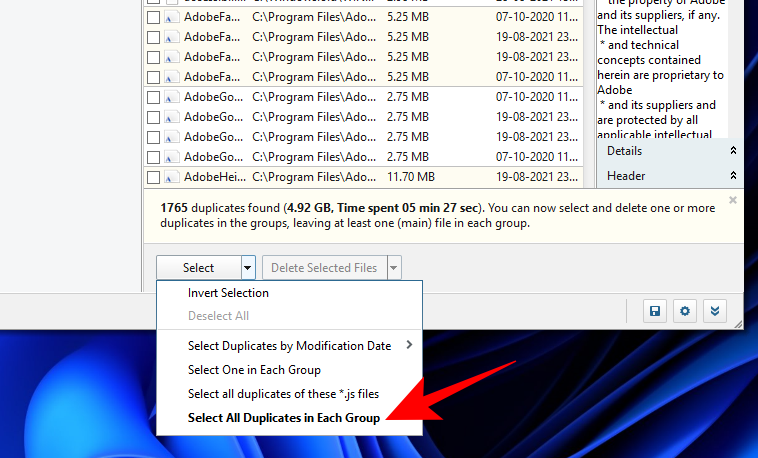
Then click on the arrow next to “Delete Selected Files” and choose how you want to delete them (“To Recycle Bin” is recommended).
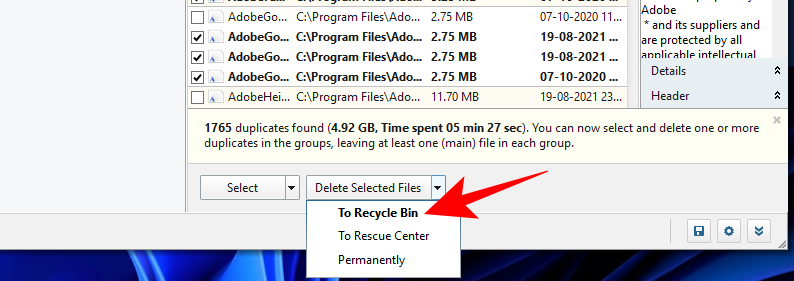
Now go ahead and click on Delete Selected Files.
Auslogics Duplicate File Finder, with its simple yet effective search setting options and its clean UI, is the perfect tool to scour your PC for duplicate files and purge them in the process.
2. How to use ‘CCleaner’
If you’ve ever looked for system cleaners you know CCleaner and, dare we say, its reputation as a malware-introducing rather than a malware-cleaning program. But those controversies are well in the past, and it’s building itself back up again.
Download: CCleaner
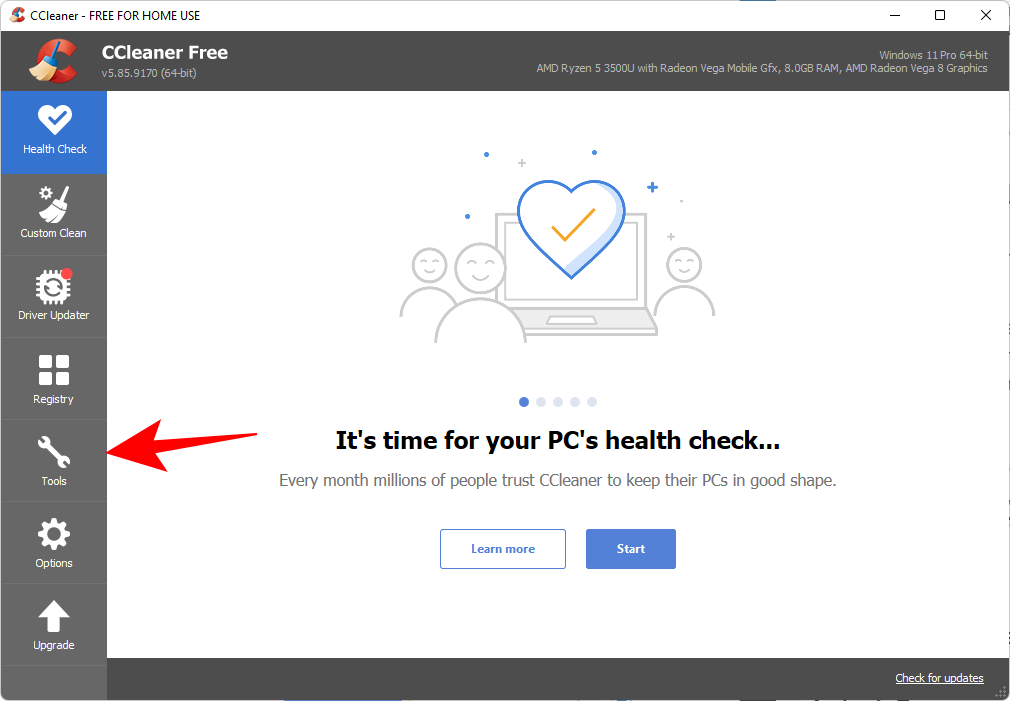
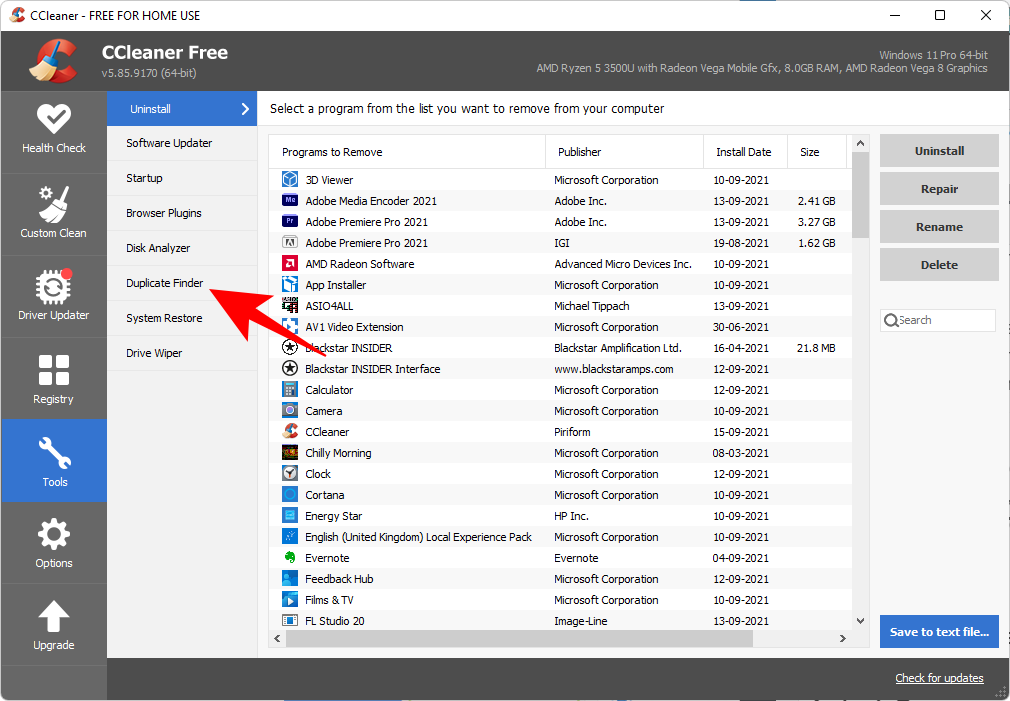
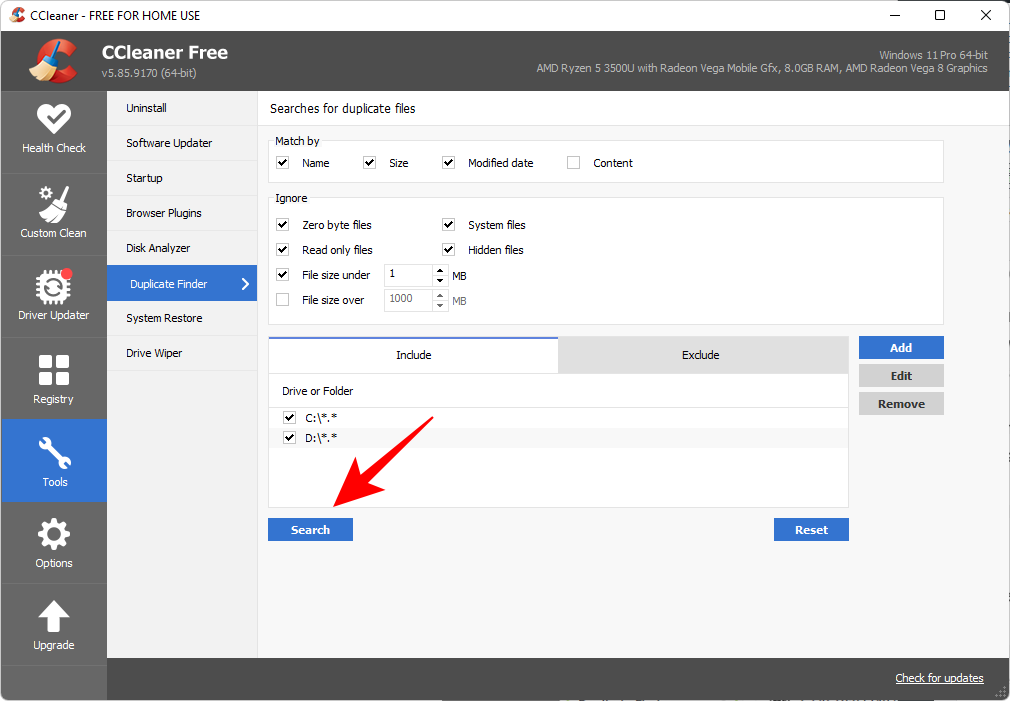
CCleaner still is one of the more popular tools out there that have an all-in-one functionality, including a ‘Duplicate Finder’. Open the application and click on the Tools option in the left panel.
Then select Duplicate Finder.
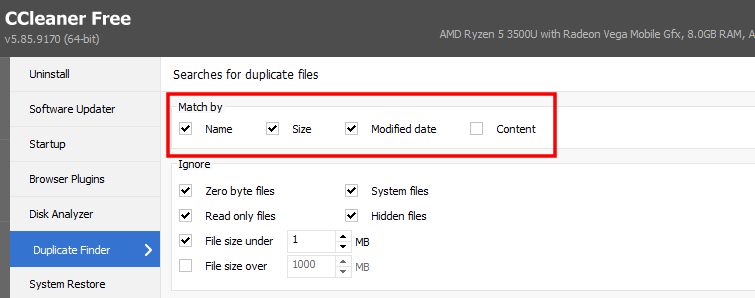
You’ll find all the search settings options on the same screen. The name, size, date, and content options are at the top.
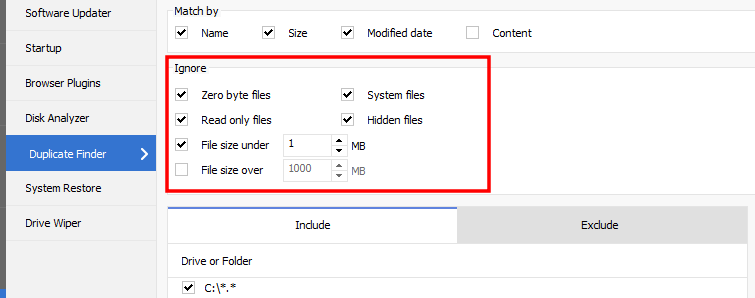
The options to ignore files by their parameters are in the middle.
And the drives and folders to include/exclude are at the bottom.
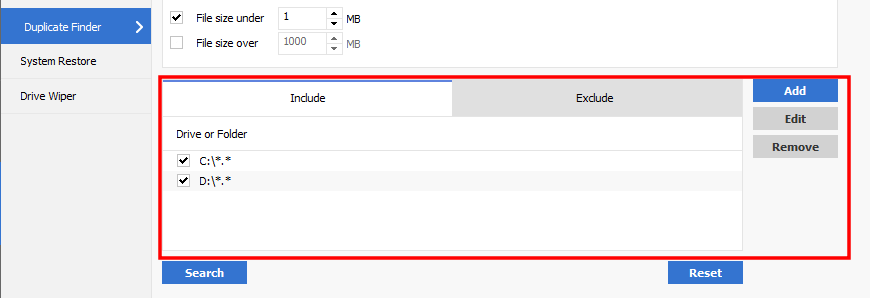
Once you’ve selected your search settings, click on Search.
CCleaner will now start the search and display the duplicate files as they are found. Once the search is complete, click OK.
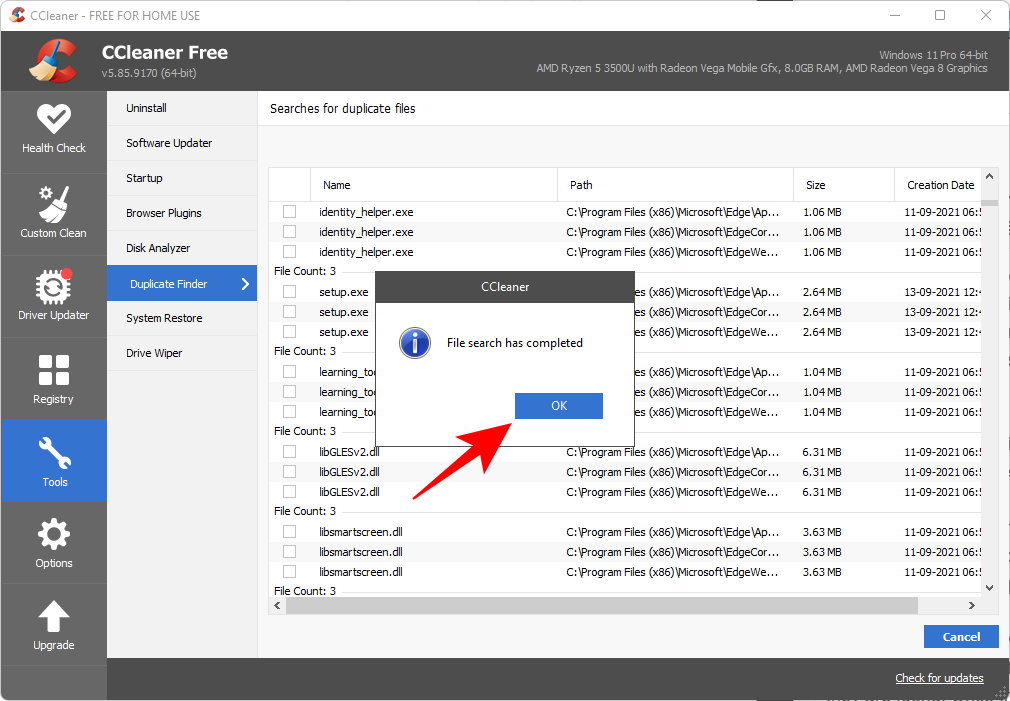
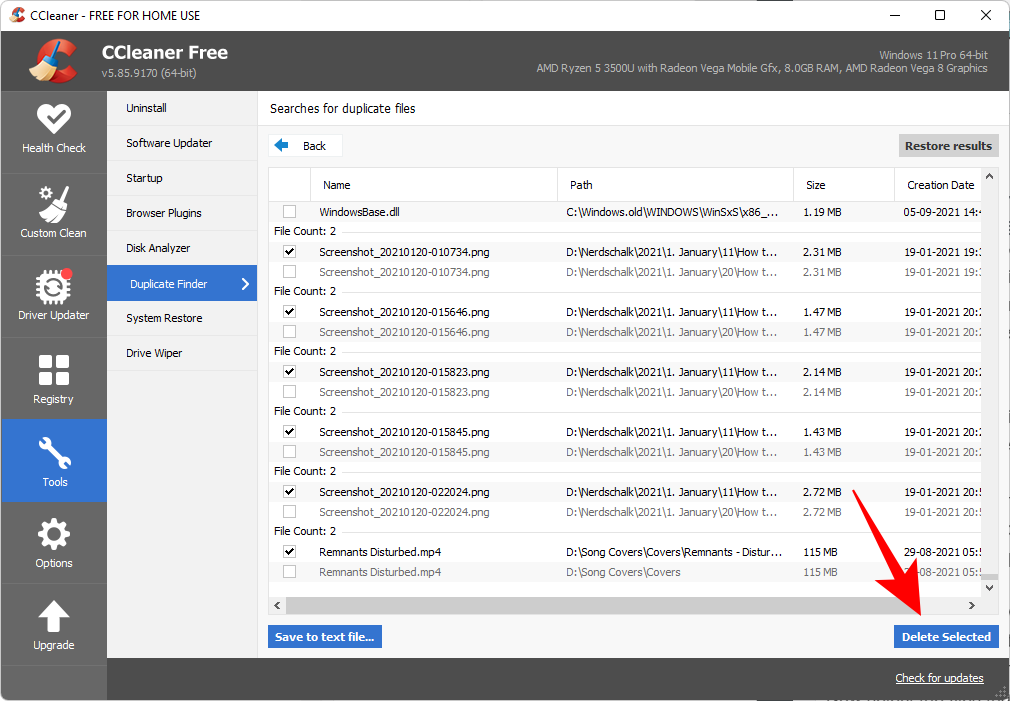
Now select the files that you would like to delete. This has to be done manually as there is no option to select duplicates in each category. But it also forces you to be careful while deleting because once these files are deleted, they’re gone for good. So be careful while making your selection. Then click on Delete selected.
Despite its reputation, CCleaner is still one of the more popular tools to find duplicate files, even if it doesn’t offer enough options for the purpose of deletion.
3. How to use ‘Easy Duplicate Finder’
The name says it all! – an application that lets you find duplicate files with ease. This is all possible thanks to sophisticated algorithms that dig through your PC for any and all files hiding in duplicity.
Download: Easy Duplicate Finder
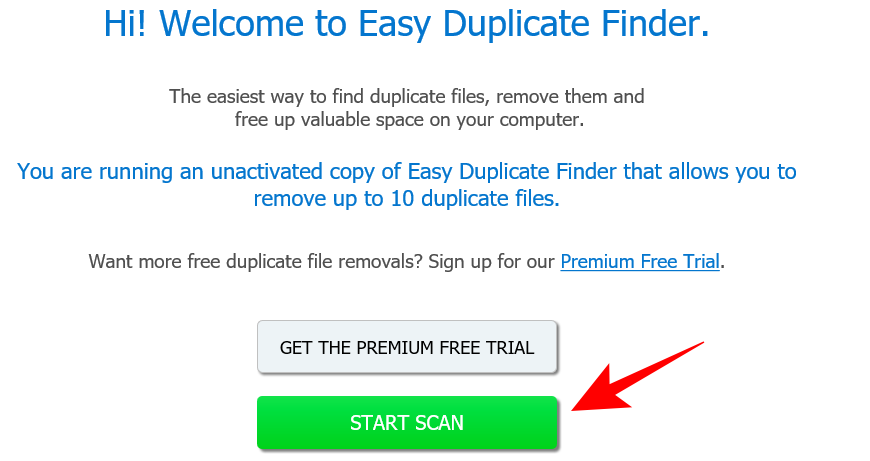
Before we begin, know that the application only allows you to remove up to 10 duplicate files, a very small amount even by trial-version standards. You can, if you wish, sign up for a free Premium trial and notch up that number.
Or you could just keep using the unactivated free version. Simply go ahead and click on Start Scan.
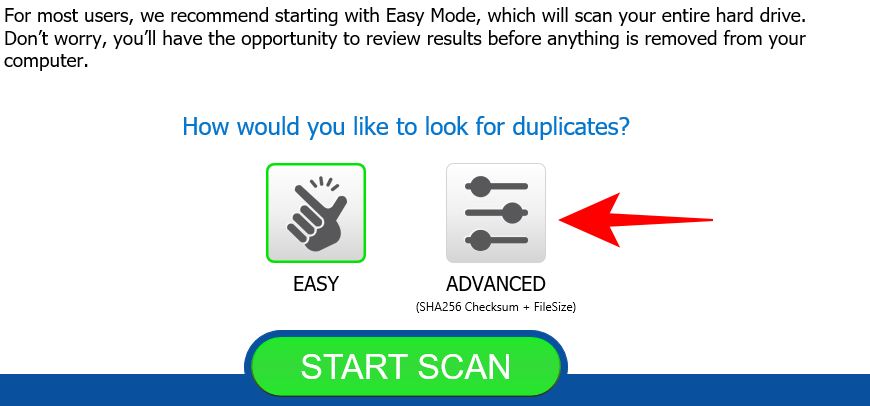
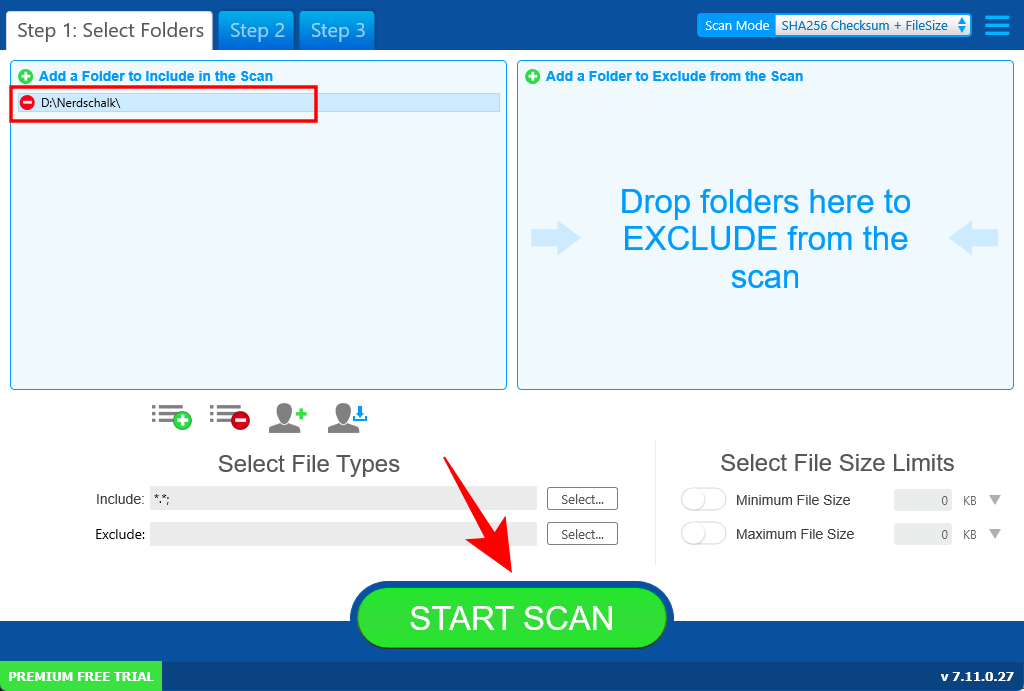
If you don’t have the time to configure the settings, the Easy option will take care of things for you. Or, you could specify what to search, what to exclude, and all things related to duplicate files search. For this, click on Advanced.
The Scan Mode at the top lets you select from a number of scan options. Choose one that fits your purpose.

The option to limit the search by file size is towards the bottom right. It’s advisable to keep things set to default. Then drag and drop the folders that you want to scan in the left square. Once you’ve specified your settings, click on Start Scan.
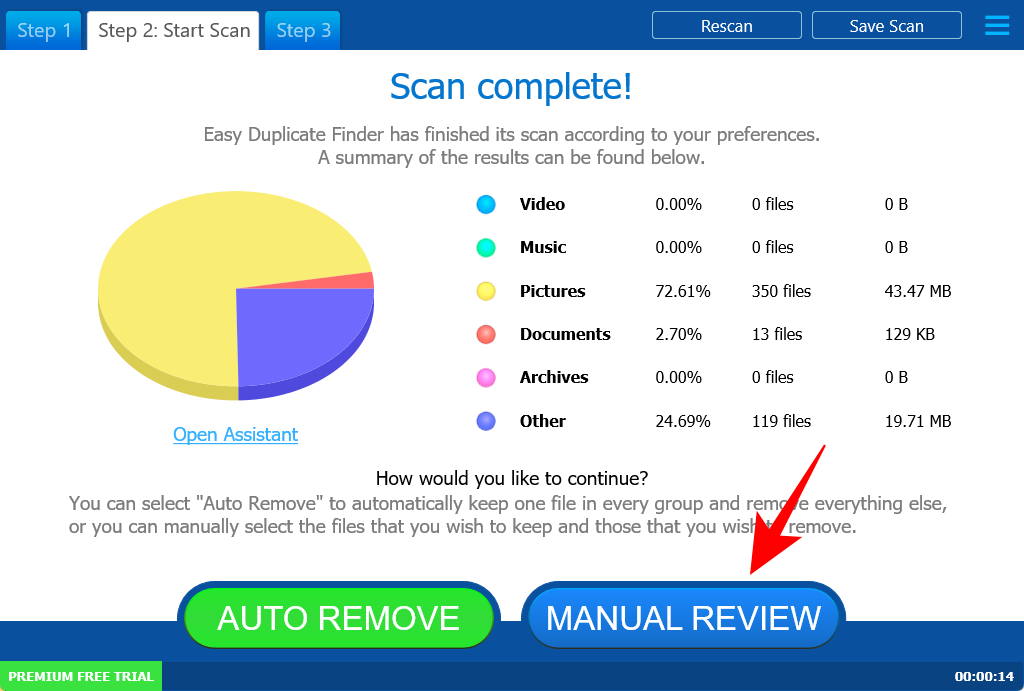
As soon as the scan is complete, you’ll see options to either ‘Auto Remove’ or ‘Manual Review’. We recommend the latter to ensure that you’re not deleting some important system files in the process (just in case).
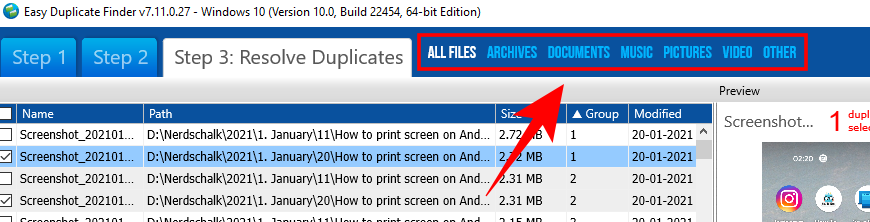
The duplicate files will be selected automatically. You can look through the different categories by selecting one from the top.
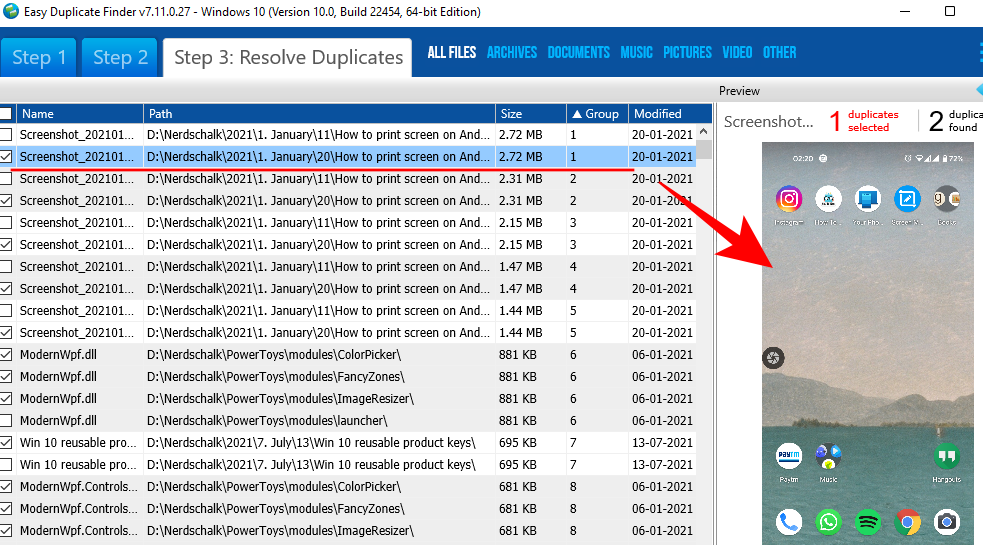
Click on a file to highlight it and see its preview in the right panel.
Once you’ve looked through the files to be deleted, go ahead and click on the Trash icon.
Now choose whether you want to move the files to the Recycle bin or delete them permanently. Then click on Yes.

4. How to use ‘Duplicate Files Finder’
This application has been around for a while now, and it’s more than evident with the antiquated interface. Safe to say it hasn’t been updated in some time, but that’s only because it doesn’t need to. This titular duplicate files finder is lightweight and quite adept at detecting duplicate copies.
Download: Duplicate FilesFinder
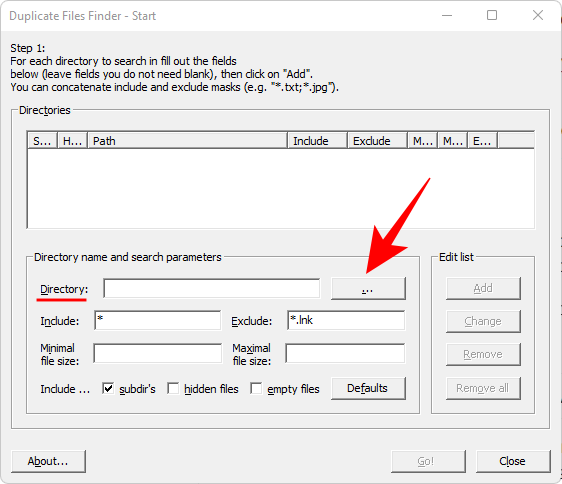
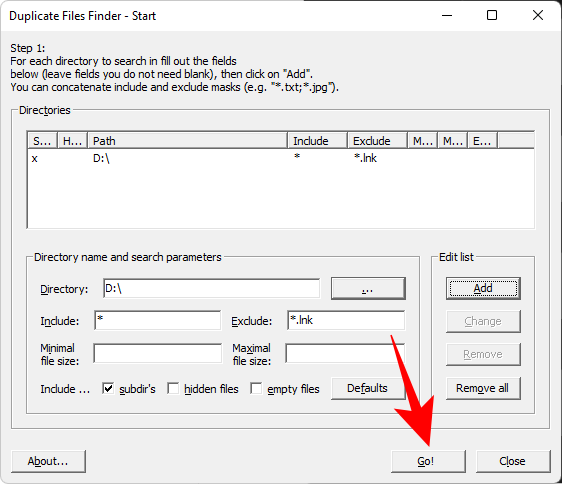
The application has a single screen that contains all the necessary options to customize your search. The main thing that you need to do is to click on the ellipsis button next to the Directory field.
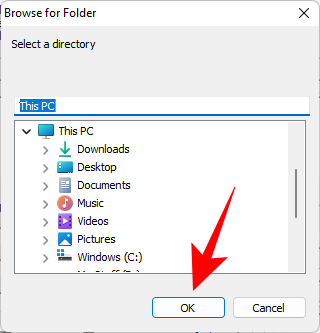
And choose which drive or folder you want to scan, then click OK.
The rest of the options are quite self-explanatory and are no different from what we’ve seen in other duplicate file finders. Once you’ve specified your search (or left the fields that you don’t need blank), click on Add.
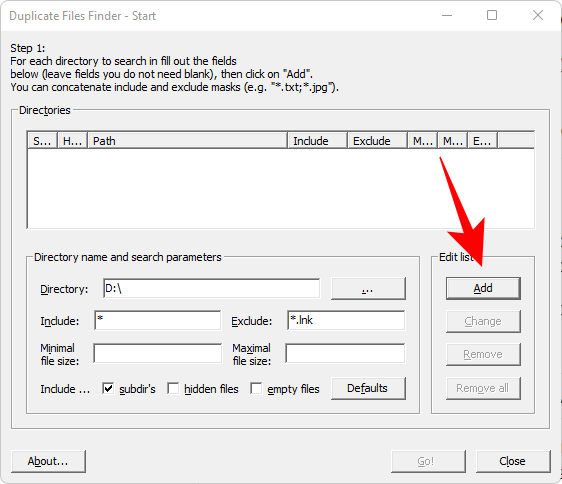
Then click on Go! to start the search.
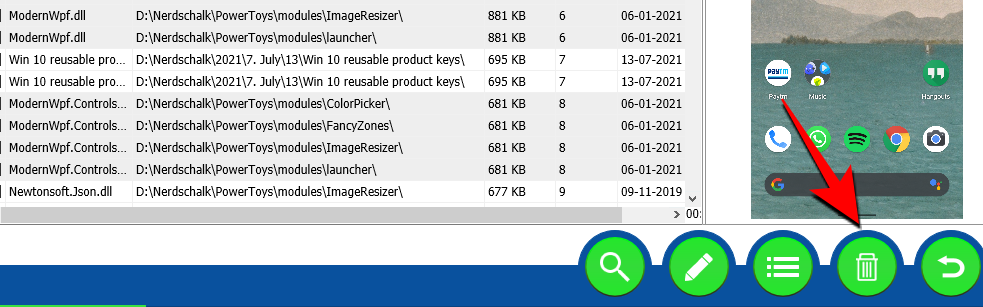
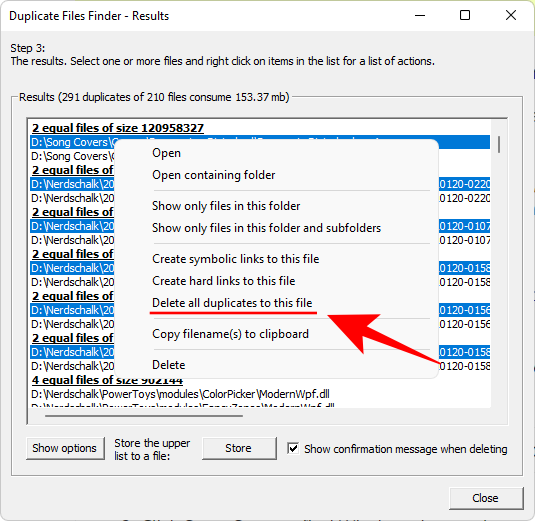
Once the scan is complete, you’ll get a list of duplicate files. To delete a file (or multiple files), select them, right-click and choose Delete all duplicates to this file.
Duplicate Files Finder may look like an application out of the dark ages, but it is a convenient little lightweight tool that has more options than most so-called ‘file finders’ of the day.
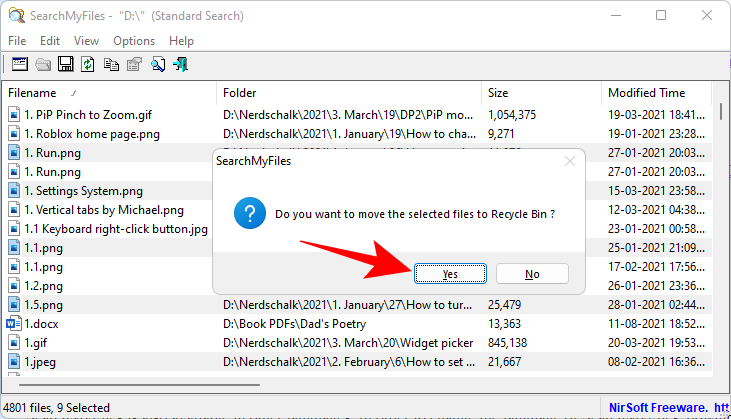
5. How to use ‘SearchMyFiles’
If you liked the simplicity of the nominal Duplicate Files Finder, you may also dig SearchMyFiles. Just like the previous entry, this portable program may make you nostalgic about Windows versions of yore. But its search algorithms and search options are at par with the best in the industry today.
Download: SearchMyFiles
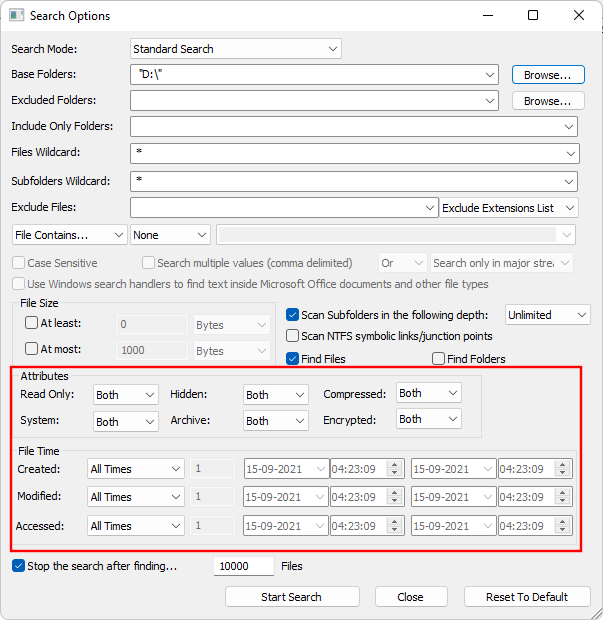
There’s no installation required here. Simply extract the contents from the downloaded zip file and run the application. There are tons of search options available on SearchMyFiles. Select from 5 different Search Modes, add the Base Folders to scan, and go through all the major options to narrow down your search.

Besides the run-of-the-mill options to include/exclude folders and subfolders and file size range, you can narrow down the hunt further with options to search based on file attributes, date created, modified, and accessed.
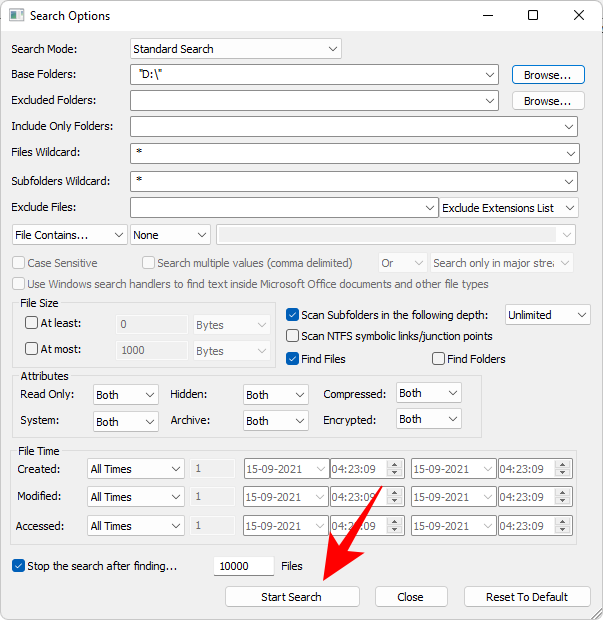
Or, you could leave them all set to default and get going with the scan by clicking on Start Search.
Once the search is complete, select the files that you want to delete (hold Ctrl and click on the files). Then hit the Delete button. When asked to confirm, click Yes.
Aside from its outdated look, the only thing holding this program back is the unavailability of an option to select duplicate files to delete with a single click. If that doesn’t bother you, then this is a gem right here, in our books at least.
6. How to use ‘Duplicate Cleaner Free’
This is another one of those programs that only give you a week’s worth of trial, after which you’ve got to purchase it to keep using. But as a one-time duplicate file cleaner, the free version gets the job done just with some class.
Download: Duplicate Cleaner Free
Run the application and click on Search criteria to begin.

You have four modes to choose from on the left – Regular, Image, Audio, and Video mode. Each has its mode-specific set of options, which is quite an intelligent feature that’s nonexistent on some other programs. Tweak your search settings and filters, then click on Scan Location.

Now, drag and drop the drive/folder to scan, or pick from the left panel by selecting the drive/folder and clicking on the arrow to its right.

The advanced folder search options are provided at the bottom. Once you’re satisfied with your settings, click on Start scan at the top.

Now click on Start scan.

Once the scan is complete, you’ll see the details of the scan as well as a graphical representation of duplicate file types towards the left.

The visual reference may not be a deal-breaker on its own, but it’s a nice little touch that makes this otherwise banal process less of a chore. Click on the Duplicate files tab to switch to it.

You’ll find the duplicate files are organized by group and the options to select files are found towards the left. By default, the ‘Mark by group’ option is set to ‘All but one file in each group’. This is the recommended option as it will mark the duplicates to delete and leave the original intact. Click on Mark to continue.

Now switch to the Duplicate folders tab.

Review how the duplicate folders are marked in each group. Once satisfied, click on the trash icon at the top.

Here too you’ll get a few options to choose from besides the usual Delete function, such as moving and copying files, renaming them, and exporting them. But if removing them is your sole need, go ahead and click on Delete files.

Were it not for the fact that one only gets a 7-day free trial for this program, it would have been our main recommendation. But this is too good an application to not try out, and if you want to keep deep cleaning your PC of duplicate files every now and then, you can even consider purchasing it.
So these were our top picks for the best duplicate file finders and cleaners for Windows. Some of these might look antiquated, but make no mistake about their ability to dig out unnecessary duplicates. We hope you found the right one for your PC.
RELATED
- How to Find Large Files on Windows 11
- How to use Windows 11 Search
- How to Disable Windows Search on Windows 11
- How to Show Hidden Files on Windows 11
- How to delete temporary files in Windows 11
- How to Find Computer Name on Windows 11
- Windows 11 Shortcuts List
- How to Clear Space on Windows 11
- How to Find Which File or Folder is Currently in Use on Windows 11


Great article…
I’ve used Easy Duplicate Finder for years. Very simple to use and effective. Plus their support is tops.
I take care of 11 PCs at our office. I use CCleaner too for cleaning junk off the systems. Their duplicate finder is okay, but not as thorough as Easy Duplicate Finder.