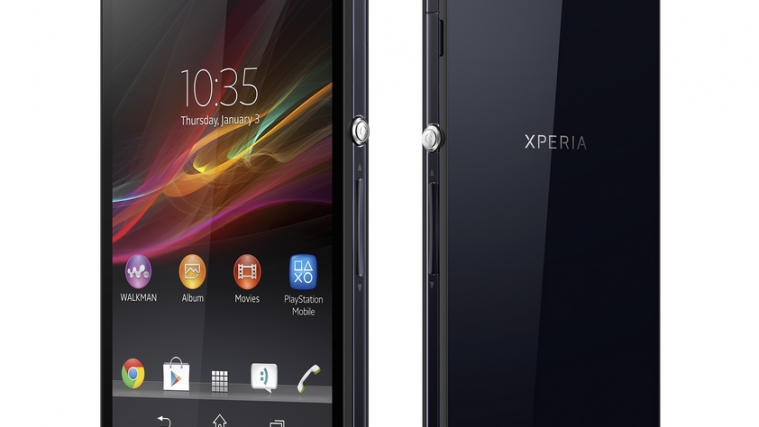
The Sony Xperia Z was launched only in early February 2013 and many who bought the device were no doubt wishing to root it straightaway. And like always, XDA Recognized Developer DooMLoRD went to work and released a proper root method that people could use. But first things first for the newcomers to Android – what exactly is rooting?
In the world of Android, rooting is an extremely popular process that many look towards after buying a new Android device, allowing them to gain privileged access to the system and perform operations that would otherwise not be possible and accessible to a normal Android user, similar to desktop operating systems like Linux.
For example, one can remove system apps and bloatware that carriers add to devices, run apps such as file managers or backup apps that require root access, use data connection tethering even if your carrier doesn’t allow it, or even overclock the device’s processor using a custom kernel. Rooting makes all of this possible and more, including allowing one to replace the stock firmware with a custom one.
So if you’re looking to root the Xperia Z but need a little help, you’ve come to the right place – our all-in-one root guide for the Xperia Z has easy to understand step-by-step instructions to help you through the rooting procedure.
There are two methods below – the first one is for both locked and unlocked bootloaders and should be used by those who wish to root without losing any data or voiding warranty by unlocking bootloader, while the second method can be used by those have an unlocked bootloader or wish to easily install custom ROMs and other mods later on. Both methods are proven to work.
So, grab your Xperia Z and continue reading to find out how you can root it.
Compatibility
The procedure described below is only for the Sony Xperia Z. Do not try it on any other device.
Warning!
The methods and procedures discussed here are considered risky, so try them out at your own risk, and make sure to read each step carefully before attempting anything. We will not be held responsible if anything goes wrong.
Method I
This method works on both locked and unlocked bootloaders, but should be used by those who only want to root without unlocking the bootloader and without making any other changes. If you wish to flash custom ROMs later on, use Method II below that will unlock the bootloader as well and allow easy installation of custom ROMs.
- Download and install the drivers for the phone on your computer.
Download Drivers | Alternate Link - Enable the following things on the phone.
- Go into the Settings » Developer options menu and enable the USB Debugging option. On Android 4.2, you’ll have to first unhide the Developer options menu by going into Settings » About phone then clicking on the Build Number field seven times.
- Enable Unknown Sources from the Settings » Security menu.
- Go into Settings » Display and change the Sleep setting to 10 minutes or more.
- Download the Toolkit from the source page. The download link can be found at the end of the first post of the source page, under the “Download Link” section.
- Extract the contents of the Toolkit file you just downloaded to a convenient location on your computer.
- Connect the phone to the computer, and let the drivers install if this is the first time you’ve connected the phone to the computer. You might need to finish the Windows driver installation manually, do that and go to next step.
- Now, double-click on the “runme” file in the folder where you extracted the toolkit’s files, which will open the command prompt window. Then, unlock the phone (that is, make sure the phone is not on lockscreen and its display is on) and then press enter to start the rooting procedure.
- Keep watching the command prompt until it shows a message saying something like “press the button to restore the data in your phone.“
- On the phone, press the “RESTORE” option. Keep an eye on the phone, and when you get a message saying “Restore Ended,” press any key in the command prompt window to continue to next step.
- Now, open the phone dialer and dial *#*#7378423#*#*, which will open the Service Menu. Here, select Service Tests, then select Display. The screen will now turn white and the command prompt window will show some commands being executed.
- Now, press the power button to turn off the screen, wait for 2-3 seconds, then press the power button again, then again turn it off for 2-3 seconds. Repeat this process (press power to turn off screen, press power button again) till you see a “Cleaning Up” message in the command prompt window.
- After the Cleaning Up message, the phone will reboot automatically. Once it boots up, it will be rooted. You can close the command prompt window now and disconnect the phone from the computer.
- Rooting is now complete. Whenever an app or operation needs root access, you will get a prompt on-screen asking you whether you want to grant or deny superuser access, and you can make the necessary selection to allow or deny root access.
- Important: If you find that NFC doesn’t work afterwards, install an app like Explorer or Solid Explorer from the Play Store, and delete the /data/usf folder on the phone.
Method II
This method includes unlocking the bootloader on the phone first, which wipes all data from the device and also voids its warranty permanently. This method is useful for those that intend to install custom ROMs and other mods later on easily. If you’re only looking to root, use Method I above.
Requirements
- Your phone must be running the 10.1.A.1.350 firmware/build number. Check the firmware/build number in the Settings » About phone menu. Don’t try this procedure if you are running any other firmware.
- Take a backup of all the data on your phone. Unlocking the bootloader on the phone wipes everything – including music, photos, videos, etc – and factory resets it. Use our Android Backup Guide for help on how to back up apps and other data, such as contacts, SMS, bookmarks, etc. Then, after you’ve backed personal data up, copy everything off the phone’s storage to a computer.
- NOTE: Backup is optional and you can skip this step if you do not wish to back up anything.
- Unlock the bootloader on your Xperia Z using this guide. Unlocking bootloader wipes all data from the phone so make sure you take a backup as mentioned in step 1.
- NOTE: If you’ve already unlocked the bootloader on your device, you can skip this step.
- Install the Android SDK using the guide → here. This is required for flashing the necessary files on the phone. NOTE: Skip this step if you already installed Android SDK when unlocking the bootloader.
- [Skip if you did this while unlocking bootloader] You’ll need to do the following things to install the fastboot drivers (fastboot is used for flashing the necessary files on the phone) for the phone on your computer.
- Download and unzip this file (use a program like WinZip or WinRAR for extraction) to obtain a file named android_winusb.inf.
- Copy this android_winusb.inf file to the extras » google » usb_driver folder where you installed the Android SDK. Replace the existing file when asked to do so.
Root
- Download the CF-Auto-Root kernel as well as the stock kernel from the links below.
Download CF-Auto-Root | Download Stock Kernel - Copy both the downloaded files from step 1 to the Android SDK » platform-tools folder.
- Now, turn off your Xperia Z. Then, while holding down the “Volume UP” button, plug in the USB cable to your phone (make sure cable is connected to the computer before connecting to phone). This will start the device in FASTBOOT mode.
- [Skip if you already installed the drivers during bootloader unlocking] The device installation screen will pop up on your computer. Here, select the “Browse my computer for driver software,” followed by “Let me pick from a list of device drivers” option. Then click on “Have Disk”, browse to the Android SDK » extras » google » usb_driver folder, and select the android_winusb.inf file. Then, select “Android Bootloader Interface” from the list and finish the driver installation by following the onscreen instructions on your computer.
- Open the Android SDK » platform-tools folder. Here, press and hold down the SHIFT button on your keyboard, then right-click on an empty part of the screen. Then, click on the “Open command window here” option in the right-click menu to open a command prompt window.
- In the command prompt window, type in fastboot.exe -i 0x0fce getvar version and press Enter. If a value is returned as a response, such as 0.3 or 0.5, then the device is properly connected and you can go to the next step.
- Then, type in fastboot.exe -i 0x0fce flash boot Z_DooMLoRD_CF-Auto-Root-ported_FW-350.img in the command prompt and press Enter. This will flash the CF-Auto-Root kernel you downloaded in step 1.
- After you get a FINISHED message in command prompt, enter fastboot reboot to reboot the phone. Don’t close the command prompt window.
- Once the device starts booting up, you will see a message saying that the phone is going to reboot in 10 seconds. Now, when the device reboots after 10 seconds, do a hard power off on the phone by holding down both the Volume Up + Power keys together for 15-20 seconds. This will turn off the phone forcefully and stop it from booting.
- Now, repeat step 3 to connect the phone in fastboot mode again. Then, flash the stock kernel by typing fastboot flash boot Z_DooMLoRD_insecure_FW-350.img in the command prompt window.
- Once you get the “FINISHED” message, enter fastboot reboot to reboot the phone. You can close the command prompt window and disconnect the phone from the computer.
- The phone is now rooted, but there are a few more things we need to do to finalize the root procedure:
- Open the app named “SuperSU” on the phone. (NOTE: SuperSU is the app that grants root access to those apps that need it, so it needs to be always installed on the device).
- If the app shows a message saying that the “SU binary needs to be updated”, allow the update, then close SuperSU. If you don’t get the message, then simply close SuperSU after opening it.
- Install the BusyBox app from the Play Store (install the one by Stephen (Stericson)).
- Now open the app “BusyBox Free” on the phone. Once you open it, you will get a “Superuser request” window, where you must press “Grant” to allow root access to the BusyBox app.
- Close the welcome message, then wait for a few seconds till a message saying “Smart install has finished loading” will show up. Close this message as well.
- Now, click on Install, followed by “Normal Install” to install busybox files, which will take around 2 minutes. These files are required by some apps for proper root access and to perform advanced functions.
- You will get a message box confirming that busybox was installed after the process has finished. Close this message then close the BusyBox app, which you can uninstall now if you want.
- Rooting is now complete. Whenever an app or operation needs root access, you will get a prompt on-screen asking you whether you want to grant or deny superuser access, and you can make the necessary selection to allow or deny root access.


That’s it, your Xperia Z is now rooted and ready to be used, with access to all the apps and possibilities available via root access at your fingertips. Do let us know if you run into any issues during the procedure, we’ll be glad to help you out the best we can. Enjoy!
Via: XDA


