
Cheers, people in the USA! Galaxy Note 7 has achieved root on one of the leading carriers in the country — Sprint. What this means is root could be possible for other variants of Galaxy Note 7 at T-Mobile, US Cellular and probably AT&T & Verizon Note 7 too.
The Sprint Note 7 root is coming from combined efforts of developers freeza and cruckus over at xda. The duo came up with a way to root Sprint Note 7 using a userdebug version of the device which apparently had the su binary pre-installed with N930PVPU1APH3 build. This PH3 build is supposed to be an upcoming update for the curent PGC build on Sprint Note 7 devices.
What’s Userdebug version? You may ask. Well, it’s debugging variant of a device used by Samsung employees to test software updates before releasing them publicly. These builds include binaries not present on the stock firmware shipped with Samsung devices for debugging purposes.
Note: Using a userdebug firmware to root Sprint Note 7 means you will not be able to use Samsung Pay, Android Pay, OR get official OTA updates on your device. PH3 is the only firmware build you can use while rooted.
That said, this doesn’t mean you can’t restore back to stock firmware. If there’s an official update out there for the Sprint Note 7 and you want to install in on your device. You can do so by flashing the stock firmware on the device, and then get the official OTA. BUT, doing so will unroot your device.
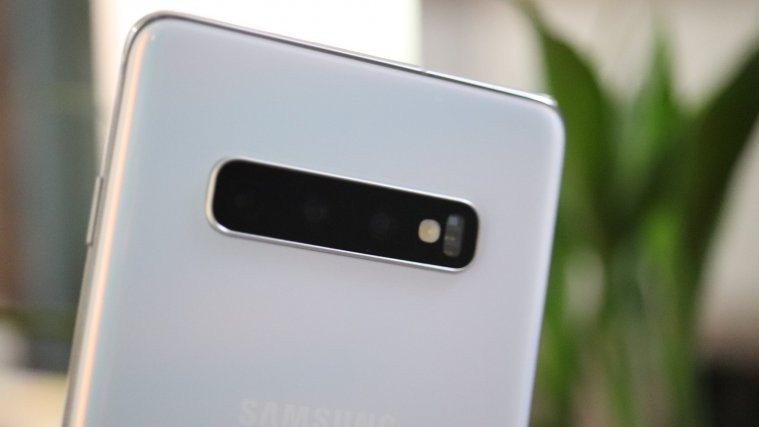
Picture of a Sprint Galaxy Note 7 rooted using PH3 userdebug PH3 firmware.The process of rooting Sprint Note 7 using the userdebug rooted firmware (PH3) isn’t as easy as CF Auto Root or SuperSU root methods are. Follow the instructions below carefully and to the letter.
Tip: Your device might get fully wiped during the rooting process. So make sure you backup all important data on your device before you follow the steps below.
Downloads
- Rooted Userdebug PH3 firmware (2GB, .tar.md5)
- SuperSU for Note 7 (Qualcomm devices only)
- Odin 3.12.4
How to Root Sprint Note 7 with Rooted PH3 Firmware
The first thing you need to do is flash the rooted userdebug PH3 firmware to your Sprint Note 7. To do that download the firmware file (.tar) from the downloads section above and flash it to your device using Odin 3.12.4.
- Unzip the Odin 3.12.4_4 .zip file and run/open Odin3 v3.12.4_4.exe file from the extracted files on your PC.
- Enable OEM unlock:
- Go to Settings » About phone » and tap “Build number” seven times to enable“Developer options”.
- Go back to main Settings page, scroll to bottom and select “Developer options” from there.
- Under Developer options, look for “Enable OEM unlock” checkbox/toggle and make sure you Check it or turn it ON.
- Boot your Samsung device into Download mode:
- Switch off your phone.
- Press and hold “Home + Power + Volume down” buttons for a few seconds until you see a warning screen.
- Press Volume Up on the warning screen to accept it and boot into Download mode.
- Once your device is in download mode, connect it to the PC with a USB cable. The Odin window on PC should detect the phone and show an “Added!!” message.
- Click on the AP tab on Odin window and select the .tar.md5 FIRMWARE file that you downloaded.
└ Note: DON’T play with any other options on the screen. You’re only required to connect your Samsung device and select the FIRMWARE file in AP tab. - Click the Start button on Odin and wait for it to finish the process. Once it has finished successfully, you’ll see a pass message on the Odin screen.
- Your phone will automatically reboot when Odin is done flashing. You can then disconnect your device.
- Have patience! Your Note 7 is going to take really long for the first boot after installing PH3 firmware.
- After boot, if you’re going to restore your Google account (with all apps), make sure you do NOT restore/install the SuperSU app.
Install SuperSU (Note 7 specific) via ADB
With the PH3 firmware installed on your Sprint Note 7, you now have su binaries and root access available on the device. However, SuperSU app isn’t installed. So you don’t have a GUI to manage Superuser permissions on the device. To fix this, we need to install the Note 7 specific SuperSU via ADB. Follow the instructions below.
- Setup ADB and Fastboot on your PC.
- Enable Developer options & USB debugging on your device.
- Extract the SuperSU for Note 7 (sun7.zip file you downloaded above) to a separate folder on your PC.
- Now open a command window OUTSIDE that folder (we need to push the sun7 folder to the device not files). To do that, Shift + Right click on any empty white space on the folder screen and then select Open command window here from the context menu.
- Connect your Note 7 to the PC. If it asks for your permission to allow USB debugging, select OK.
- Issue the following commands one-by-one in the command window on PC:
adb push sun7 /data/local/tmp/su

adb shell chmod 0777 /data/local/tmp/su/*

adb shell

cd data

cd local

cd tmp

cd su

su

./root.sh
- The script will now install SuperSU, set up root access and then reboot your device automatically.
- Download/install Busybox on rails from Play store on your Note 7 and set up Busybox.
└ SuperSU may or may not update binaries after installing busybox. It’s not an issue.
That’s all. Enjoy root access on your Sprint Galaxy Note 7. Hopefully, developers are able to built upon this rooting method and get future updates to this device and other US variants of Note 7 rooted as well.
via xda


Hello there. When i type “cd su” it says not such file or directory. Can you help
did you find a solution?
Hello there. When i type “cd su” it says not such file or directory. Can you help
i have a problem. i tried flashing the OS on the AP slot using the Userdebug file and im on t mobile. my phone is not non explosive version and it also had the first update installed which was release like a week ago like september 20 or something. odin failed and it gave me an error. here is the full log
Added!!
Removed!!
Added!!
Enter CS for MD5..
Check MD5.. Do not unplug the cable..
Please wait..
Checking MD5 finished Sucessfully..
Leave CS..
Odin engine v(ID:3.1205)..
File analysis..
SetupConnection..
Initialzation..
Set PIT file..
DO NOT TURN OFF TARGET!!
Get PIT for mapping..
Firmware update start..
SingleDownload.
emmc_appsboot.mbn
lksecapp.mbn
xbl.elf
FAIL! (Auth)
Complete(Write) operation failed.
All threads completed. (succeed 0 / failed 1)
now on the other hand i get “SW REV CHECK FAIL : |aboot|Fused 2 > Binary 1
|1|eMMC write fail: aboot”
this is in the very first few seconds that i get this. if i boot into recovery, i get i get a load of errors and the android “installing system updates” gets ignored the errors that i get are:
dm-varity verification fail…
Need to check DRK first…
E:failed to mount /cache (invalid argument)
E:failed to mount /cache (invalid argument)
E:failed to mount /cache (invalid argument)
E:Can’t mount /cache/recovery/last_locale
E:failed to mount /cache (invalid argument)
E:failed to mount /cache (invalid argument)
E:failed to mount /cache (invalid argument)
E:can’t mount /cache/recovery/log
E:Can’t open /cache/recovery/log
E:failed to mount /cache (invalid argument)
E:can’t mount /cache/recovery/last_log
E:Can’t open /cache/recovery/last_log
E:failed to mount /cache (invalid argument)
E:can’t mount /cache/recovery/last_Install
E:Can’t open /cache/recovery/last_Install
E:failed to mount /cache (invalid argument).
to fix this and install stock samsung firmware i had to wipe cache partition and boot into bootloader from recovery or go to download mode because my device would not boot. and flash the stock firmware with odin. i tried odin 3.12.4 and 3.12.3 as well as both tried unckecking re partition in options tab as it was enabled by default. usb debugging was turned on as well as OEM unlocking. again. i have the T mobile variant.
Where did you get the stock firmware?
i have a problem. i tried flashing the OS on the AP slot using the Userdebug file and im on t mobile. my phone is not non explosive version and it also had the first update installed which was release like a week ago like september 20 or something. odin failed and it gave me an error. here is the full log
Added!!
Removed!!
Added!!
Enter CS for MD5..
Check MD5.. Do not unplug the cable..
Please wait..
Checking MD5 finished Sucessfully..
Leave CS..
Odin engine v(ID:3.1205)..
File analysis..
SetupConnection..
Initialzation..
Set PIT file..
DO NOT TURN OFF TARGET!!
Get PIT for mapping..
Firmware update start..
SingleDownload.
emmc_appsboot.mbn
lksecapp.mbn
xbl.elf
FAIL! (Auth)
Complete(Write) operation failed.
All threads completed. (succeed 0 / failed 1)
now on the other hand i get “SW REV CHECK FAIL : |aboot|Fused 2 > Binary 1
|1|eMMC write fail: aboot”
this is in the very first few seconds that i get this. if i boot into recovery, i get i get a load of errors and the android “installing system updates” gets ignored the errors that i get are:
dm-varity verification fail…
Need to check DRK first…
E:failed to mount /cache (invalid argument)
E:failed to mount /cache (invalid argument)
E:failed to mount /cache (invalid argument)
E:Can’t mount /cache/recovery/last_locale
E:failed to mount /cache (invalid argument)
E:failed to mount /cache (invalid argument)
E:failed to mount /cache (invalid argument)
E:can’t mount /cache/recovery/log
E:Can’t open /cache/recovery/log
E:failed to mount /cache (invalid argument)
E:can’t mount /cache/recovery/last_log
E:Can’t open /cache/recovery/last_log
E:failed to mount /cache (invalid argument)
E:can’t mount /cache/recovery/last_Install
E:Can’t open /cache/recovery/last_Install
E:failed to mount /cache (invalid argument).
to fix this and install stock samsung firmware i had to wipe cache partition and boot into bootloader from recovery or go to download mode because my device would not boot. and flash the stock firmware with odin. i tried odin 3.12.4 and 3.12.3 as well as both tried unckecking re partition in options tab as it was enabled by default. usb debugging was turned on as well as OEM unlocking. again. i have the T mobile variant.
does this work on Mac?
does this work on Mac?
I NOW OWN A BRICK.
I NOW OWN A BRICK.