One would think that users of Google’s Nexus devices would prefer the stock Android experience and wouldn’t want to use custom OEM skins such as TouchWiz. But then, one would think wrong. The TouchWiz 5 UX from the upcoming Galaxy S3 has been ported over to the Galaxy Nexus as well, for ROMs such as CM9 and AOKP, after ports for the Galaxy S and Galaxy S2 released previously, which shows that there’s a demand for TouchWiz even in the Nexus world.
Take a look at some of the features:
- Original high-resolution Galaxy S3 Symbols (xhdpi)
- Settings themed with Galaxy S3 Symbols (xhdpi)
- TouchWizUX Launcher
- Samsung Galaxy S3 Sounds
- Galaxy S3 Wallpaper Picker and Live Wallpapers
- Memo App and Widget
- PopUp MultiTasking Video-Player (Super Video)
- Trebuchet Drawer Icon themed
- Apollo Music-Player
- FileExplorer
Important! This has been tested with CM9, AOKP and Liquid ROM. It might also work with other ROMs such as Gummy, but that isn’t guaranteed.
Let’s look at how the TouchWiz UX can be installed on the Galaxy Nexus.
How to Install TouchWiz UX on Galaxy Nexus
- Important! Make sure your phone is running on AOKP/CM9/Liquid ROM. It might work with other ROMs as well.
- Download the latest TouchWiz package from the official development page.
- Copy the downloaded .zip file to the internal SD card on the phone (without extracting it).
- Turn off the phone. Then, boot into ClockworkMod (CWM) recovery. To do so, press and hold Volume Up + Volume Down + Power buttons till the screen turns on. Then, using the volume buttons, navigate to the Recovery mode option, then select it using the power button to reboot into CWM recovery.
In recovery, use Volume keys to scroll up and down and power key to select an option (or simply use the touchscreen if you are using a touch-enabled CWM recovery) - Select install zip from sdcard, then select choose zip from sdcard. Scroll to the .zip file (copied in step 3) on the sdcard and select it. Confirm installation on the next page by selecting Yes.
- After the installation is complete, select go back and then select reboot system now to reboot your phone.
- NOTE: Later if you want to go back to the stock UI, simply reflash your ROM from recovery without wiping data or cache.
The TouchWiz UX is now installed on your Galaxy Nexus. Try it out, and let us know if you like it or whether you prefer the stock ICS UX, in the comments below.
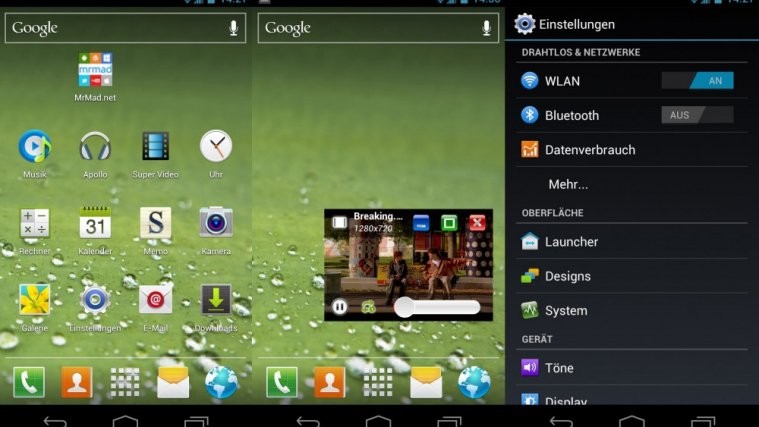
Screenshots:


It is a really cool UX Thanks Guys
I didn’t get all the tweaks and setting overlay so I don’t find it too nice.