The Samsung Galaxy Note, the Android smartphone that started the “phablet” phenomenon and resulted in manufacturers releasing 5-inch phones, has finally started receiving the official Android 4.1.2 Jelly Bean update that was promised by Samsung in late 2012. Users in Taiwan and Hong Kong woke up to the good news as the update’s notification arrived on their devices, bringing an end to the long wait.
Android 4.1 “Jelly Bean” is an important update for many reasons. First and foremost, it features “Project Butter”, which provides a much faster and smoother interface and operation compared to previous versions of Android. Using the processor and GPU in tandem along with techniques such as Vsync, triple buffering, and touch anticipation, Project Butter keeps the interface running at 60 fps and results in a smooth and responsive experience.
Other new features in Jelly Bean include the expandable and actionable notifications, Google Now search assistant that provides users with information before they even look for it, offline voice typing, faster browsing performance, better accessibility features, and a range of other small yet useful tweaks that put Android 4.1 leaps and bounds over Android 4.0 Ice Cream Sandwich.
But the biggest change of all is that Samsung has completely replaced its old user interface and slapped on the Nature UX found on newer devices like the Galaxy S3 or Note 2. It’s a major revamp and brings along some very useful features from Samsung’s latest iteration of TouchWiz, such as multi window multitasking, pop-up video play, and many more, along with a radically different visual look.
The new TouchWiz features and improvements in the update include:
- Multi-View (Multi Window Multitasking, same as in Note II)
- Multi-View can also be disabled
- Page Buddy
- Notification Panel can now be customized
- New Additions in Notification Panel
- Smart Rotation (Screen Display adjusts to your angle of sightings)
- Continuous Input in Samsung Keyboard (Like Swipe or Android 4.2 Keyboard)
- Samsung’s Cloud services
- Features like Direct Call, Smart Stay and Pop-up Play
- New Widgets From the Galaxy S III
- 2 Home screen modes
- New Notifications bar
Needless to say, the Android 4.1 update will provide a much improved and new user experience to users, bringing the software up to par with what is seen on newer Samsung devices. This is a great show of support on Samsung’s part, as you won’t find any other manufacturer putting on an entirely new interface and UX on two-year old devices.
As always, those who haven’t received the update yet for some reason and don’t want to wait for it to arrive can flash the update manually using the official firmware files. This is also useful for those that are on custom ROMs or are using a Galaxy Note from countries other than Taiwan or Hong Kong where the update has not yet been released.
However, keep in mind that manually updating, specially if you’re on a custom ROM or flashing a Galaxy Note from a country other than Taiwan or Hong Kong, might require you to factory reset your device, and while apps and personal data can be backed up and restored, things like your Google account will need to be re-entered.
Now let’s take a look at how the update can be installed on the Galaxy Note.
Compatibility
The procedure described below is only for the Samsung Galaxy Note, model number N7000. Do not try it on any other device, not even on the LTE/US variant of the Galaxy Note.
Warning!
The methods and procedures discussed here are considered risky, so try them out at your own risk, and make sure to read each step carefully before attempting anything. We will not be held responsible if anything goes wrong.
How to Install Android 4.1.2 Firmware on Galaxy Note (N7000)
- [Important] You might need to wipe the data on the phone to make the firmware boot up properly, especially if the firmware is flashed over a custom ROM or on a device not from Taiwan or Hong Kong. Hence, to be sure you do not lose any data, backup your Apps and important data — bookmarks, contacts, SMS, APNs (internet settings), etc. This Android backup guide would help you. The SD card contents are always safe, so there is no need to back up those. Only backup apps and personal data.
- Download and install the software Kies on your computer, which will install the necessary drivers for the phone.
Download Kies
You can also download the drivers directly — download from here: 32 bit (x86) Windows | 64-bit (x64) Windows - Download the firmware for your country.
Taiwan (Alternate Link)| Hong Kong (Alternate Link) - Extract the file downloaded in step 3 on the computer to obtain a file with a .tar.md5 extension (the file name may end at .tar, which is normal). This is the actual firmware file that we need to flash on the phone.
- Download Odin. If you are new to this, Odin is a Samsung program used to flash stuff – firmware, kernels, etc. – on Samsung phones. We’ll use Odin to flash the firmware file obtained in step 4.
Download Odin3 v3.04 | Filename: Odin3_v3.04.zip - Extract the contents of the Odin3_v3.04.zip file to a folder on your computer.
- Now, turn off your phone and wait for it to shut down completely.
- Then, put the phone into download mode. To do so, press and hold these keys together: Volume Down + Home + Power till the phone turns on and shows a Warning!! screen. Then press Volume Up to enter download mode.
- Open Odin by double-clicking on the Odin3 v3.04.exe file obtained in step 6 after extracting Odin3_v3.04.zip.
- Important! Connect your phone to PC now. You should get the message “Added !!” under Odin’s message box in the bottom left.
- If you don’t get this message, make sure you installed drivers correctly (using Kies or directly) as given in step 2. If it still doesn’t work, try changing to another USB port on the computer and also use the USB ports on the back if you have a desktop PC.
- Click on the PDA button in Odin, then browse to and select the .tar.md5 file obtained in step 4 above.
- Important! Do not make any other changes in Odin except selecting the required files as given in step 11. Leave all other options as they are. Make sure Re-Partition check box is not selected.
- Now, make sure you took a backup as explained in step 1 before continuing, then click the Start button in Odin to start flashing the firmware on your phone. When the flashing is complete and is successful, you’ll get a PASS message (with green background) in the left-most box at the very top of the Odin, and the phone will automatically reboot. When you see the Samsung logo, you can safely unplug the cable.
- What do if Odin gets stuck or doesn’t do anything: If ODIN gets stuck on setup connection or at any stage of this process after you’ve hit the Start button, and doesn’t seem to be doing anything, or if upon completion of the process you get a FAIL message (with red background) in ODIN, do this: disconnect the phone from the PC, close ODIN, remove battery for 4-5 seconds, re-insert it, turn phone on in Download mode again, and do the procedure again from Step 9.
- [Important] What to do if phone doesn’t boot: After you get the PASS message and the phone reboots, the phone might get stuck at the booting animation. If that happens, perform the following steps to make it boot. Remember that these steps will wipe your personal data like contacts, apps, messages, etc. If your phone has already booted, stop reading the guide here, your phone has been updated successfully:
- Boot to recovery mode — for which, first power off phone (by removing battery and reinserting it), wait for 5-6 seconds, and then press and hold Home + Volume Up + Power keys together till the screen turns on, then let them go to boot into recovery. Once you are in recovery mode, use volume keys to move the selection up and down and home/power key to select the option.
- Go to Wipe data/Factory Reset and select it. Select Yes on next screen.
- Then, select reboot system now to reboot the phone, which will now boot properly.
- If you run into any roadblocks while flashing the firmware, let us know and we’ll help you out.
The official Android 4.1.2 Jelly Bean update is now installed on your Galaxy Note. Go ahead and play around with your phone and check out all the new features and improvements, and don’t forget to leave a comment if you run into any trouble.
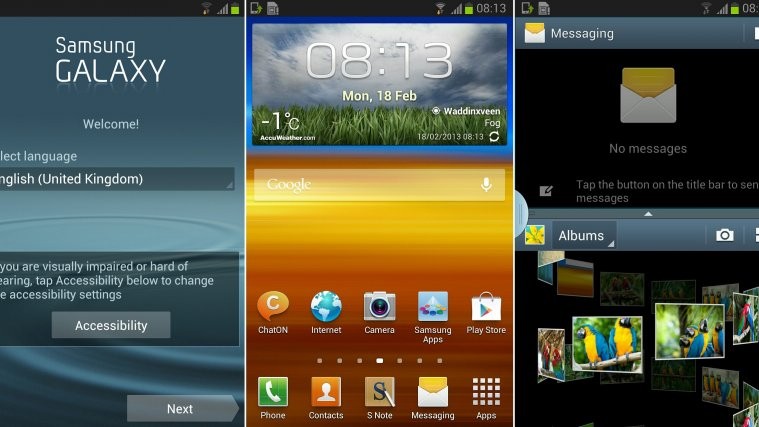
Screenshots:


Via: Sammobile


Done it…some bugs in translation
Root?
Root done and no problems so far.
Done it…some bugs in translation
Root?
Root done and no problems so far.
Is there any technical difference among ROM if I install this version than German or UK etc.? Apart from phone modem, would there be any usability or language issues using this ROM. I am happy to wipe out my current installation..
The English language is included in ROMs of every country, so apart from the modem everything else will be fine (unless you want use the German language which most likely should be included). Even the modem will work of course, but might not be as good as a German or UK modem (though Hong Kong modems have often been proven to be among the best, specially on the first Galaxy S).
Updated to Jelly Bean successfully. Thanks for providing with the detailed installation instructions.
I am having a bid battery drain issue after the update. Cpu Spy shows mean that phone does not go to deep sleep. I am not sure what to do. I have not been syncing anything except Gmail.