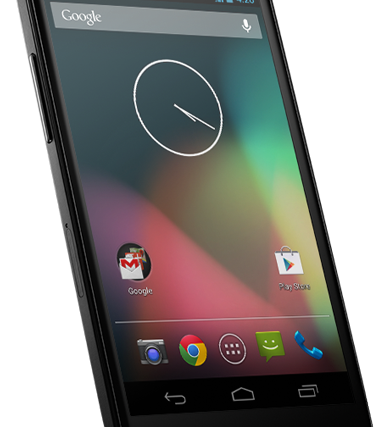
While there are some that buy Nexus devices to get the pure unadulterated stock Android experience, most buy them to tinker around with the device, including installing custom ROMs, kernels, overclocking, etc. However, before one can do that, the bootloader of the device must be unlocked. The Nexus 4 is set to release soon, and will need the same bootloader unlocking process before one can install custom ROMs and the like on it.
That is exactly what this guide is going to help you do, with step-by-step instructions that will get you an unlocked bootloader on your Nexus 4 in no time. The device hasn’t launched yet, but once it does, you’ll be able to unlock the bootloader using the procedure below.
Keep in mind that unlocking the bootloader will erase all the data on your phone (every single thing, including internal storage), hence it is preferable to unlock the bootloader when the phone is new, as then you don’t have to go through the hassle of re-installing everything.
Now, let us take a look at how the bootloader on the Nexus 4 can be unlocked.
Compatibility
This guide is applicable only for the LG Nexus 4. Do not try this on any other device.
Warning!
The methods and procedures discussed here are considered risky and you should not attempt anything if you don’t know completely what it is. If any damage occurs to your device, we won’t be held liable.
How to Unlock Bootloader on Nexus 4
- Backup everything on your phone, including the data on the internal storage, as unlocking the bootloader will erase every single thing on the phone. To backup contacts, SMS, apps, etc, take the help of this Android backup guide.
- Download and install the Android SDK → from here. This will install the necessary drivers for the phone on your computer.
- Download Fastboot, which will be used for unlocking the bootloader.
Download Fastboot | Filename: Fastboot.zip - Extract the Fastboot.zip file on your computer to get a folder named Fastboot with four files inside it. To keep things easy, extract the Fastboot folder to your C: drive.
- Turn off your Nexus 4. Then, boot into fastboot mode by holding down the Volume down and Power buttons together till the screen turns on and shows “Start” written in big green letters.
- Then, connect your Nexus 4 to the computer with your USB cable, then wait for Windows to finish installing the drivers (drivers will be installed only the first time). For reliability, ensure that you use a USB port at the back if you are using a desktop computer, as the front panel ports can be loose and cause problems.
- Click on Start menu » All Programs » Accessories » right-click on Command Prompt and click on Run as administrator. If you are using Windows 8, this can be done by right-clicking on the extreme bottom left corner of the taskbar, then selecting “Command Prompt (admin)”
- Now, perform the following steps in the command prompt to unlock the bootloader (check the screenshot after step 8.3 for reference)
- Navigate to the Fastboot folder which you obtained in step 4. For example, if the Fastboot folder is in drive C on your computer, enter cd C:Fastboot in command prompt (and press Enter) to navigate to the folder.
- Then, enter fastboot devices. If your Nexus 4 has been detected properly, you will see a device ID show up in command prompt. If nothing comes up, make sure you have installed the drivers (step 2).
- Finally, to unlock the bootloader, enter fastboot oem unlock in command prompt. You will get a prompt on the phone asking whether you want to unlock the bootloader. Just select Yes. Remember that this will wipe all your data, so make sure you took a backup.
- The phone will then reboot, and once it starts up, you can set up your phone.
- To re-lock the bootloader, simply follow the entire procedure again from step 5 to 8, but in step 8.3, enter fastboot oem lock. This will re-lock the bootloader.


download link is off
download link is off