ICS333 ROM is an Ice Cream Sandwich Android 4.0.4 based custom ROM for the Galaxy S i9000, a device that refuses to recede into the background, with new ROMs coming out for it regularly. ICS333 ROM is built from the latest Google sources, and also takes a few functionality from CM9 and AOKP ROM and throws them into the mix for an improved ICS experience.
Here’s a look at the features of the ROM:
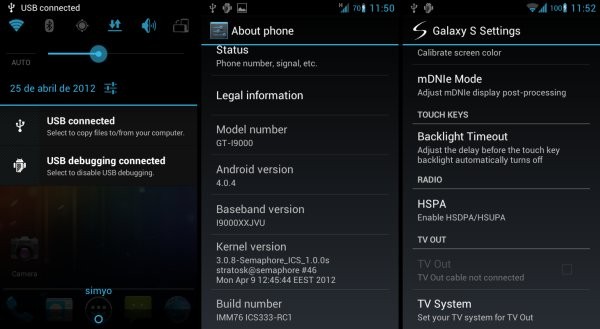
- Built from Android sources (IMM76D)
- Notification bar toggles and numeric battery indicator
- Brightness control in status and notifications bars
- Extended power menu with reboot, recovery and screenshot.
- TV-Out
- Video face effects working
- Application killing with long press on back button
- Removed “R” roaming indicator for national roaming
- Kernel Semaphore 1.0.0s (387 MB RAM)
- BigMem patch for 720p video
- Pre-installed apps: OI File Manager, Barcode Scanner
- APN’s predefined huge list
- Modified hosts file to remove ads in applications.
So, let’s take a look at how you can install ICS333 ROM on your Galaxy S i9000.
Compatibility
This ROM and the guide below are compatible only and only with the Samsung Galaxy S, model number i9000. It’s not compatible with any other device and may render an incompatible device unusable. Check your device model in Settings » About phone.
Warning!
The methods and procedures discussed here are considered risky and you should not attempt anything if you don’t know exactly what you are doing. If any damage occurs to your device, we won’t be held liable.
ROM Info
Developer → el_navajita/3xtr3m3 Team
Known Issues:
- Can’t store device backup in Google’s servers
- In certain situations, mobile data and silent toggles icons can be not properly updated.
How to Install ICS333 ROM on Galaxy S i9000
Important Note, Please Read: If you are already on an Ice Cream Sandwich Android 4.0 ROM, you can skip steps 3 and 4 and skip to step 5 after the 2nd step. If unsure of what ROM you are on, follow all the steps.
- This procedure will wipe all your apps, data and settings (but it will NOT touch your SD cards, so don’t worry about those). Backup your Apps and important data — bookmarks, contacts, SMS, APNs (internet settings), etc. This Android backup guide would help you.
Important! Don’t forget to at least make a backup of your APN settings, which you can restore later if your data connection does not work after installing the ROM. Use the backup guide to find out how. - Remove sim card lock, if you have set it earlier. Go here: Settings » Location and Security » Sim card lock » checkbox should be clear (not selected).
- Flash the stock XXJW4 firmware by using → this guide.
- Root XXJW4 to obtain Clockworkmod recovery (CWM) by using → this guide.
- Download the latest version of the ROM from the official development page.
- Download the Google Apps package. This will install apps like Market, Gmail, etc. which are not present in the ROM.
Download Link | Filename: gapps-ics-20120317-signed.zip - Transfer the downloaded zip files from step 5 and step 6 to the root of the internal SD card (not the micro SD).
- Turn off your Galaxy S and wait for complete shutdown (wait for vibration and check capacitive button lights).
- Then, boot into CWM recovery. To do so, press and hold these 3 buttons together: Volume Up, Home, and the Power button till the screen turns on, then let go of the buttons. In recovery, use Volume keys to scroll up and down and power key to select an option.
- Select wipe data/factory reset, then select Yes on next screen to confirm. Wait a while till the data wipe is complete.
- Now select install zip from sdcard, then select choose zip from sdcard. Scroll to the ROM file on the sdcard and select it.
- Confirm installation by selecting Yes – Install _____.zip on the next screen. The ROM will start installing.
- The phone will reboot into recovery in the middle of installation and then continue installing the ROM. However, if it simply reboots but doesn’t continue installation, repeat step 11 and 12.
- After the ROM finishes installing, select go back to go back to the main recovery menu.
- Now repeat step 11, but this time select the Google apps package file you downloaded in step 6 to install the Google apps package. Confirm installation by selecting Yes on the next screen.
- After the installation is complete, select go back and then select reboot system now to reboot your phone.
Wait for around 5 minutes for the first boot, then enjoy using ICS333 ROM based on Ice Cream Sandwich Android 4.0.4 on your Galaxy S. Visit the original development page to get more info and to get the latest updates on the ROM. Share your thoughts on the ROM in the comments below.


Is it support for Arabic Lung. ?
ICS is supposed to have inbuilt Arabic support, but not sure if this would have it by default.
Hello, I installed Play Google but does not work well as a solution that? thanks
Did you try it?
Does it have arabic support?
Bad 🙁 aroma build 28 much better
Is it support for Arabic Lung. ?
ICS is supposed to have inbuilt Arabic support, but not sure if this would have it by default.
Hello, I installed Play Google but does not work well as a solution that? thanks
Did you try it?
Does it have arabic support?
This is VERY BAD! It is a JVU ROM not JW4! I’ve been stuck in a bootloop. Gee Thanks!
poor GPS performance… takes for a while to get satellite fix and then it is very unstable…
going back to CM9 – ICS 4.0.4
Bad 🙁 aroma build 28 much better
This is VERY BAD! It is a JVU ROM not JW4! I’ve been stuck in a bootloop. Gee Thanks!
poor GPS performance… takes for a while to get satellite fix and then it is very unstable…
going back to CM9 – ICS 4.0.4
works perfectly..!!! thanks.
works perfectly..!!! thanks.
You Said ”
Wait for around 5 minutes for the first boot”
And it took 15 min and still making this weird start any Help ?
Bored From waiting
I think you gotta flash the rom again. Do factory reset from recovery and then flash the rom again.
You mean to Repeat Step 11,12 again? 🙂
Thanxxx Alottttttttt It Works Now :))
Okay… cool 😀
Yes.
Okay Everything is great but there is no Fm Radio?
Try an app from Google play store.
You Said ”
Wait for around 5 minutes for the first boot”
And it took 15 min and still making this weird start any Help ?
Bored From waiting
I think you gotta flash the rom again. Do factory reset from recovery and then flash the rom again.
You mean to Repeat Step 11,12 again? 🙂
Yes.
Thanxxx Alottttttttt It Works Now :))
Okay… cool 😀
Okay Everything is great but there is no Fm Radio?
Try an app from Google play store.
I followed all the steps and everything is working fine except main feature.. calling. My cell is not coming on mobile network. I tried doing a manual search of networks. It is showing me networks but when I try to select the one, it is not allowing to connect to the network.
Please help!
i am having the same problem…. and after that i want to go back to xxjw4(2.3.6) but i cant do that… now i am really upset.. what to do dont know….
please help me guys ….. i am having no any phone so i really my phone working…. please help me…..
What’s the problem with going back to xxjw4? Should be easy… just go to download mode and follow our guide on xxjw4 installation.
bro i have done all the steps step by step for many types for going back to the xxjw4 but it nothing happened.. only restarts everytime……..
the odin software shows succesfully done on lappy but after flash when phone reboots there shows a error message(E not found type)…
but when i went again for ics then phone starts very comfortably…….
flash it with this https://nerdschalk.com/xxjvp-android-2-3-4-firmware-galaxy-s-install-and-download/
and then put xxjw4 back
my phone is under warranty…. so i went to service center and they did rest all… revert back to gingerbread 2.3.3
now i am happy with it… i am not going to update any unauthorised version…..
Everything is fine just one small problem my battery level went from 100% down to 90% in literally one minute and from there it went down to 89% 87% and counting way to quick. btw my battery was working perfect right before the update to 4.0.4 i was running 4.0.3 before.
i just installed this.. so far it works nicely. everything is fine and no issues. i installed this using psyqiq guide in xda. then i flash the google apps link from this guide. works fine! m/
i just installed this.. so far it works nicely. everything is fine and no issues. i installed this using psyqiq guide in xda. then i flash the google apps link from this guide. works fine! m/
Hi there i flashed this rom and liked it very much ,but 2 days after i faced to force close almost all the apps even launcher (facebook, gtalk, game apps like fragger) ……want to stay on this rom , what should i do?
Reboot tor recovery mode and do ‘wipe dalvik cache’ under advanced. Then also do Fix Permissions from there. This should fix it.
If it doesn’t fix it, you gotta go factory reset from recovery mode, but this will delete contacts, apps, etc. (nothing on sdcard, though).. so make appropriate backup before doing a factory reset.
Thethering switch off automatically when i turn it on… Why it does’nt work?
just flash it. works fine but then i get force close on all of my apps….
i clear dalvik and did fix permission from the recovery and it just come back again 🙁
i flash the rom again all over and its still doing it again after an hour or so…
what should i do????
thanks
just flash it. works fine but then i get force close on all of my apps….
i clear dalvik and did fix permission from the recovery and it just come back again 🙁
i flash the rom again all over and its still doing it again after an hour or so…
what should i do????
thanks
just flash it. works fine but then i get force close on all of my apps….
i clear dalvik and did fix permission from the recovery and it just come back again 🙁
i flash the rom again all over and its still doing it again after an hour or so…
what should i do????
thanks
just flash it. works fine but then i get force close on all of my apps….
i clear dalvik and did fix permission from the recovery and it just come back again 🙁
i flash the rom again all over and its still doing it again after an hour or so…
what should i do????
thanks
Hey! Thanks a bunch. It is working fine so far. Can you please tell me from where I can get applications like Maps??
Download from Google Play (Android Market, that is).
I didn’t find any. Further I got its APK from my motorolla Xoom using wifi explorer. Installed it and working fine so far.
So far I wana report an issue i.e. Sometimes camera application crashes if I load it from lock screen.
after the installation process it showed to factory reset .. and i did that .. and then my phone started to reboot .. but it is stuck in the restarting .. any help ?
Hey, are you still stuck with it. let me know if you are, will be quick to help this time.
i got the same problem . I’m stuck in rebooting and it keeps showing the Kernel Semaphore logo , please help !!!!
Kapil can you please help? after following the exact steps, the installation starts and then gets stuck at the Kernel Semaphore Logo. Please help….
Ok, here is what I did… removed the battery and again went directly to recovery mode and 1. Wipe cache, wipe data/factory reset, and then install again. After that it was a smooth sail 🙂 very happy that i installed this one.. it so far working great… ofcourse I drained my battery from 71% to 51% in the installation process… would check for two three cycles before deciding on battery drain.
How to remove the Search Bar from the HomeScreen?
Tried disabling Google Search but it’s still there 🙁
Kapil, i got problem when installing ics. i follow the steps but after the phone reboot the warning encryption unsuccessful and ask to reset the phone. i click it and the phone stuck with the kernel and galaxy s logo. i removed and reinsert the battery and do recovery mode (wipe cache, wipe data) and reboot back but now only galaxy s logo appear. i installed back xxjw4 by odin but it seems still. Please help me..!
just put both files in external sd card …… than slct file named like that … cm9 ..nightly sonething …. thn yes install …… than again apply update form sd card ……. this time slect file named gapps ics
Now I am on 2.3.6 xxjw4, so do you mean I don’t need to follow step 3 and 4? After reading the posts here, I have found that there are 2 possible problems (force closed app and no mobile network) when flashing ics 4.0.4. Therefore, are there any useful solutions to these problems? Now I hesitate to do it.
Now I am on 2.3.6 xxjw4, so do you mean I don’t need to follow step 3 and 4? After reading the posts here, I have found that there are 2 possible problems (force closed app and no mobile network) when flashing ics 4.0.4. Therefore, are there any useful solutions to these problems? Now I hesitate to do it.
u know what! discard all the negative comments out there! i’ve been using this rom for about a month now. just follow the exact procedure given from the orginal developer page! this custom rom rocks! it does what it says.. fast, easy and stable! android 4.0.4 at it’s best! PUTANG INA ASTIG!! m/
u know what! discard all the negative comments out there! i’ve been using this rom for about a month now. just follow the exact procedure given from the orginal developer page! this custom rom rocks! it does what it says.. fast, easy and stable! android 4.0.4 at it’s best! PUTANG INA ASTIG!! m/
SIM NO WORKING
no connection
wats the use of a phone without calling feature
In India
Same issue here
remove your battery and sim than install again …. this will work
guy you need to replace your sim card…same prob was with me….was fucked up and then tried my sim (new)
nad its working now:D
SIM NO WORKING
no connection
wats the use of a phone without calling feature
In India
Same issue here
remove your battery and sim than install again …. this will work
guy you need to replace your sim card…same prob was with me….was fucked up and then tried my sim (new)
nad its working now:D
I install zip beat audio but when i reboot system, it can’t boot just. Then i remove the battery and boot into recovery and do wipe data but still cant boot. Any help please.
You’ll have to flash the rom again then to restore all of its files back, some of which got replaced by beats audio.
It worked after I flashed xxjw4 again. Anyway thank u very much. If I install ics 4.0.4, do I have to wipe cache and dalvik? I am not sure for this. Please.
Hi there,
I have installed the gallary of previous version i.e. Stock Gallary with I9000 but it is force closing and not getting albums properly. Installed it from this:
http://forum.xda-developers.com/attachment.php?attachmentid=959242&d=1332393901
Can anyone help me???
I have installed this and everything seemed to work fine until i tried using my data network. I have entered all the saved configuration but still it doesn’t work…..what could be wrong here? Also i cannot even retrieve saved contacts from sd card or even import from SIM….Somebody please advice
I have installed this and everything seemed to work fine until i tried using my data network. I have entered all the saved configuration but still it doesn’t work…..what could be wrong here? Also i cannot even retrieve saved contacts from sd card or even import from SIM….Somebody please advice
after installing I9000XXJW4_I9000OXAJW4_XEU then
gapps-ics-20120317-signed.zip I followed the step as it is I can not conect to my gmail account and to Google play (google market) although I can do from the internet browser do you have an idea whats wrong
thanks
Bassem
after installing I9000XXJW4_I9000OXAJW4_XEU then
gapps-ics-20120317-signed.zip I followed the step as it is I can not conect to my gmail account and to Google play (google market) although I can do from the internet browser do you have an idea whats wrong
thanks
Bassem
Camera Application Crashing…:S:S
Please do something…
Camera Application Crashing…:S:S
Please do something…
does it work on s2?
does it work on s2?
does it work on s2?
hey kapil. its said that i have lack of space. so what i have done i moved some apps to the usb storage.
that solve it but now it come back again….. i moved another apps again and that didnt solve it.
what should i do???? can i disable that icon? or do something else????
thank you
hey kapil. its said that i have lack of space. so what i have done i moved some apps to the usb storage.
that solve it but now it come back again….. i moved another apps again and that didnt solve it.
what should i do???? can i disable that icon? or do something else????
thank you
How long does it take the ROM to install? the kernel semaphore logo?
How long does it take the ROM to install? the kernel semaphore logo?
working perfectly …pulse notification led not working but is faster than 4.0.3… Thanks!!
working perfectly …pulse notification led not working but is faster than 4.0.3… Thanks!!
After flashing this from, I faced duplicated data, song n photo. How to figure out this problem?
After flashing this from, I faced duplicated data, song n photo. How to figure out this problem?
Hi man…THANX!!!..It was simple to upgrade from ICS 4.0.3 and although I had 1460mhz on my old version and only have 1000mhz max on ICS 4.0.4 it is MUCH Faster and more responsive.
BIG THUMBS UP AND THANX!!!
Just one problem though, when I do TV out, The picture on my Panasonic Plasma and my friends old Tube telly is as though its not quite tuned in.
I see some movement when I operate the phone but the picture is `zig-zaggy` and a funny sound too..
Might be the lead but its brand new. (although cheap off ebay)
Any workarounds???
Apps perhaps or some kind of update??
Any help will be sooo soundly Appreciated as TV-Out is why I upgraded!! lol
Thanks again for a Sweet Rom
PS…. How can I extend the cpu frequency back up to 1460mhz cos it ran it fine..(gaming with the back cover off!!! LOL)
>;-{*}
Heya,
Been following a lot of tutorials off this site – AWESOME STUFF. Everything has worked perfectly so far.
Right now i’m stuck with the fact that the download link to gapps-ics-20120317-signed.zip seems to have vanished..
Anyone know of an alternative download location?
Can anyone confirm that this is the right file –
http://www66.zippyshare.com/v/2759431/file.html
Cheers!
Regarding this tutorial
I’ve reached step 4 – installed 2.3.6 and installed CWM. Everything is working except that my phone appears to not recognize SIM…
Is there another modification I need to get this working? Or a setting? Or is this something specific to my mobile carrier?
Settings show GT-I9000, 2.3.6, I9000XXJW4 if it helps
hello kapil…I previously had official 2.3.3..then i upgraded firmware to 2.3.6 xxjvu(in which mobile data stopped working) and then to the official 2.3.6 xxjw4(with the hope that mobile data bug gets fixed)…but unfortunately the mobile data still doesn’t work….now i don’t know if rooting xxjw4 and upgrading to 4.0.4 as mentioned in this site would help my mobile recover from the mobile data bug?reply soon..thank you 🙂
just search on google download
gapps-ics-20120317-signed.zip
and u will find many alters
Heya,
Been following a lot of tutorials off this site – AWESOME STUFF. Everything has worked perfectly so far.
Right now i’m stuck with the fact that the download link to gapps-ics-20120317-signed.zip seems to have vanished..
Anyone know of an alternative download location?
Can anyone confirm that this is the right file –
http://www66.zippyshare.com/v/2759431/file.html
Cheers!
hello kapil…I previously had official 2.3.3..then i upgraded firmware to 2.3.6 xxjvu(in which mobile data stopped working) and then to the official 2.3.6 xxjw4(with the hope that mobile data bug gets fixed)…but unfortunately the mobile data still doesn’t work….now i don’t know if rooting xxjw4 and upgrading to 4.0.4 as mentioned in this site would help my mobile recover from the mobile data bug?reply soon..thank you 🙂
Regarding this tutorial
I’ve reached step 4 – installed 2.3.6 and installed CWM. Everything is working except that my phone appears to not recognize SIM…
Is there another modification I need to get this working? Or a setting? Or is this something specific to my mobile carrier?
Settings show GT-I9000, 2.3.6, I9000XXJW4 if it helps
just search on google download
gapps-ics-20120317-signed.zip
and u will find many alters
everything goes fine except when the phone ones…it says encryption unsuccessful and asks for the phone for factory reset..I do that and the S logo and kernel logo never go off …please help?
everything goes fine except when the phone ones…it says encryption unsuccessful and asks for the phone for factory reset..I do that and the S logo and kernel logo never go off …please help?
This is fake, it’s just XXJVU + theme and stuff + extra features and shit
This is fake, it’s just XXJVU + theme and stuff + extra features and shit
hello kapil i want to run ICS in my samsung glaxy s i9003 plz help me what should i do
hello kapil i want to run ICS in my samsung glaxy s i9003 plz help me what should i do
how can you put your sim contacts in the contact list in the phone itself? it didnt ask if i wanted to do this when i inserted the sim card.. help? :
how can you put your sim contacts in the contact list in the phone itself? it didnt ask if i wanted to do this when i inserted the sim card.. help? :
its like having new phone with this rom, super fast, but keeps force closing all the apps, did dalvik cache and fix permissions, factory reset, flashed again and force closing still appears…. please help, love the rom
After installation everything works fine, but I can’t make calls. Everytime shows 19 secs of call duration and then calling ends. What’s the problem? I installed and tried to fix it twice.
everything works, but wifi not detecting.:(
everything works, but wifi not detecting.:(
y it doesnt work/.
y it doesnt work/.
All went well until step 11.
After I select the
ICS333-2.0.1-signed.zip file from the root of my internal SD card I am getting the message:
“E:signature verification failed
Installation aborted”
I have tried to download it again but I keep getting this error message.
Does someone know what to do?
THX!!!
shows kernel semaphore on my screen, no progress, what to do ?
shows kernel semaphore on my screen, no progress, what to do ?
Installs fine but …
* Refuses to save APN … As a result, can’t use the mobile as a phone or networking (except via WiFi). SIM works in other mobiles and tablets. Other SIMs doesn’t work in this mobile … Restoring APN from backup don’t work and generate an error (possibly because of being unable to save) …
* After ca one minute of inactivity, the screen turns black and nothing works (home key, power …), except for a Norwegian Reset (remove battery …)
* Reinstalling XXJW4 (2.3.6) at this stage causes multiple errors and a never ending boot loop. Error messages relates to “wipe data/factory reset” not working properly. Reinstalling ICS at this point results in boot process stoping at Semaphore screen … Basically bricked … Nice!
Manage to unbrick it by installing 2.3.4 together with .pit file …
Manage to unbrick it by installing 2.3.4 together with .pit file …
I dont like its look. Original camera of Eclair is good. There are more options in Eclair’s camera. . and It does not show kies connection option..
I dont like its look. Original camera of Eclair is good. There are more options in Eclair’s camera. . and It does not show kies connection option..
ITs working absolutly fine..Thnx alot
ITs working absolutly fine..Thnx alot
It´ awesome but, this is old android,anof android camera and mp3 player are sucks…this is only theme of android 4.0.4
i´m disappointed and back to 2.3.6
It´ awesome but, this is old android,anof android camera and mp3 player are sucks…this is only theme of android 4.0.4
i´m disappointed and back to 2.3.6
Hello i did everything what was told to do, but when reaching the 12th step it all went wrong 🙁
Whenever i click on the .zip file to install it looks like its going to work but then it says: Installation aborted: and i didnt even touched the phone,,, its really frustrating, please help!
Hello i did everything what was told to do, but when reaching the 12th step it all went wrong 🙁
Whenever i click on the .zip file to install it looks like its going to work but then it says: Installation aborted: and i didnt even touched the phone,,, its really frustrating, please help!
you say wait 5 min,i waiting 1 days already,also cannot.why?
you say wait 5 min,i waiting 1 days already,also cannot.why?
Hey my version is I9000DDJV7 root file was working in my phone
Hey my version is I9000DDJV7 root file was working in my phone